Beginner soy candle making instructions
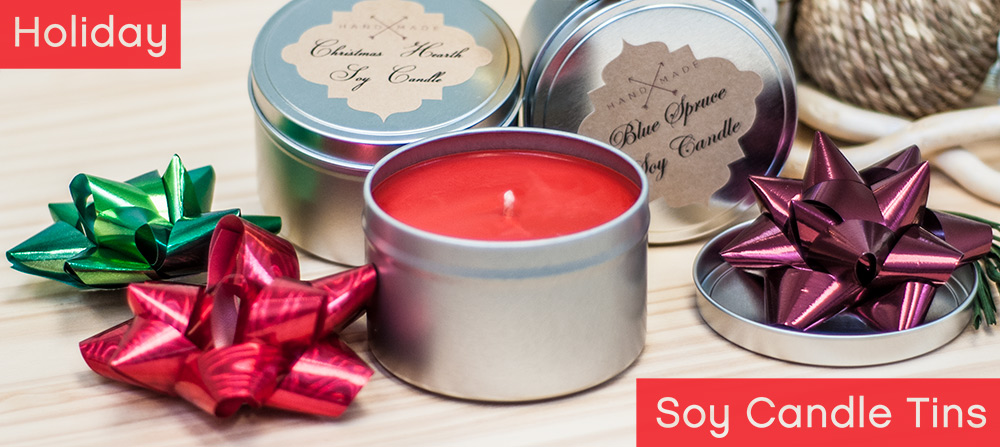
Candle Tins for the Holidays
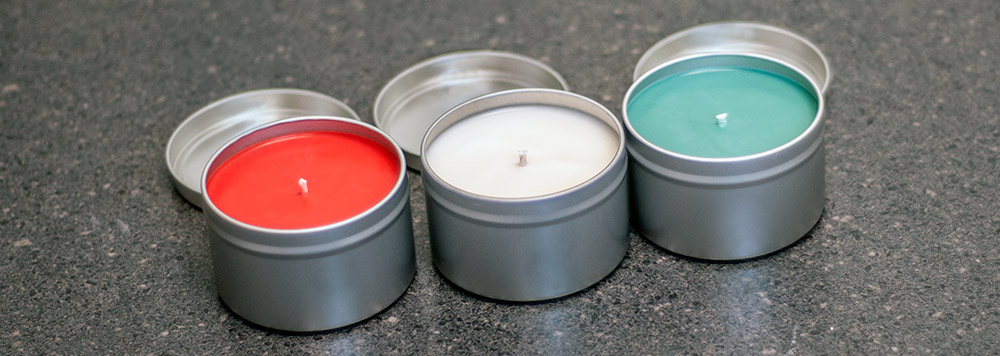
If you've never made candles before, soy candle tins are a good place to begin. They're easy to make and can be personalized for any special occasion. Our simple and easy-to-follow instructions will make 3 different colored 8 oz. candle tins with 3 popular holiday fragrances.
For this project we're using GB 464 Soy Wax and melting it using a microwave as an quick and convenient alternative to using a double boiler. See directions below.
Additional Items Needed:
- 1 - (3-6 cup) Microwaveable Safe Plastic Container (do not re-use with food)
- Pot Holders or Towel
- 3 - 2 oz. Paper Cups - for measuring fragrance oil
- Paper Towels and Alcohol - for cleaning the microwaveable container
Directions:
STEP 1: PREPARE CANDLE TINS
Wipe each tin with a paper towel to remove any dust or dirt.
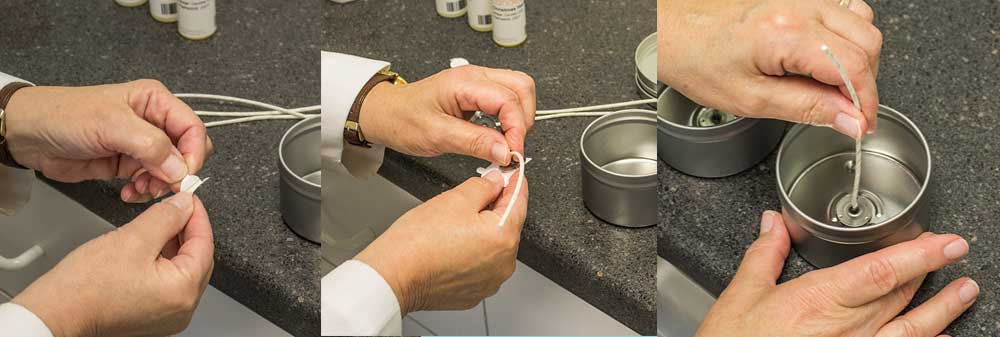
Remove a wick stickum from the paper sheet and place the stickum on the bottom of the ECO 14 Pretabbed Wick. Remove the second paper backing from the stickum on the wick tab and place the wick in the center of the 8 oz. tin.
STEP 2: MELT WAX USING THE MICROWAVE
Important! Using a microwave to melt wax requires extra safety precautions.
- Keep a careful watch while heating wax in the microwave and Do Not walk away.
- Melting wax typically takes 4-5 minutes, but can vary depending on microwave.
- Be careful not to over heat wax once it liquifies.
- Container and melted wax will be hot! Use caution when removing melted wax from microwave.
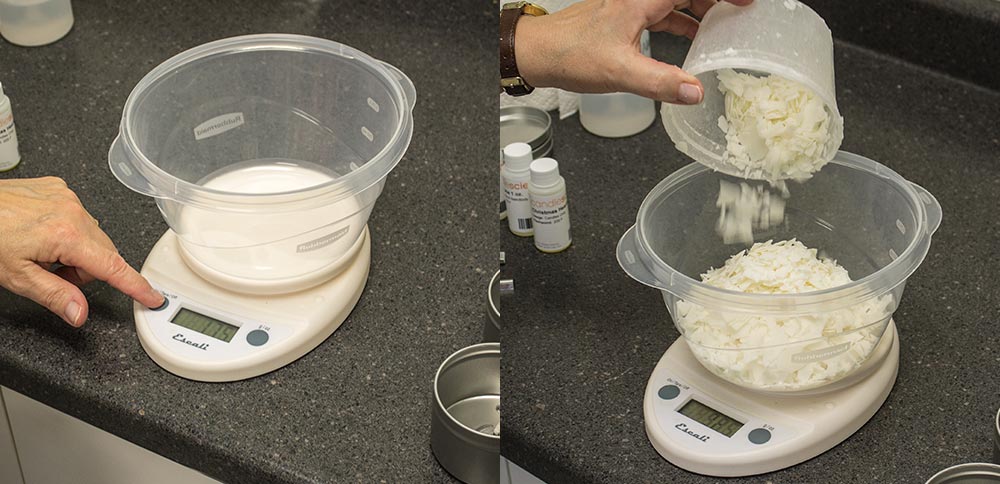
Place the microwavable safe container on the scale and set the scale to zero. Weigh 6 oz. of GB 464 Soy Wax in the container.
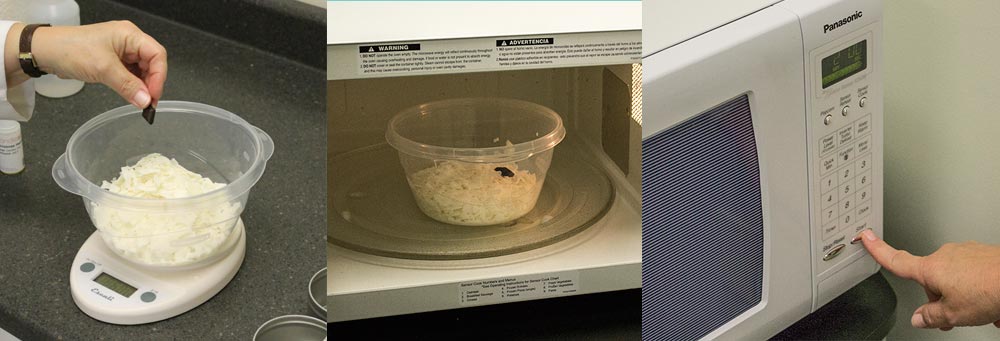
Add 1 Cinnamon Red Dye Chip to the wax flakes in the container. Place the container of soy wax flakes in the microwave and heat the wax for 4 minutes.
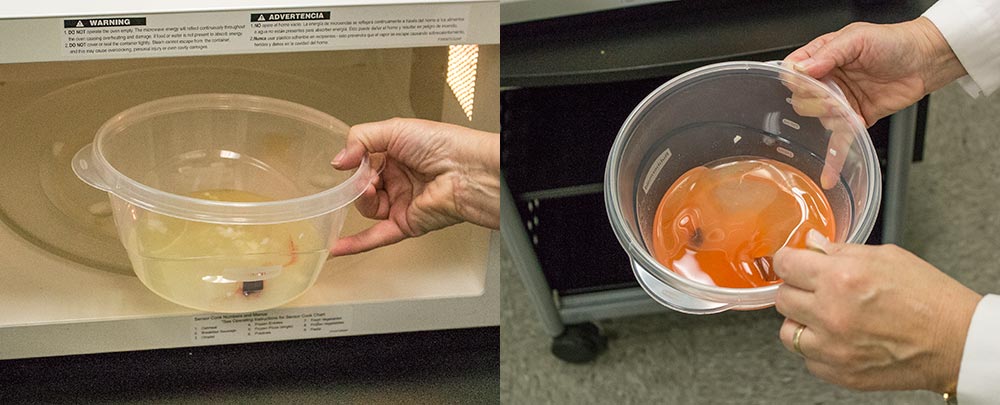
After heating for 4 minutes, carefully remove the plastic container of melted wax from the microwave and stir. Caution: Container and wax will be hot!
If the wax is not completely melted, continue to heat at 30 second intervals until the wax liquifies.
Note: Dye chip may not be completely dissolved. Don't worry, simply stir the melted wax until it dissolves.
Place the plastic container of melted wax to the side on a level surface.
Note: You can also follow our instructional video to guide you through the steps needed to melt soy wax in the microwave.
STEP 3: MEASURE FRAGRANCE OIL
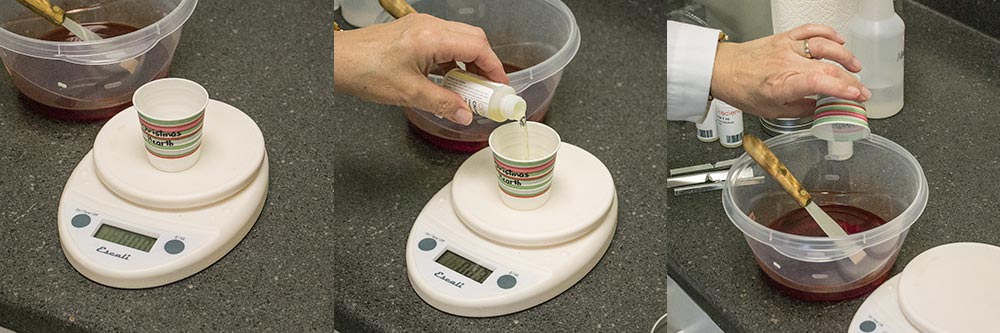
Place one of the 2 oz. cups on the scale and tare the scale so the display shows zero. Pour .4 oz of Christmas Hearth fragrance oil into the paper cup and then carefully add it to the melted red wax.
STEP 4: STIR WAX AND ALLOW TO COOL
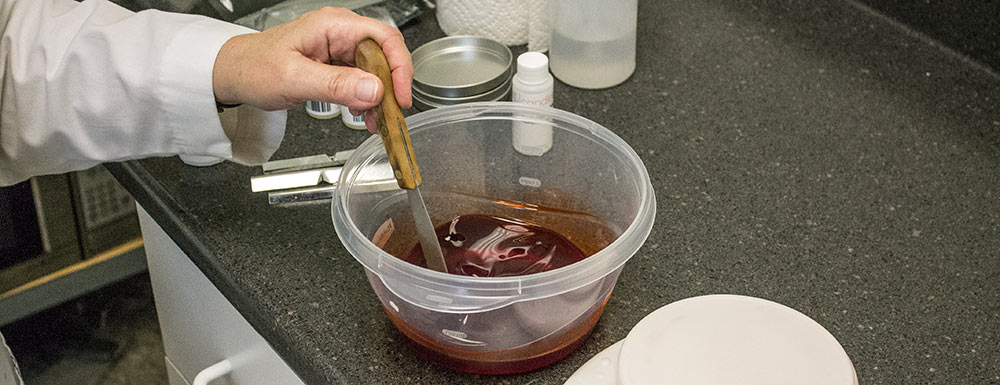
Stir wax slowly for 2 minutes. This will insure that the color and fragrance are thoroughly mixed in and will also help cool the wax for pouring. Try not to add air bubbles to the wax when stirring.
STEP 5: POUR WAX INTO CANDLE TIN
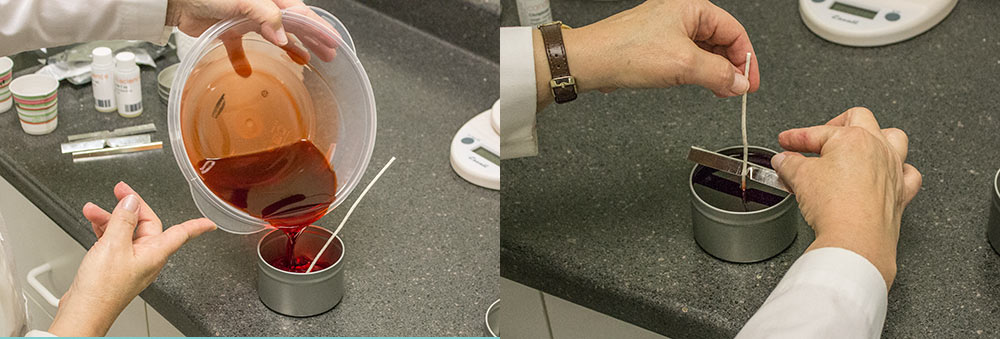
Carefully pour the melted wax into prepared tin to about 1/4 of a inch from the top of the tin.
Place the wick bar with the center peak facing up on top of your tin. Pull wick taut and gently press wick into the opening of the wick bar. This will keep the wick straight and centered while the candle is cooling.
STEP 6: CLEAN MICROWAVABLE CONTAINER
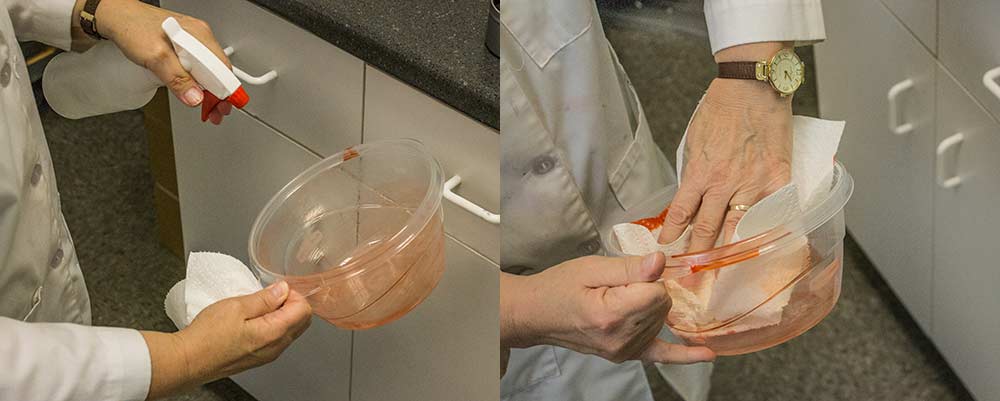
While plastic or pyrex container is still warm, wipe off any extra wax with a paper towel and rubbing alcohol to clean the container. Do not pour leftover wax down the sink. Left over wax can be poured and stored in a labeled paper cup for future use.
REPEAT STEPS 1-6
Follow the above procedure for the other two tins (1 green and 1 white). For the second tin, use the Hunter Green dye chip and Blue Spruce fragrance oil. Use the Peppermint Bark fragrance oil and no dye chips for the third and final candle tin.
STEP 7: ALLOW CANDLE TINS TO COOL, TRIM WICK AND ADD WARNING LABEL
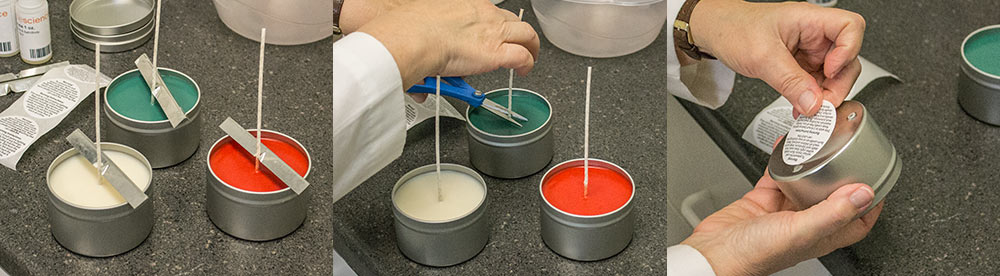
Allow candles to cool overnight. Trim wick to a 1/4 inch and place the candle tin lid on each container. Add warning label to the bottom of each tin and enjoy.
Remember to always follow all candle burning safety rules.