Beginner candle making with soy wax
Whether you want to learn how to make homemade candles, how to make candles for business, or are just curious about the process, this beginner-friendly video will jumpstart your candle making journey.
Scroll to the bottom of this page for step-by-step instructions.
Simplify supply ordering with a candle making kit, or quickly order the supplies used in this tutorial by clicking the "Add Items to Cart" button below the supply list.
What do I need to know before I begin making candles?
Anyone can learn how to make candles at home! Making your own candles is a fun way to completely customize them and express yourself creatively. There are endless container options, from mason jars to trendy straight-sided containers to classic apothecary jars; infinite color play opportunities, from dying your wax with dye blocks or liquid dye, to containers in modern colors, to mixing and matching the wax color and container color; and lots of ways to customize the scent of your candles, from fragrance oils to essential oils.
Before you begin making candles, you should know that it’s okay to pace yourself. Many beginning candle makers experience information overload. There’s a lot to learn when starting a new hobby and soy candle making is no different!
Enjoy the process, take a few notes, and have fun with your first few candles. There are tons of free online resources to help with troubleshooting and improving your candles down the line, but make sure you celebrate your first few candles for what they are—an accomplishment!
Is soy candle wax right for me?
As demand for eco-friendly and natural ingredients continues to rise, soy candle wax remains one of the most popular plant-based waxes on the market. Soy candles are known for their excellent cold throw, long-lasting slow burn, and opaque white finish. Natural soy wax candles make impressive gifts for eco-conscious friends, housewarmings, and holidays.
When choosing the best type of wax to start with, it's helpful to review the properties of the wax. Different waxes are suited to different types of candles, but soy wax flakes are a great option for making natural soy candles.
Our best-selling soy wax is Golden Brands 464, a great option for beginning soy candle makers! To achieve a strong hot throw, soy candles should cure for at least one week before burning.
Can I use essential oils to scent my candles?
You can use many essential oils to scent candles. However, some essential oils are better saved for wax melts or soap because they shift in aroma when exposed to a flame. We thoroughly test all CandleScience essential oils in candles; if you’re curious about using your favorite essential oil in a candle, start by checking our testing notes on the product page.
We recommend fragrance oils for candle making beginners. Many fragrance oils do contain essential oils; however, fragrance oils are made specifically for use in candles, making it a bit easier to achieve your desired scent and hot throw strength. Fragrance oils are made from a variety of aromatic ingredients, some made naturally and others synthetically. Our CandleScience Clean Scents fragrances are 100% phthalate-free, don't contain ingredients on the Prop 65 list, and are safe for their intended use.
Can I add gems, flowers, and other decorations to my candles?
There are tons of fun ways to customize your candles, but items not specifically intended for candles like crystals, dried plants, and glitter, aren’t recommended. Botanical candles look lovely, but the plant matter and crystals shift as the wax melts, creating burn issues and even fire hazards.
You don’t have to forgo the aesthetic of botanical candles, though! Wax melt embeds are a great alternative to real flowers and crystals, and you can customize them with candle dyes and fragrance oils. Silicone molds are perfect for wax melt embeds; find them in the baking section of your local craft store or online.
Is candle making profitable?
Absolutely! What might cost $5 in supplies can be sold for $20 or more, and you don’t need a lot of equipment or space to hit the ground running. Many candle makers start out right in their kitchen using the double boiler or microwave method. Candles generate a high return on investment, and many fragrance oils and essential oils can also be used for soap making or other body-care products.
Browse our Candle Making Business Guides if you’re interested in learning how to make candles to sell. With its low start-up cost, making candles at home often turns into a side hustle or a full-fledged candle business!
Candle making kit for beginners
The easiest way to learn candle making and get all the supplies you need is with a kit. Check out our recommended candle making kits for beginners.
Candle Making Instructions
Step 1: Make a double boiler to melt your candle wax
Place a medium saucepan on your burner or hot plate and fill ⅓ of the pot with water. This will create your double boiler. Heat on medium-high heat, stirring occasionally.
Step 2: Weigh out your soy candle wax and heat it in the double boiler
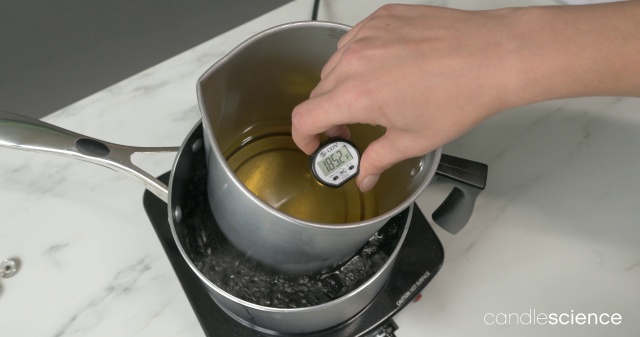
Place the pouring pitcher on a digital scale and "tare" out the scale. Weigh out 1 lb (16 oz or 454 g by weight) of wax, and place the pitcher with the soy wax in the double boiler. Allow the wax to melt to 185°F (85°C).
Step 3: Place a cotton wick in each of your candle containers
Place on wick sticker on the bottom metal tab of the candle wick, and then place the wick in the center of the candle container. Repeat for the remaining two containers.
Step 4: Add fragrance once the wax reaches 185°F (85°C)
Once the wax hits 185°F (85°C), add 1 oz (28 g) of fragrance and then remove the pitcher from the heat. Gently stir for 1-2 minutes to allow the fragrance to bind with the wax.
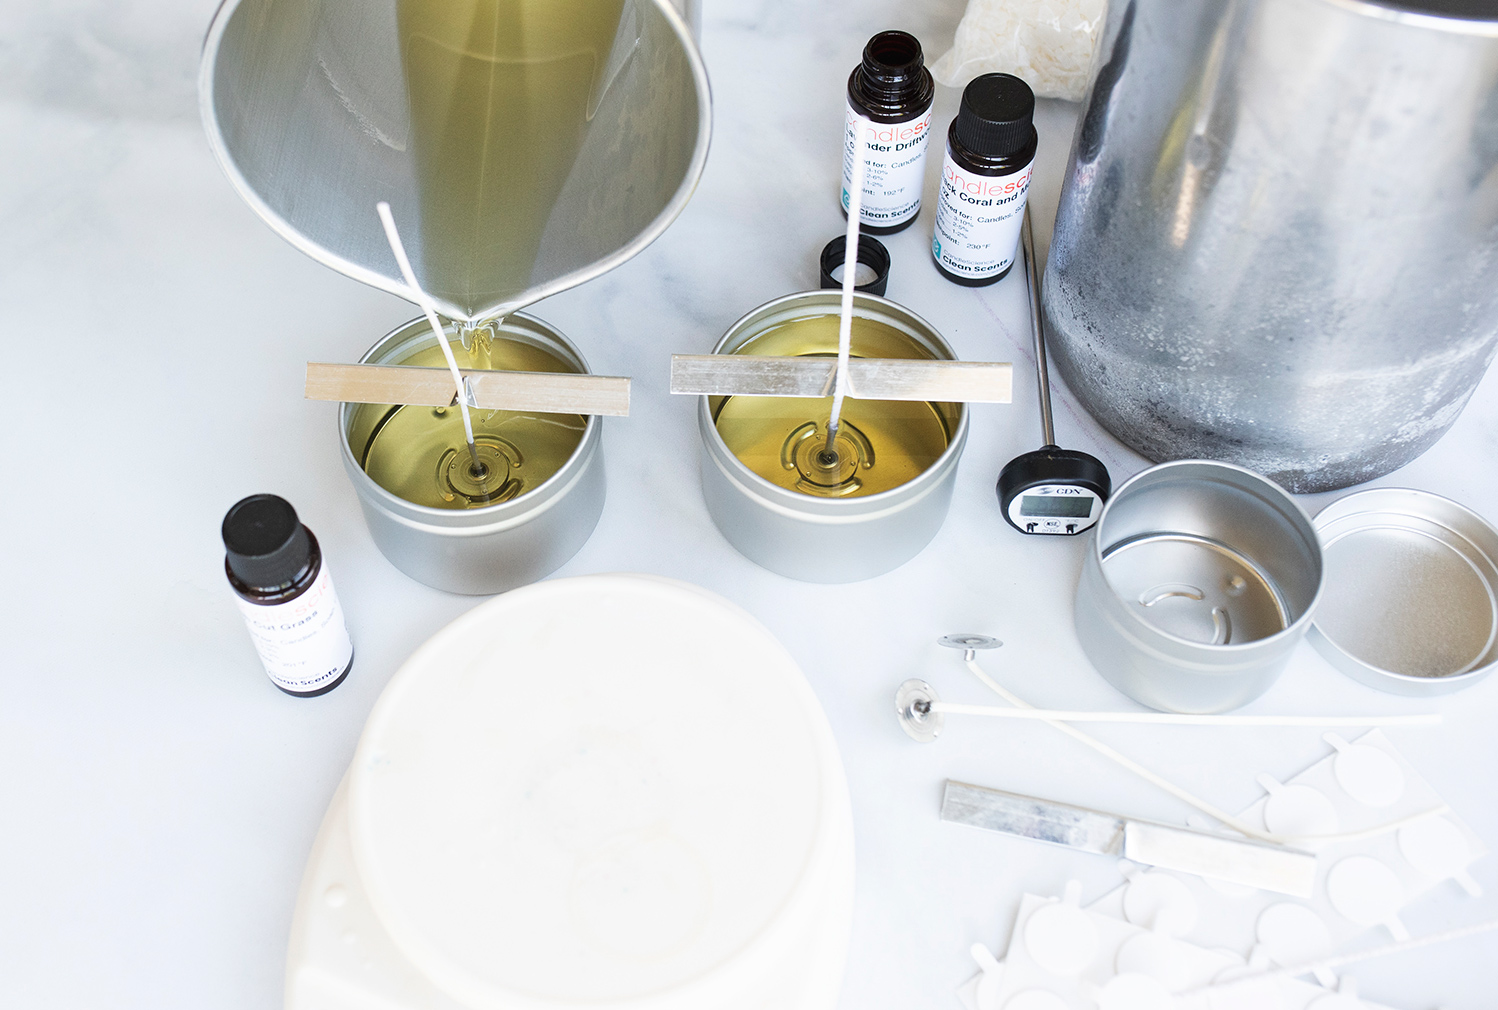
Step 5: Allow the wax to cool to 135°F (57.2°C) then pour it into your prepared candle containers
Once the soy wax cools to 135°F (57.2°C), carefully pour the wax into the prepared candle containers. Filling each container to about ¼ of an inch (6 mm) from the top. Center the wick in each candle with a wick bar, clothespin, or popsicle stick, and allow the candles to cool.
Step 6: Trim the candle wick, add a warning label, then enjoy!
When the candles have completely cooled, trim each wick to ¼ of an inch (6 mm) and add a warning label to the bottom of the containers.
For a strong scent or hot throw, we recommend allowing soy candles to cure for at least one week and up to two weeks for best results.
Helpful resources and guides for beginners
Video Transcript:
Hey there, I’m Dana from CandleScience. Today I'm going to show you just how easy and fun it is to make your own soy candles. First, let’s take a quick look at the supplies you’ll need.
For this batch, we’re going to use AAK’s 464 soy wax. This wax comes in flake form, which makes it easy to handle.
For containers, we’re keeping things simple and using our 8oz candle tins.
Wicks are chosen based on the wax and the width of the containers.
We’re using a CD 18, a braided cotton wick interwoven with small paper threads. A correctly sized wick is very important for creating a candle with a strong fragrance throw and a clean, even burn. For help finding the right size wick for other waxes and containers, take a look at the CandleScience wick guide for a recommendation.
Now for the most exciting part: the fragrance! Today we chose Oakmoss and Amber, which has notes of sage, lavender, amber, and moss. Always use fragrance oils that have been developed specifically for use in candles to make sure you get the best scent performance from your candles.
To help us measure our wax and fragrance accurately, we’ll need a digital scale. It’s necessary to measure your wax and fragrance by weight, not volume, to keep your measurements consistent.
A pouring pitcher is a candle making essential! This piece of equipment is inexpensive, lasts forever, and really makes the candle making the process a lot more friendly.
Next, you’ll need a heat source to melt your wax. Today we're using a hot plate with a medium saucepan filled about halfway with water to create a double boiler. The double boiler ensures we don’t scorch or burn the wax.
A thermometer—any candy thermometer will do. As you continue, you may want to invest in a one with a digital view.
To safely secure the wicks to our containers we’re using wick stickers, in particular, our wick stickers pro. We love these because they are very simple to use and are SUPER sticky.
Wick bars help keep the wick centered and straight as the wax cools. You can also use popsicle sticks, clothes-pins, or even pencils.
Last but certainly not least, a warning label that includes safety tips and burning instructions. Be sure to label your candles if you are giving them away or selling them.
Now, let’s get started making our own soy candle!
STEPS:
We’ll begin by filling our saucepan with water and placing it on the hot plate with medium-high heat to create the double boiler.
While the water heats up, we’ll weigh our soy wax. Place the pouring pitcher on the digital scale and "tare" or "zero out" the scale which will subtract the weight of the pitcher. Weigh out 1 lb (454 g) of wax, and place the pitcher in the double boiler.
We’re going to allow our wax to reach 185°F (85°C) before adding fragrance. We like to think of this temperature as the “Goldilocks Zone.” It’s hot enough for our fragrance oil to fully bind and mix with the wax, but not so hot that any fragrance might be lost to the heat.
To scent our wax, we’re going to weigh out 1 oz (28 g) of fragrance oil to give us a 6% fragrance load. We recommend starting out with 6%, but you may find you want to adjust that as you continue.
Once the wax hits 185°F, we add the fragrance then remove the pitcher from the heat. We’ll stir gently for about 2 minutes. This may seem like an easy step to skip, but mixing thoroughly is important for getting the best fragrance from your finished candle.
We’re going to let our wax cool down to 135ºF (57.2°C) before we pour. While we wait, let's get our containers ready. Remove a wick sticker and place the sticky side on the bottom of the wick tab. Remove the paper backing and secure the wick in the center of the tin, using the ridges to guide you. We'll repeat this for the other 4 tins.
Now that our wax has cooled to 135 degrees (57.2°C), it’s time to pour. Working slowly, we’ll pour from our pitcher into the tins we just prepared, filling them up to the inside groove of the tin or about a quarter inch (6 mm) from the top.
Next, we’ll take our wick bar and center the wick in our tin by pushing the wick into the center groove. Again, you can also use a pencil, clothespin, or popsicle stick to center the wick as your candles cool.
Space your candles about 4 inches (10.2 cm) apart in an area that’s out of the way and free from drafts. We know it’s hard to wait but allow them to cool undisturbed overnight.
When your candles are cooled, trim the wick down to about a quarter of an inch (6 mm) and top with a lid. As the last step, be sure to add a warning label to the bottom of your container.
Before burning, we do recommend allowing the candle to “cure”—optimally for 2 weeks and at least 4-5 days to get the best scent out of your candles.
Congratulations, you just made your own soy candle!
Ready to keep learning and making? Dive into the variety of resources, tutorials, learning guides, and more available right here on CandleScience.com. And if you have questions or could use an assist, don’t hesitate to reach out. My fellow support team members and I are here to help!
Thanks for watching, see you next time!