
How to make diamond soap

Add a little bling to your handwashing with this fun and oh-so-cute gem-inspired hand soap project. Using clear soap base and leftover cuttings from previous melt and pour soap projects, this is a simple project for kids and beginners.
Directions:
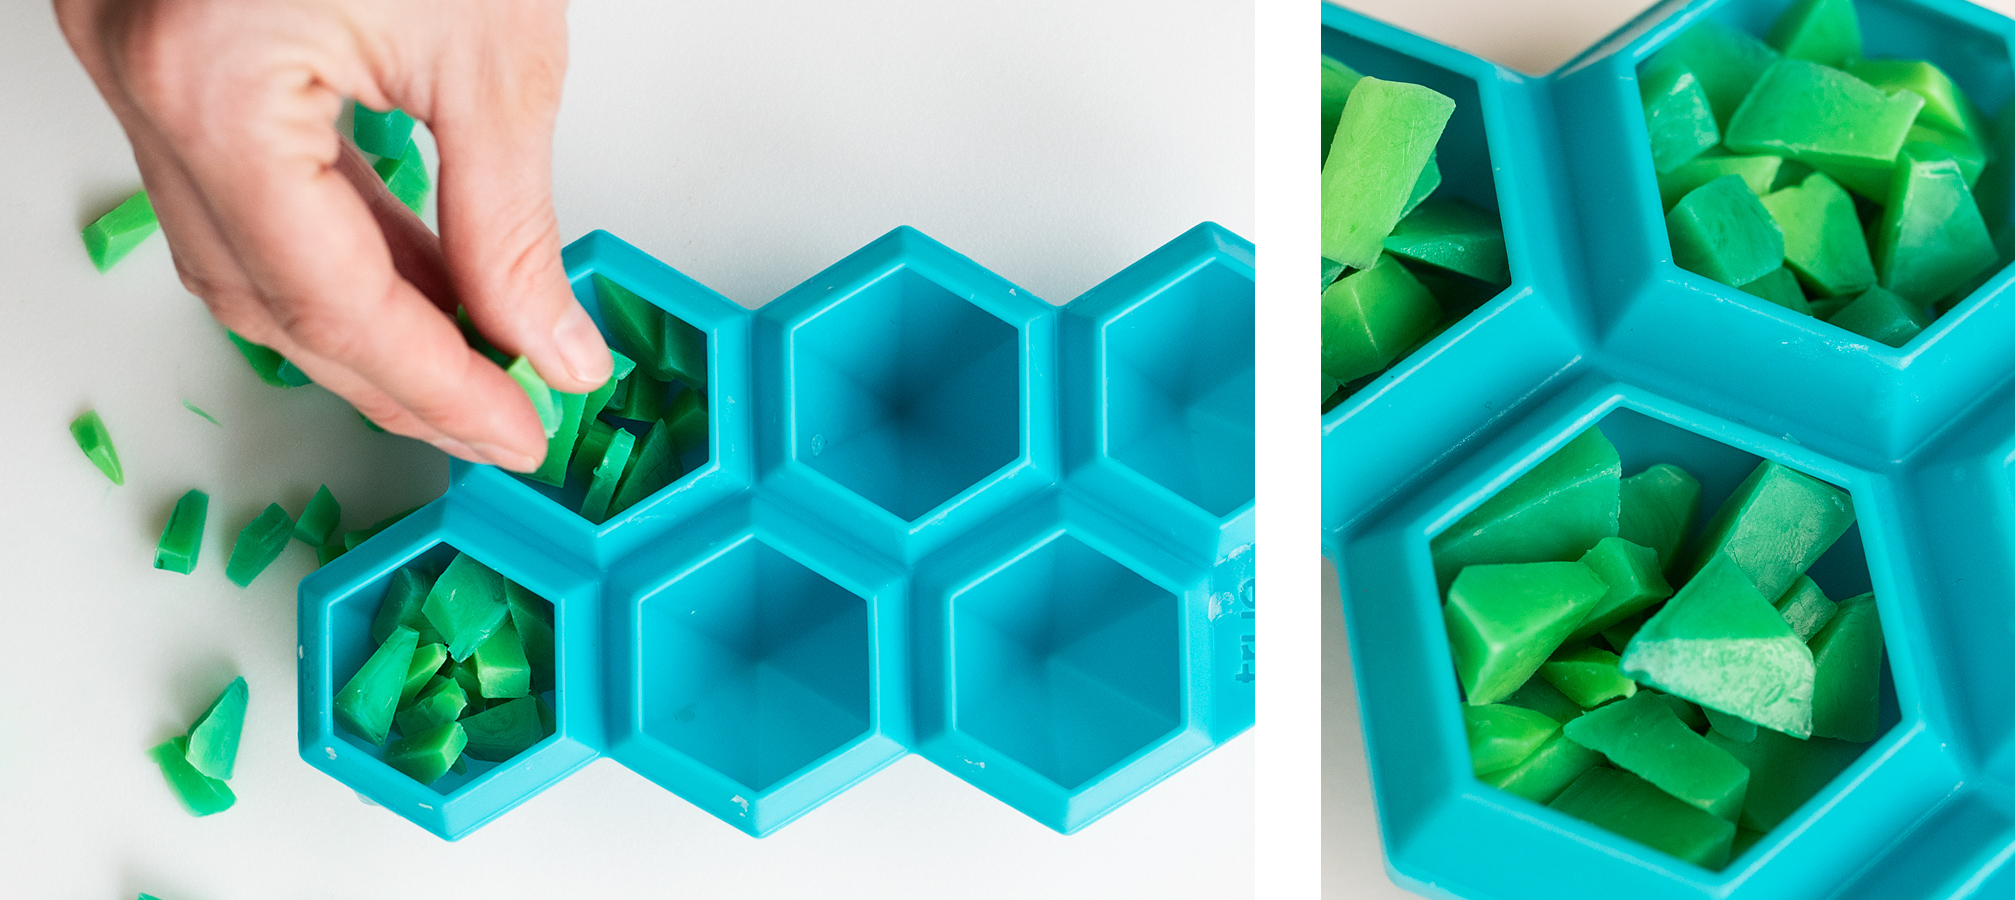
Step 1: Cut the soap
Cut your pre-made melt and pour the soap into different-sized pieces and shapes. Note: We pre-made our soap bars in the 9 Bar Large Square Silicone Soap Mold, but you can use leftover soap cuttings from other soap projects too!

Step 2: Place soap pieces in mold
We purchased this diamond soap mold on Amazon.
Place soap pieces into the mold and fill almost to the top. Be sure that the pieces don't stick out over top of the mold or you will not have a flat top when the soaps have cooled.
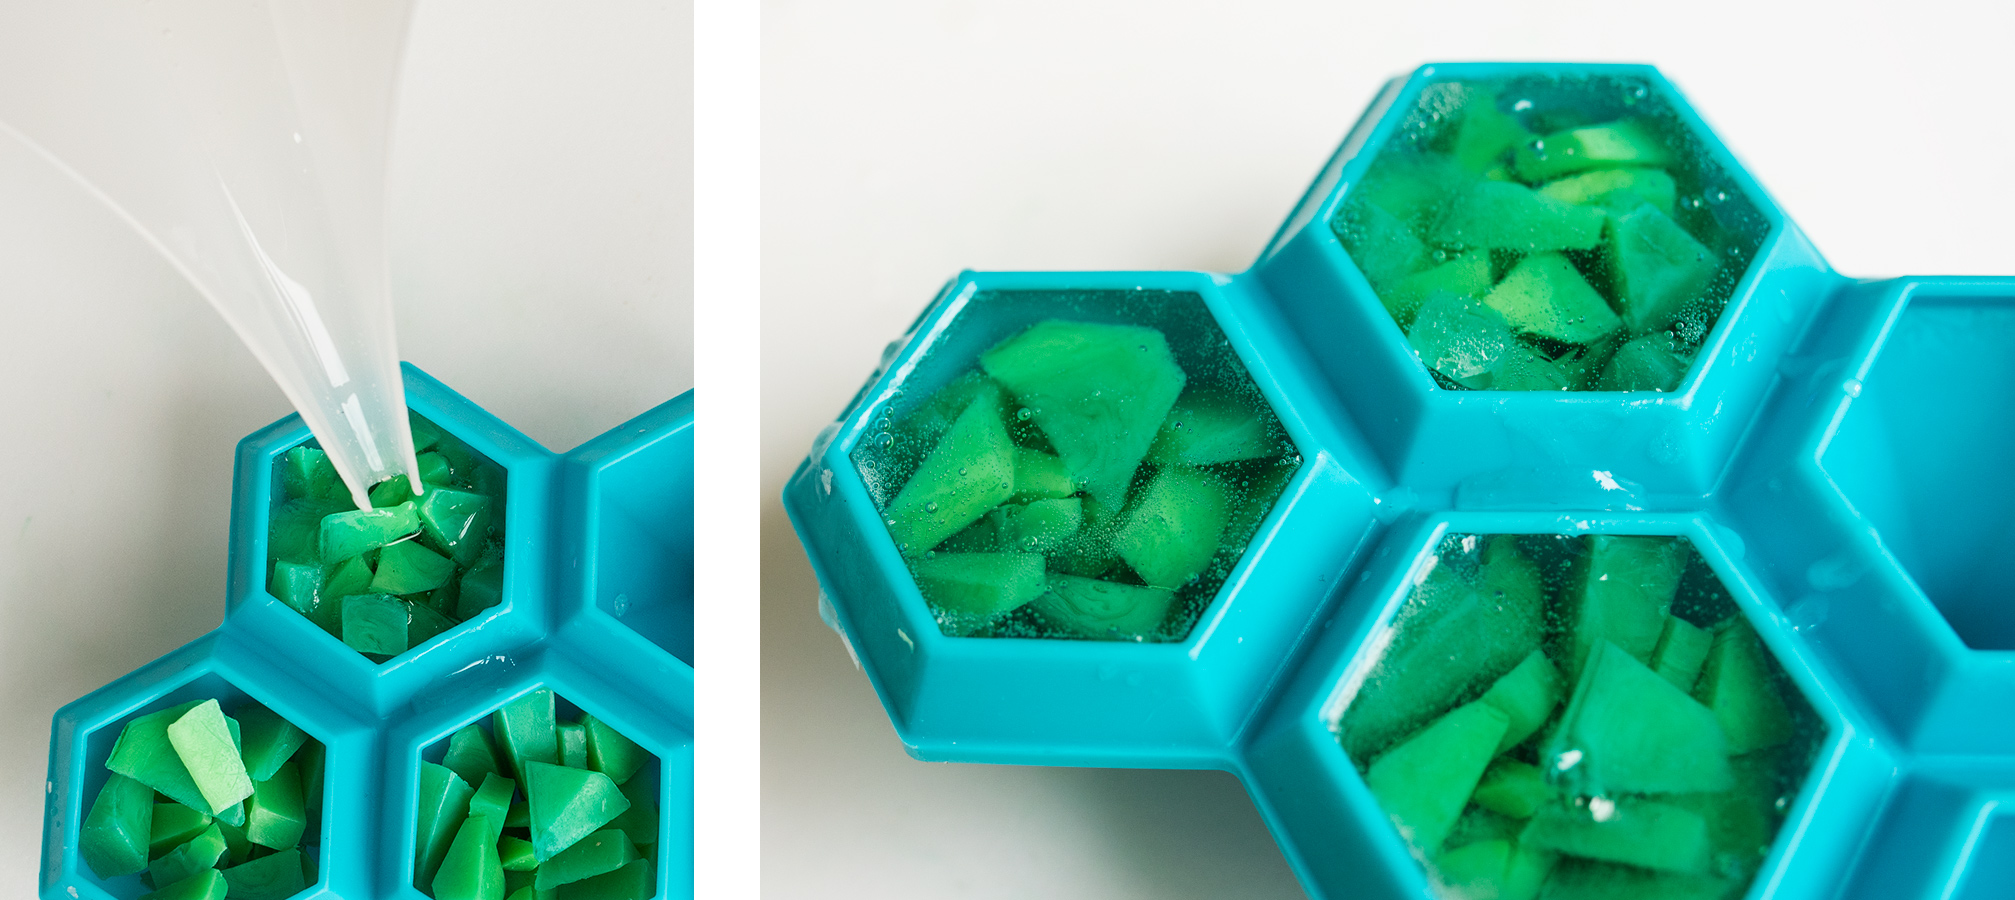
Step 3: Melt clear soap base and pour
Melt the clear soap base (about 1 oz or 28 g of clear base per diamond for this particular mold). Allow the soap to cool slightly so that you don't melt the soap pieces in your mold. Pour the base carefully into each mold right to the very top. Gently push down any pieces that may have shifted. Spray the top with isopropyl alcohol (if you don't have any, don't worry!) to get rid of any bubbles.
Step 4: Let the soap cool
Let your soap fully cool before removing them from the mold. If you're too excited to wait, pop them in the freezer to speed up the cooling process.