
Melt and pour soap making for beginners
Whether you’re making soaps for fun or plan to pursue the business entrepreneurially, our how-to guide will walk you through the process. You’ll be crafting elegant handmade melt and pour soaps like a pro in no time.
Here’s a secret: creating high-quality soaps isn’t hard. In fact, it’s simple, fun, and can be done right from your home. It’s an exciting hobby, but it’s also an easy way to make part-time or full-time income. Let’s get started!
EO Notes: You can also use soap-safe essential oils for this project. When using essential oils, be sure to check your essential oil's recommended usage percentage and IFRA Certificate. How to Make Melt and Pour Soap with Essential Oils.
Additional Items:
- Silicone Spatula
- Cutting Board (Covered with parchment paper or plastic wrap)
- Small Glass Container - Not to be reused for food
- Rubbing Alcohol in Spray Bottle
- Plastic Wrap
- Thermometer (Optional)
- Microwave
- Latex Gloves
Directions:
Step 1: Prepare Your Supplies and Work Space
Wash and dry molds, spatula, and plastic/glass containers with warm soapy water and dry completely. To avoid cross contamination, it’s good practice to sanitize your work area before getting started, especially if you’re working in your kitchen. You can spray the area with rubbing alcohol or a 5% bleach solution and then wipe dry with a clean paper towel.
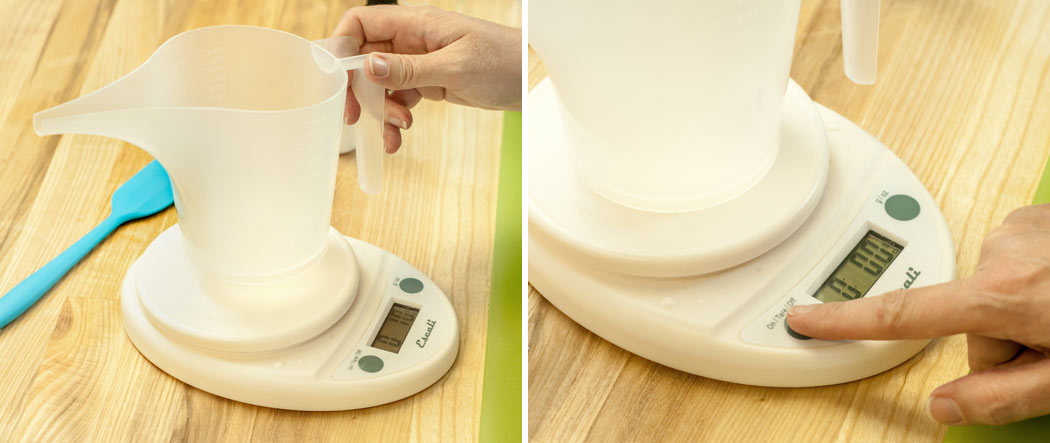
Step 2: Measure fragrance oil amount
Place small glass container on scale and tare the weight. Weigh 0.5 oz (14 g) of fragrance. You want to have your fragrance prepared ahead of time so the soap does not start to harden as you work. It is important to only use glass for this step. The fragrance can damage certain types of plastic and paper if it sits for long periods of time.

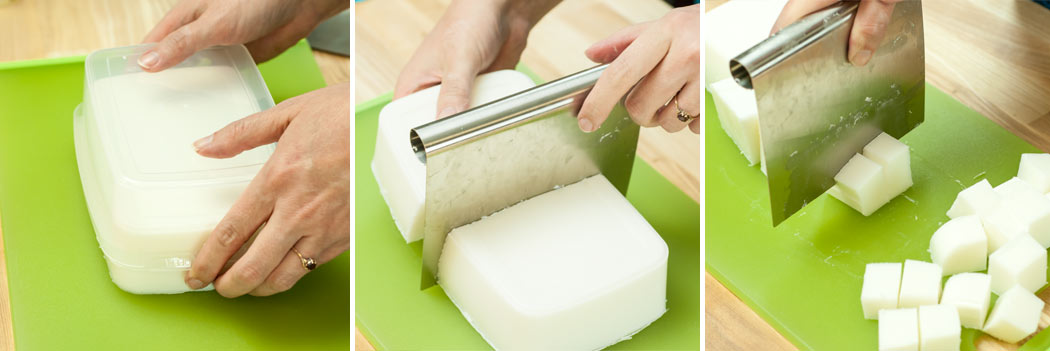
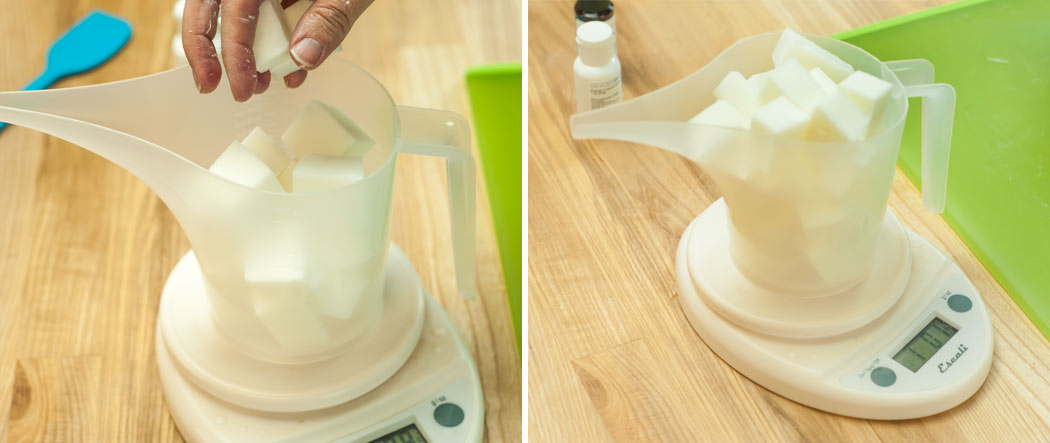
Step 3: Prepare soap base
Remove soap base from packaging and place on a cutting board. You can cover the cutting board with plastic wrap or parchment paper for easy clean-up. Cut the soap base into small, even-sized cubes (roughly 1” or 2.5 cm cubes). Place a large container on the scale and tare the weight. Add the soap cubes to the pitcher until you have 16 oz (454 g) in the pitcher.
Step 4: Melt soap base
Place container with soap base in the microwave and heat for 1 minute. Stir gently to help break up any clumps and help the soap melt more easily. If necessary, heat in 20-second intervals until most of the soap is completely liquid. It is fine if a few small pieces remain—just keep stirring until they are completely melted. Melted soap will be extremely hot, so use caution when handling it. The soap should not exceed 160ºF (71.1°C) to avoid a rubber feel to the finished bars. *Note - If the soap base starts to foam while in the microwave, it is too hot. Stop the microwave and do not continue to heat. Stir gently to continue the melting process.
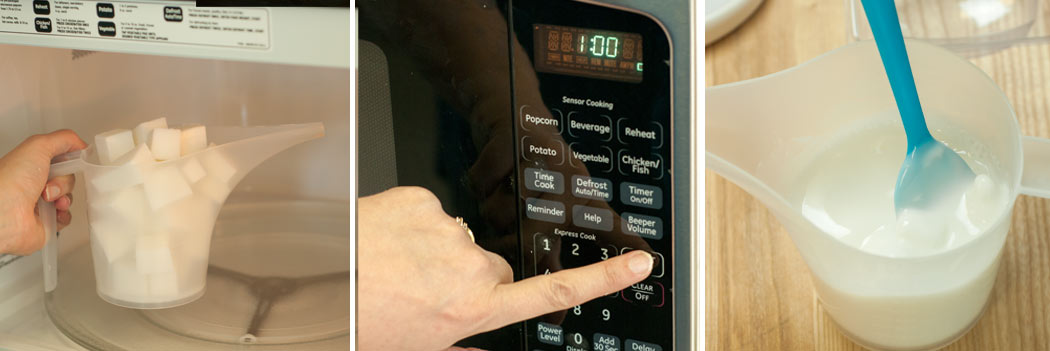
Step 5: Add dye
Once the soap is completely liquid and all the pieces have melted, add soap dye and stir well to make sure it is completely incorporated. Start with 3-4 drops and add more until the desired color is achieved. You may notice a thin skin form on the surface of the soap. This is normal, so just stir it back into the liquid soap. If the soap has started to thicken at this point, it is fine to microwave again in 5-10 second intervals until it is thinner.
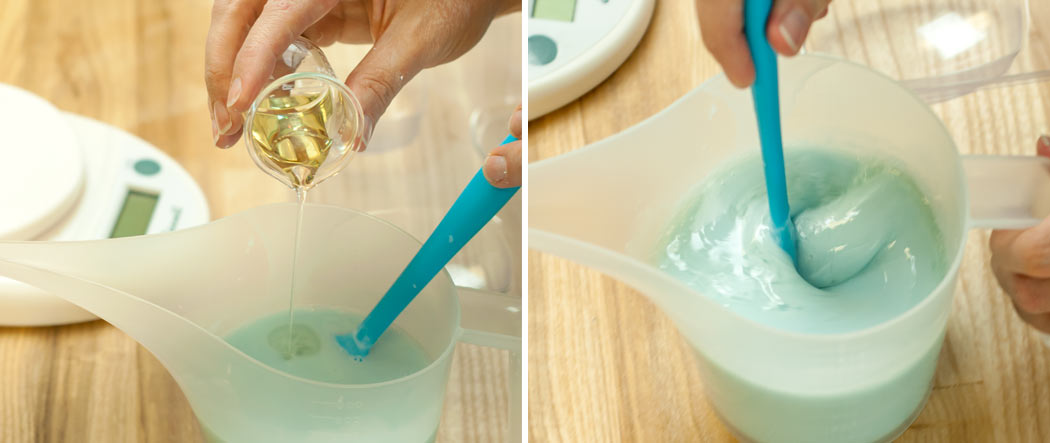
Step 6: Add fragrance
It’s a good idea to check the temperature of your soap and make sure it is between 140-150ºF (60-65.6°C). Add your premeasured fragrance to the soap base and stir well.
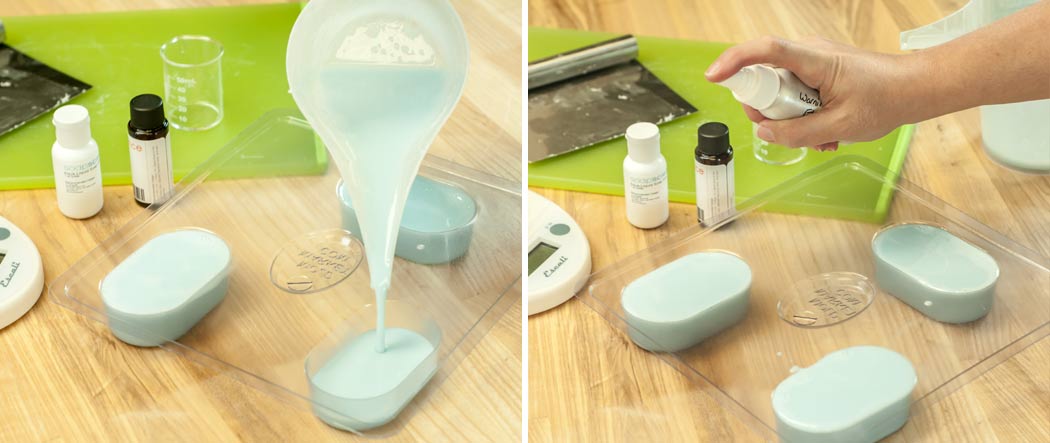
Step 7: Pour soap base Into molds
Once you have added your fragrance, it’s time to pour the soap into the mold. Pour slowly to minimize bubbles. Fill to the rim of the mold. Quickly spray the surface with rubbing alcohol to break up any bubbles that may have formed on the surface. It is OK to spray several times to eliminate as many bubbles as possible, however over spraying will cause the soap to foam.
Step 8: Allow the soap to cool
After 30 minutes a thick skin will have formed. Loosely cover with plastic wrap. Allow to cool undisturbed for 24 hours. *Tip - You can place your mold on a cookie sheet so that it can easily be moved without disturbing the soap.
Step 9: Clean up
Melt and pour soap clean up is so easy—just wash with water and a scrub brush or dishcloth to loosen larger pieces. If you’re left with a thick layer of soap in your container, try pulling the layer of soap from the container while the soap is still warm. You can roll this into a little ball for fun and use it right away.
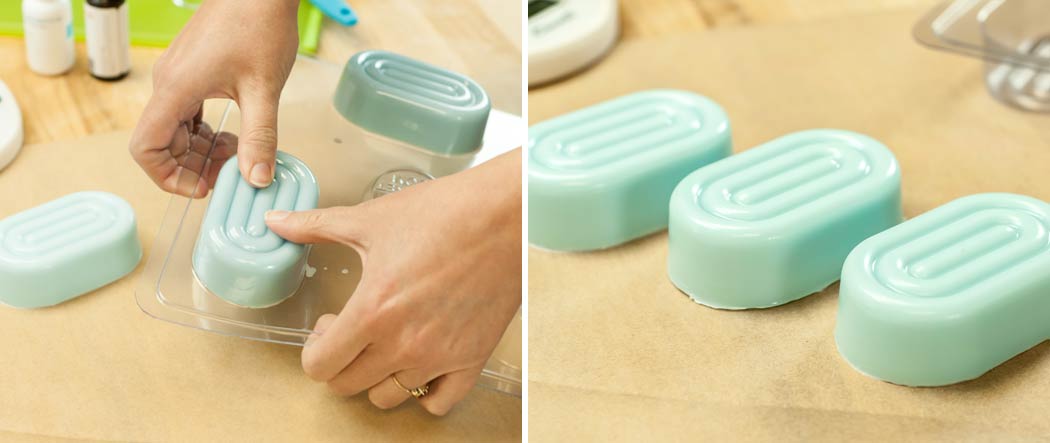
Step 10: Unmold soap bars
After 24 hours the soap should easily pop out of the mold. Gently pull at the sides of the mold to help loosen the soap from the edges. Invert the mold and apply light pressure to the center of the cavity. DO NOT force the soap. If it is not coming out easily, you can stick the mold in the refrigerator for up to 30 minutes and try again.
Step 11: Package and label or enjoy now
The soap will be ready to use right away, so when you’re done admiring your handy work, go ahead and give it a try!
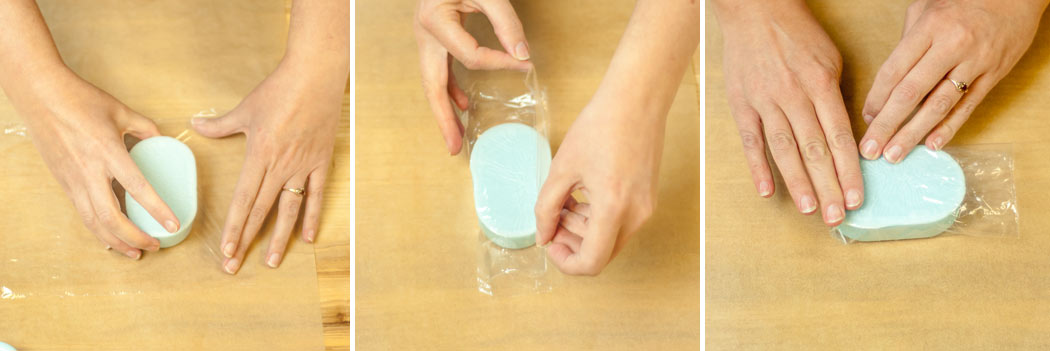
If you plan to sell your soap you’ll want to package and label it appropriately. Soap contains glycerin which pulls moisture out of the air and can cause water droplets to form on the surface. Wrapping the soap right away helps prevent this from occurring.
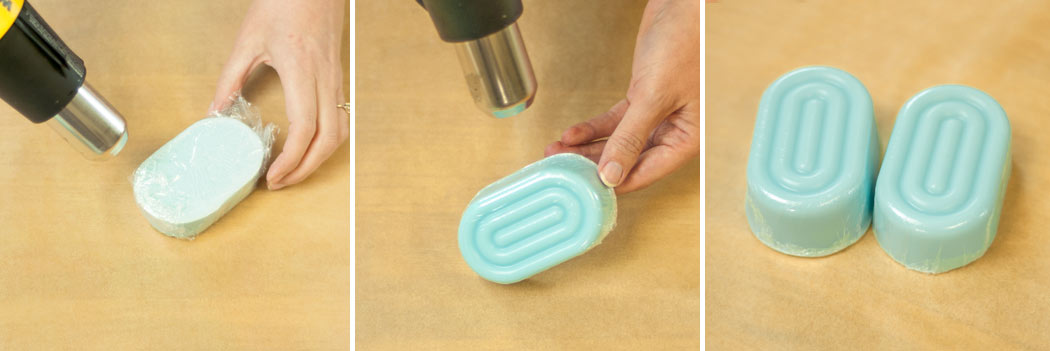
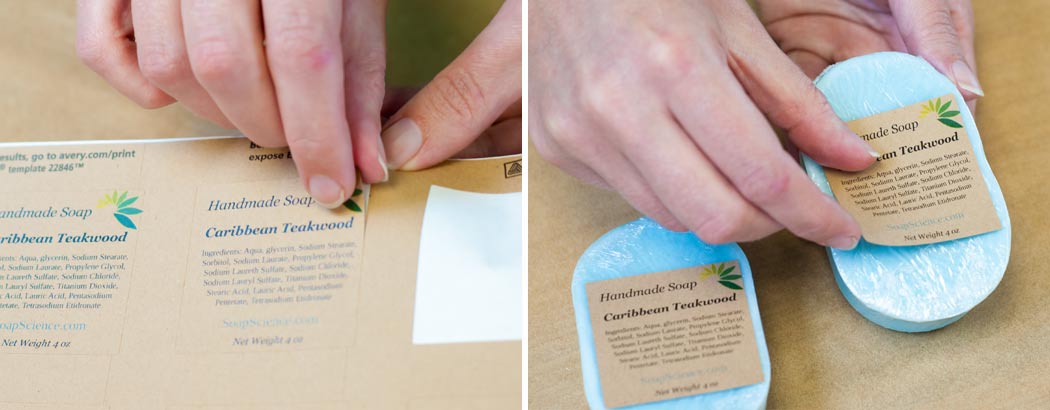
To package, tear off a piece of plastic wrap from the box. If it is too big, cut it with scissors to fit. Fold plastic tightly around the soap on all four sides (similar to wrapping a present). Use a heat gun to shrink the plastic tightly around the soap to keep it protected. Add your soap labels that include ingredients, product weight and name.
Show off your melt and pour soap bars and all your handmade creations, with the CandleScience community by tagging us @CandleScience and using the #CandleScientist hashtag on Facebook, Twitter, and Instagram. We may feature you in our Stories or on our website!