
How to make clamshell wax melts
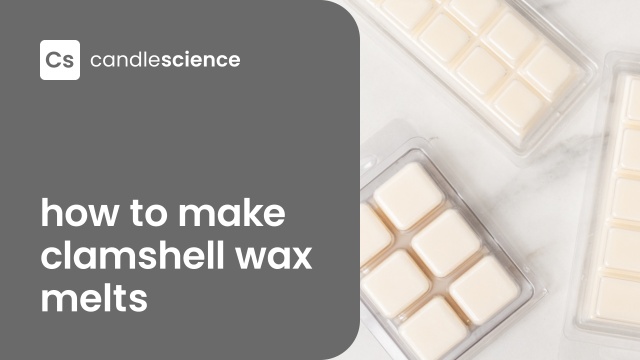
Breakaway or clamshell wax melts are popular because they’re inexpensive and convenient. The melts are usually made in a six compartment plastic clamshell mold with a snap lid. When the wax hardens in the mold, the melts break off easily and can be placed in a candle warmer.
Watch the video for step-by-step instructions. You can order the supplies used in this guide by clicking "Add items to cart" below the supply list.
This tutorial can also be used with our 5 pc. Snap Bar Clamshells and 10 pc. Mini Square Clamshells.
Make Clamshell Wax Melts Video Transcript:
Hey, it’s Janel from CandleScience.
Today, I’m going to show you how to make wax melts. These are super easy to make. And unlike a traditional candle, you don’t have to worry about open flames or smoke, which makes them a wonderful project for first-time crafters. To use–simply break off a wax melt and place it in a candle warmer.
And since it’s so quick to make melts, they are a great way for you to test blends, and new fragrances. Here’s what you’ll need to get started:
EO Notes: You can also use candle-approved essential oils for this project. Check the recommended usage percentage on the essential oil product page and start with low percentages. How to Make Soy Candles with Essential Oils
Supply List
- A 1 oz (28 g) bottle of the liquid dye of your choice. We’re using Purple Liquid Dye.
- A 1 oz (28 g) bottle of fragrance oil. We used Moroccan Cashmere for a fresh woody scent with year-round appeal.
- Standard 6 pc. Clamshell 10 pc Bag
- 8 Inch Glass Thermometer 1 pc Thermometer
- Small Pouring Pitcher 1 pc Pitcher
- Wax Melt Warning Labels 100 pc Roll
- BW-921, a blended pillar soy wax. We chose this wax for its ability to take on vibrant colors, as well as its excellent performance in molds. But if you’re looking for other options, consider EcoSoya PB or IGI 6028.
After you’ve gathered all your supplies, start by melting your wax of choice. Half a pound of wax will fill approximately 3 clamshell wax molds.
Once the wax reaches 185 degrees (85°C), add 0.75 oz (21 g) of fragrance oil, which works out to 9% or 1.5 oz (43 g) per 16 oz (454 g) of wax. Anytime you add fragrance, make sure to check the appropriate fragrance load for your wax. Also consider the size and type of room, where the wax melts will be used. For example, some scents may overpower a small room like a bathroom.
At this time, you can also add dye to the wax. After you’ve added fragrance oil and stirred in the dye, the wax is ready to pour once it reaches the correct pouring temp. Pouring temp varies between waxes, so make sure to double-check the correct temperature for the wax that you’re using. We poured our wax at 170 degrees (76.7°C).
When you buy wax melts, they often come in a plastic clamshell mold—like this one with a snap lid. All you have to do is pour the prepared wax directly into the molds.
Then, let the melts cool overnight. Snap down the lid, and add a personal label if you’d like. As always, add the warning labels to the inside of the lid, and refer to the manufacturer’s directions for the warmer that you use.
Feel free to get creative with your color and fragrance combinations, and your labels too. The flat part of the molds are an excellent place to show off your branding with a custom label. And that’s it, that’s all there is to it!