
how to conduct a basic burn test
What is burn testing?
Burn testing is the process of evaluating finished candles for performance from the first to the last burn. The goal is to ensure that your candle burns at a normal rate, isn't producing an abnormal amount of soot, and is safe for the end-user. The individual components of your candle—the type of wax, fragrance oil, fragrance load, candle dyes, wick choice, container diameter and shape—all factor into how your candle burns. Every formula you create should be burn tested before gifting to friends or selling to customers.
Because of the natural variance in supplies, particularly with soy and natural waxes, it's recommended to burn test your candles periodically. Checking your existing line at the start of each season, or at least bi-annually, is advised.
We're here to help walk you through exactly how to burn test your candles, what to look for, and what to do if your candle isn't acing its burn test.
Items needed:
- Completed candle, cured for at least 24 hours
- Ruler
- Scissors
- Burn testing notecard — we have a copy for you to download below!
- Smartphone or camera to take photos
Conduct your burn test
1. Clear your schedule and find a comfortable place to set up.
It's crucial that your candle is not left unattended, so make sure that you'll be able to hang around for the entire burn cycle. Set your candle on a clean, flat, heat-resistant surface. Place candles three to six inches (7.6-15.2 cm) apart if testing more than one at a time. Ideally, your testing area should be free of drafts.
2. Clearly label your candles.
Note the type of wax, fragrance oil, fragrance load, dyes used and amount used, wick choice, and container choice and its diameter. You can use our downloadable burn testing notecards or jot this information down in a notebook. Try printing our notecards as labels for your candles to keep things simple!
3. Trim your wick to ¼ inch (6 mm).
Grab your ruler, and place it next to your wick. Trim the wick to ¼ inch (6 mm) with sharp scissors. Always trim wicks to ¼ inch (6 mm) before lighting!
4. Light your candle, note the time, and watch it burn!
Check back each hour to record your observations. Setting hourly timers is a good practice when initially lighting the candle. Always extinguish candles after four hours.
Note: Below, we discuss what to expect a candle to look like while burning, and answer common FAQs.
5. Extinguish, wait, and repeat.
After four hours, blow out your candle and give it at least five hours to cool. Repeat steps one to four until ¼ inch (6 mm) of wax remains. Each burn cycle will be different, especially as the wax level lowers and heat builds in the container. With burn testing, we're evaluating how the candle burns throughout the candle's life, not just during the first few burns. Testing the entire candle is arguably the most important step of the process. Your customers will be burning the entire candle, and so should you!
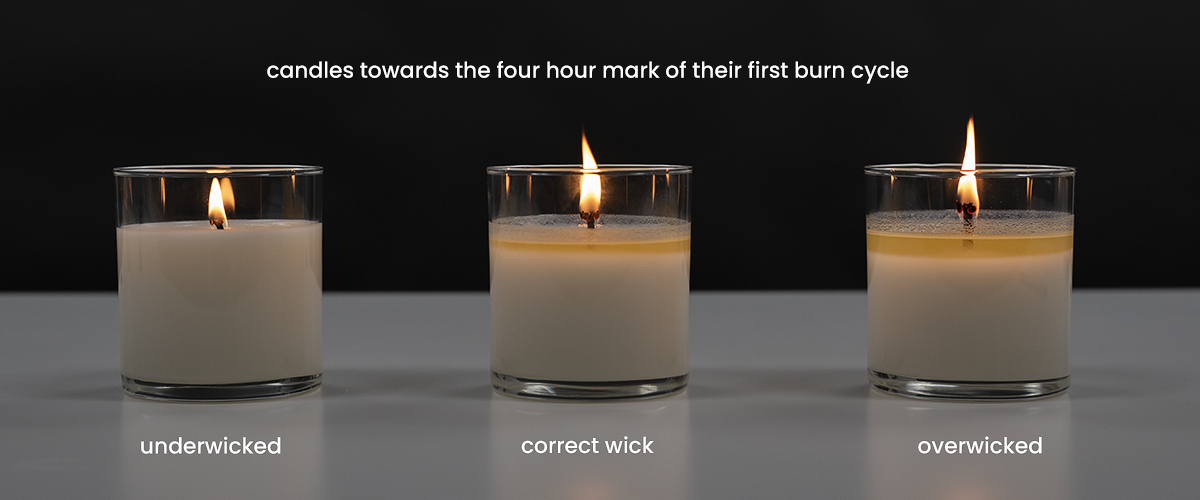
See our video "Choosing the Right Wick Size" to see a correctly wicked candle burning.
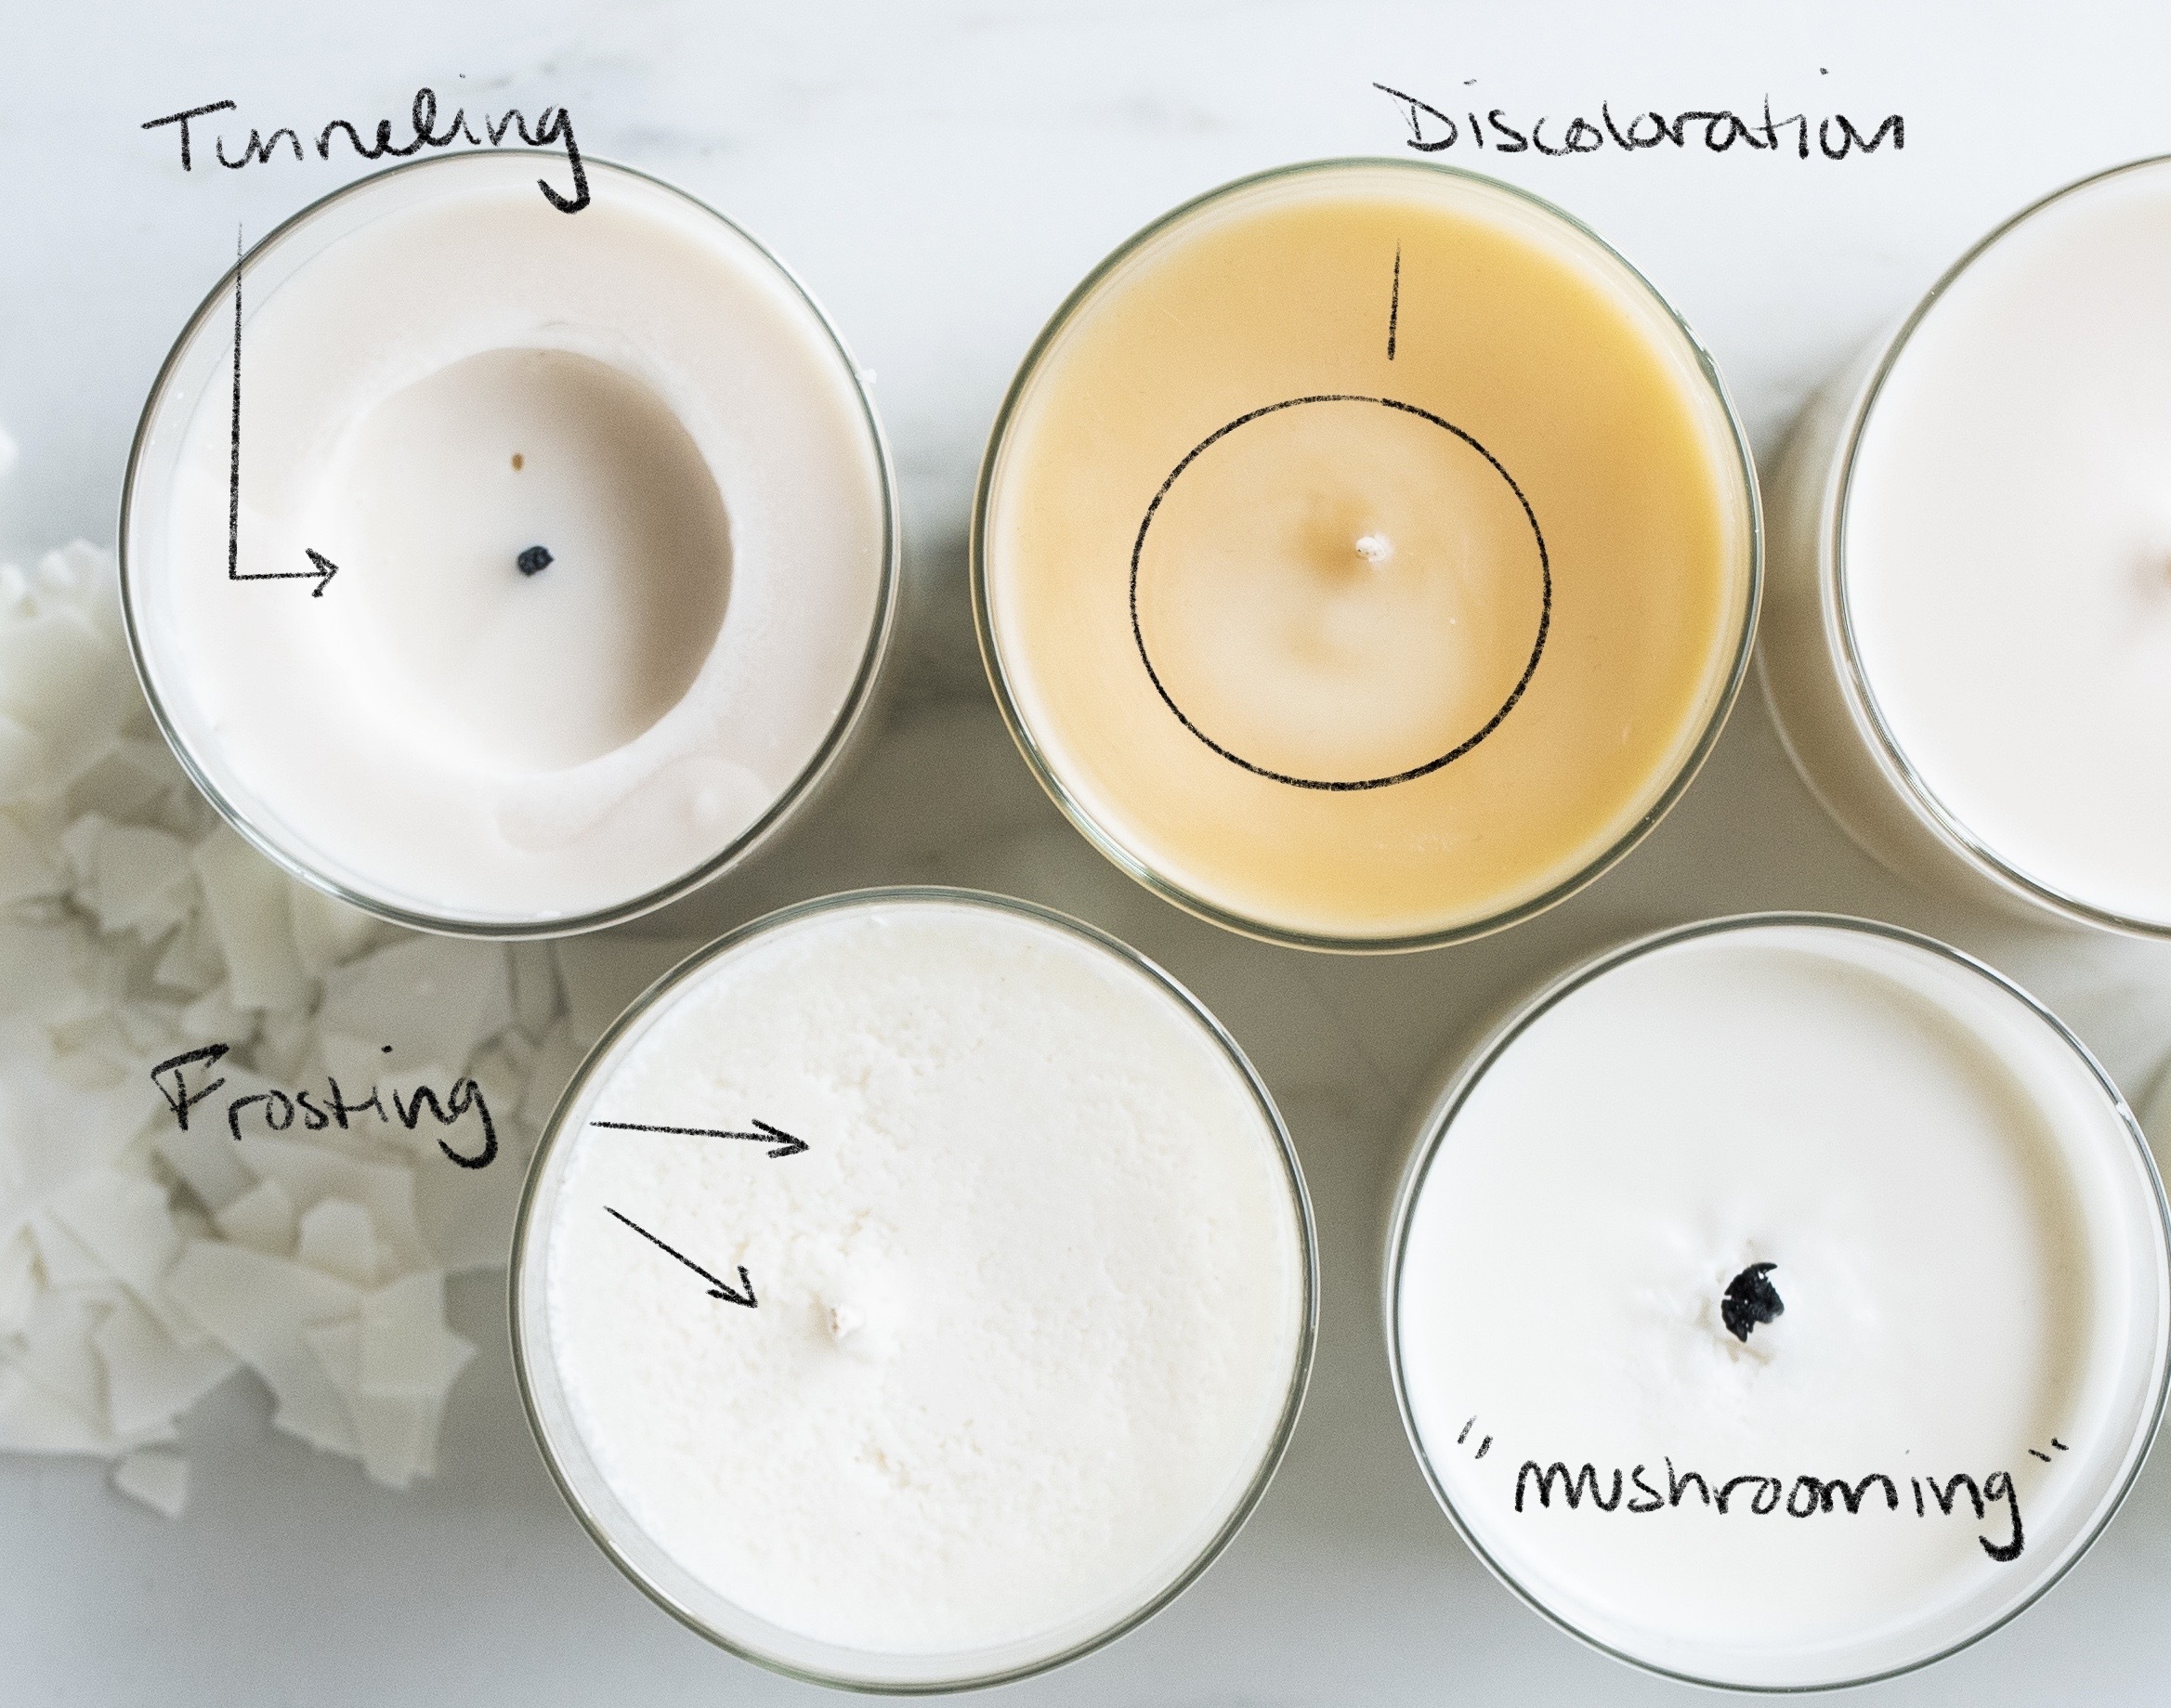
What should my candle look like while burning?
The main areas to observe are the melt pool, soot, and flame size; however, it's essential to look at these factors as a whole, and not individually.
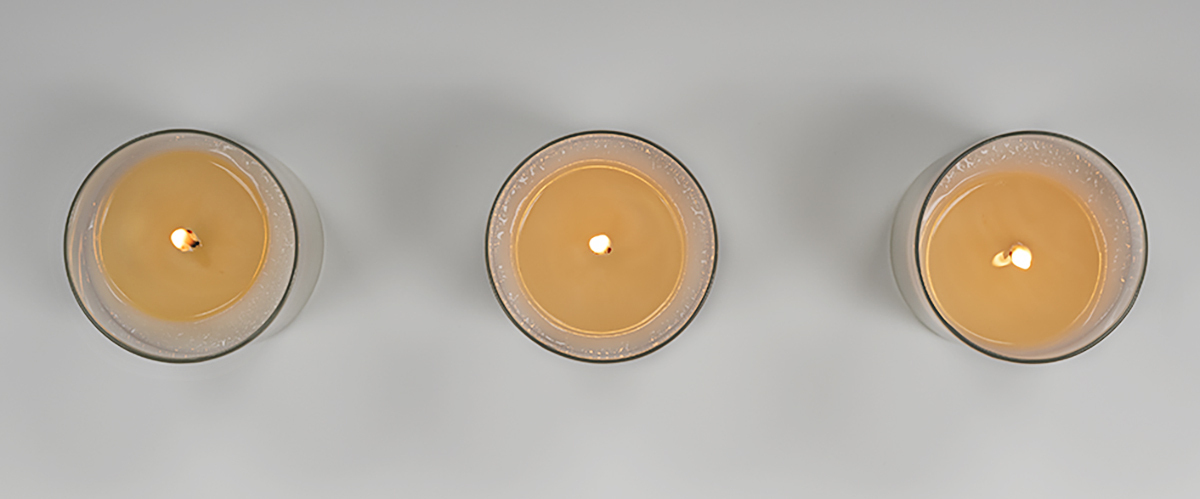
Melt pool
When evaluating your melt pool, look at the diameter of the melted wax. At three to four hours, the melt pool should be no more than ¼ inch (6 mm) from the edge of the container. A little wax remaining around the edges of the container is acceptable, and should melt down by the third or fourth burn cycle. The depth of the melt pool should typically be about ¼ to ½ inch (6-13 mm), but a slight variance here is okay. You're looking for what makes sense for your specific container, so don't be too critical regarding the melt pool depth. Always wait until four or more burn cycles to be critical of your melt pool. Melt pools are slower to form during the first few burns, but develop faster when the wax level is lower in the container.
Soot
First and foremost, remember that you are burning something, so a bit of soot is totally normal and to be expected! Soot is simply the carbon buildup burning off the wick. Soy wax typically produces white soot, which is harder to see with the naked eye; paraffin wax produces black soot, which is more visible and easy to spot. If you see little bursts of soot every now and then, there is no need to worry. If large plumes of soot appear frequently or if you see soot building heavily on the edge of your container, that may indicate that you should wick down. Excess soot can also result from a fragrance load that's too high, or certain types of fragrance oils.
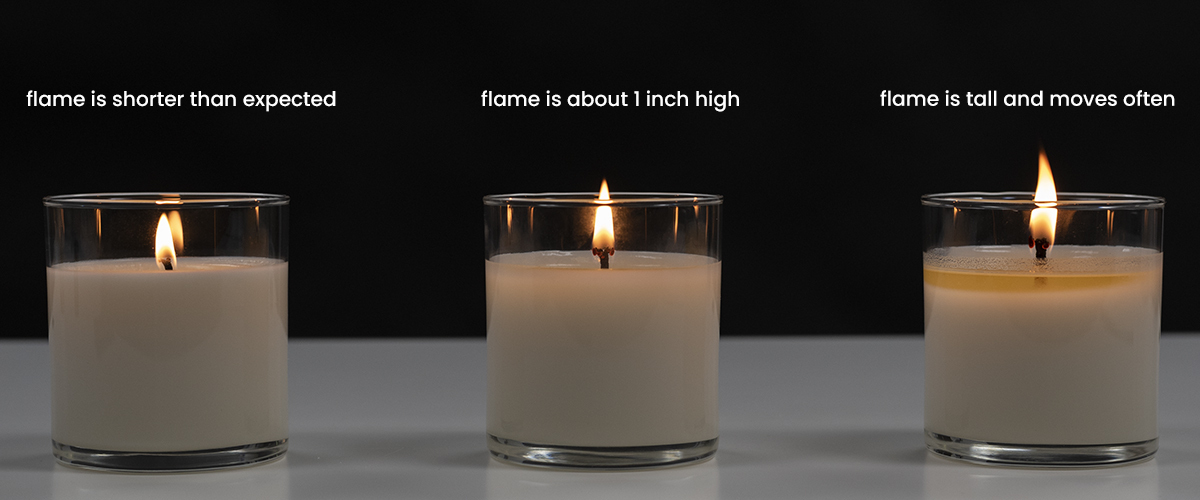
Flame size and movement
Most flames will be about an inch (2.5 cm) tall, but flames up to two inches (5 cm) can be considered normal. During most of the burn, the flame will be relatively still, with slight movement here and there. Heat tends to build up in the container as the wax level gets lower, so you could expect to see the flame moving a bit more at this point in the burn. If the flame begins moving excessively, it could indicate a draft in the room. If in doubt, check your burn testing location for drafts and try the next burn cycle in a different area.
Wait until at least the fourth burn cycle to draw any conclusions about your wick choice. Those first few burn cycles are always exciting, but remember to evaluate the full candle instead of just the first few burns!
Frequently asked questions
-
Do you recommend power burning?
Power burning is when a candle burns for longer than four hours. We do not recommend power burning because it can cause the container to overheat and potentially break, and it can also cause the fragrance from the candle to burn off faster than it's intended to. Instead of power burning your candles, focus on educating your customers about proper candle care. Teach customers about the importance of trimming their wicks, extinguishing the candle after four hours, and always keeping the candle within sight while burning. -
If one wick isn't working for me, can I switch it out mid-burn test?
Unfortunately, no. This will not accurately represent how your candle burns with the wicks you've switched out. As it's burning, a wick becomes saturated with the fragrance oil, wax, and dyes in the candle. Switching out the wick mid-burn test does not allow this to happen and therefore is not recommended. -
What if my wick is mushrooming?
Most mushrooming is simply a result of the wick's construction. You will always see a bit of mushrooming if using CD or ECO wicks. If the mushrooming is so large that it's causing the wick to tip over into the wax or causing bits of carbon to fall into the melt pool, this could indicate that you need to wick down. Mushrooming will be much more dramatic if your wick is not trimmed to ¼ inch (6 mm), so always trim those wicks before lighting! -
Does paraffin wax produce more soot than natural wax?
Paraffin wax produces dark soot that's easy to see, while natural waxes like soy and coconut produce white soot that's harder to spot with the naked eye. If using paraffin wax, you should expect to see a bit of soot while your candle is burning. If using natural wax, you can anticipate less visible soot, but infrequent dark soot sightings are normal. -
There's still a little unmelted wax on the edge of my container, do I need to wick up?
A little wax hang-up is completely normal and usually melts down with future burns. After the fourth burn cycle, if there's still a ring of unmelted wax or excess wax hang-up, it may indicate that wicking up is needed. -
Am I testing for hot throw during my burn test?
We recommend completing your burn test and finalizing your wick choice before testing for hot throw. Make sure you’re happy with the way your candle is burning and that no further adjustments will be needed before evaluating hot throw. If you’re conducting a burn test and evaluating hot throw simultaneously, you may be blown away by the hot throw of your candle for the first few burns only to find out that your candle seems to be overwicked as the wax level gets lower. Additionally, because multiple candles are typically burning during a burn test, it’s not an ideal environment to evaluate hot throw. When you’ve completed burn testing and are happy with how your candle is burning, evaluate the hot throw of your candle in a controlled environment. Remember, any changes to your formula always need to be tested. -
Should my pillar candle have a full melt pool?
Many candle makers choose to leave about ¼ inch (6 mm) of side-wall to avoid the possibility of spillage, but this is ultimately up to you! Always be sure to place your pillars on a heat-safe tray or pillar candle holder.
If you decide to try a different wick after your testing, be sure to reference our Wick Guide for recommendations specific to your wax and container!
Additional resources
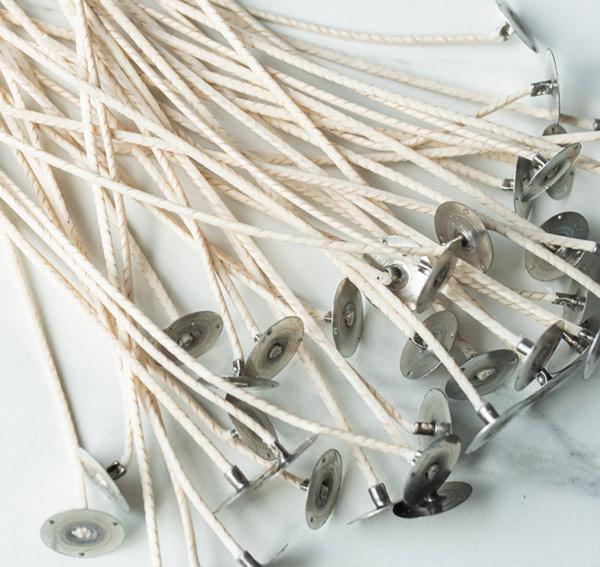
Shop Candle Wick
All of our candle wicks are constructed from all natural ring-spun cotton and are metal free.
Learn Candle Making Terms
Get familiar with frequently used candle making terms!