How to make loofah soap
Luxurious loofah soaps provide the benefits of exfoliation to the skin, with the added aesthetics of the natural loofah sponge. These are a great addition to any line for skincare during the dry winter months. You can also customize the base and the ingredients to match your brand or customer needs.
Ready to get started? Here’s what you’ll need.
EO Notes: You can also use soap-safe essential oils for this project. When using essential oils, be sure to check your essential oil's recommended usage percentage and IFRA Certificate. How to Make Melt and Pour Soap with Essential Oils.
Additional Items Needed:
- Loofah
- Deep Bowl
- Distilled Water
- Sharp Serrated Knife
- Bamboo Skewer
- Rubbing Alcohol in a Spray Bottle
- Paper Towels
- Latex Gloves
Directions:
Step 1: Prepare your supplies and workspace
Wash your equipment, soap molds, and utensils in warm soapy water and dry thoroughly. Don’t forget your workspace! Avoid any cross-contamination by spraying the area with rubbing alcohol or a 5% bleach solution, then wipe dry with a clean paper towel.
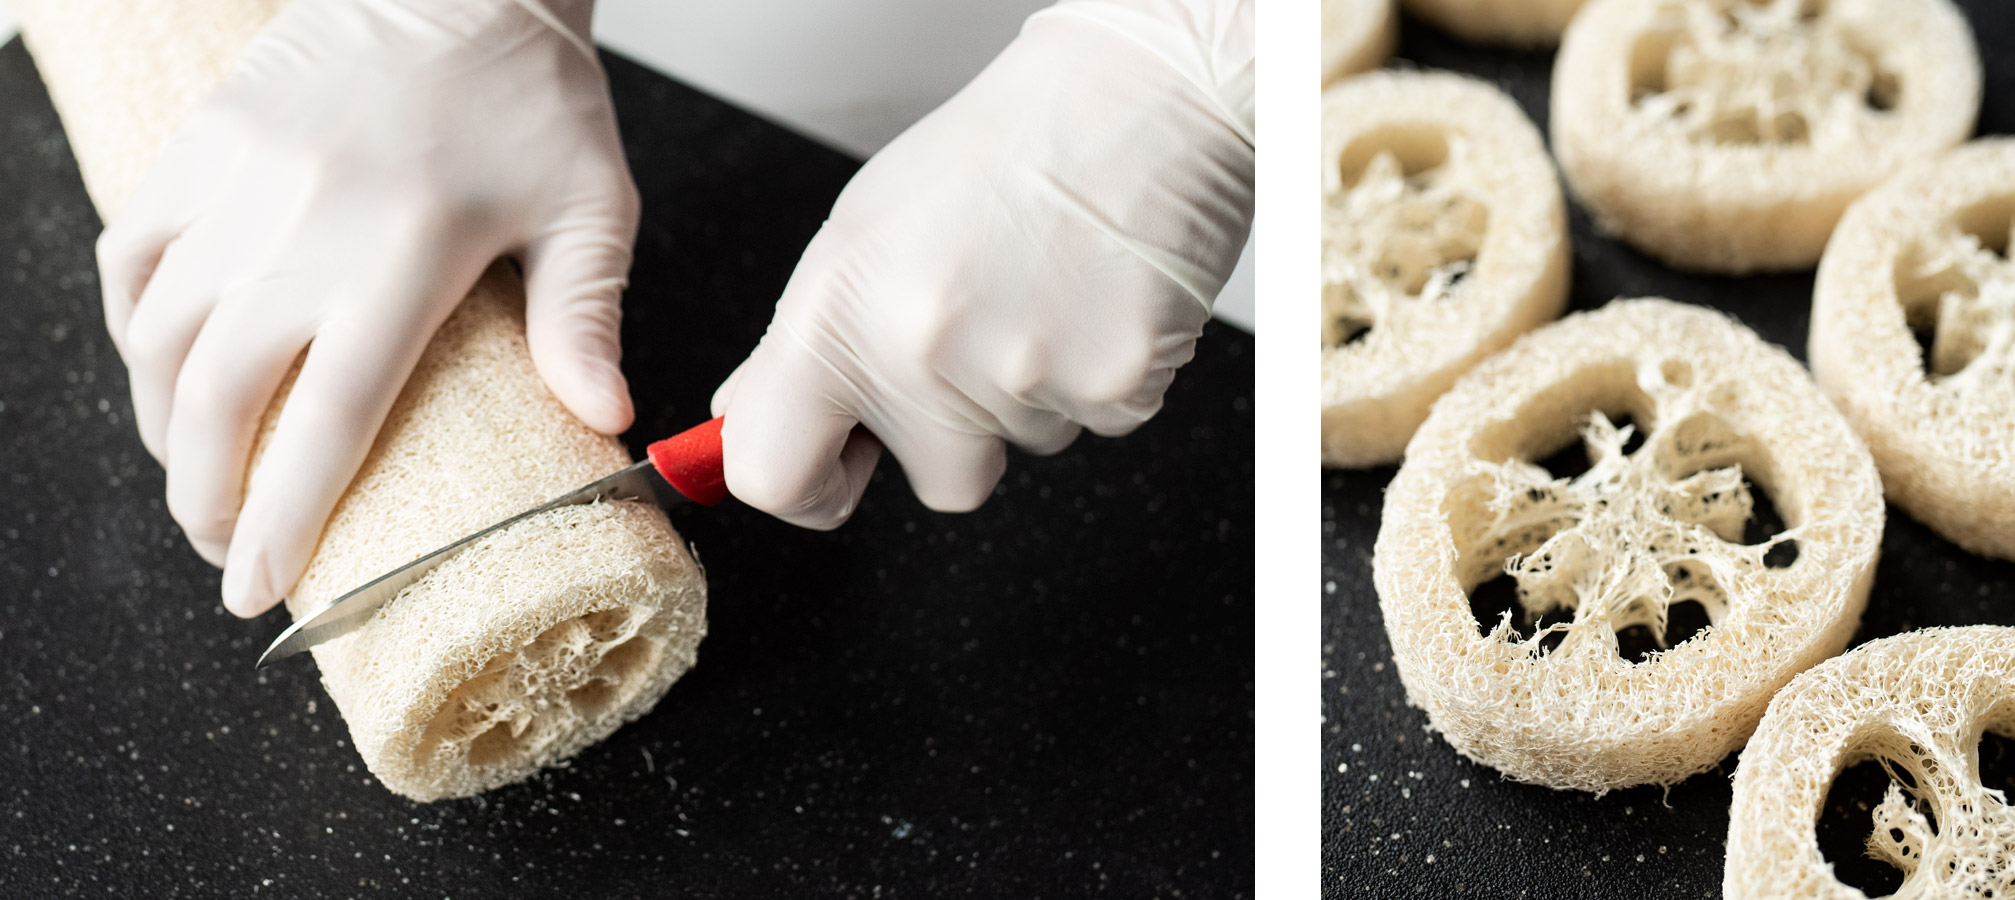
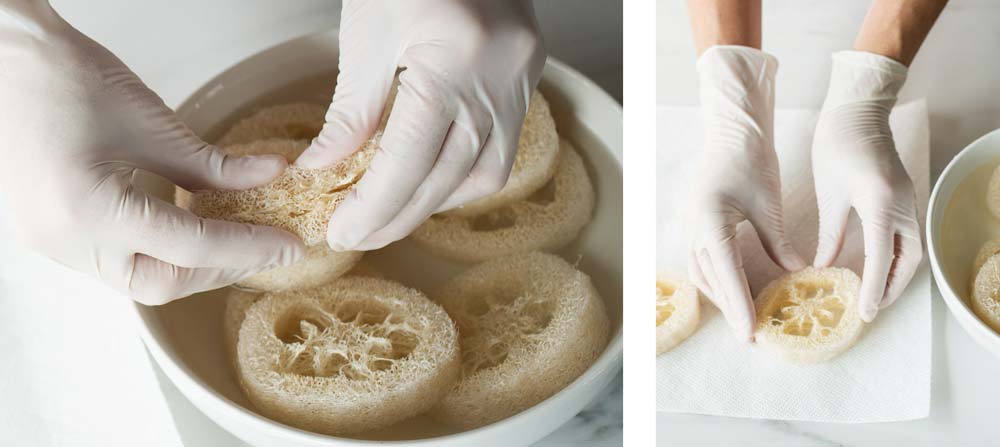
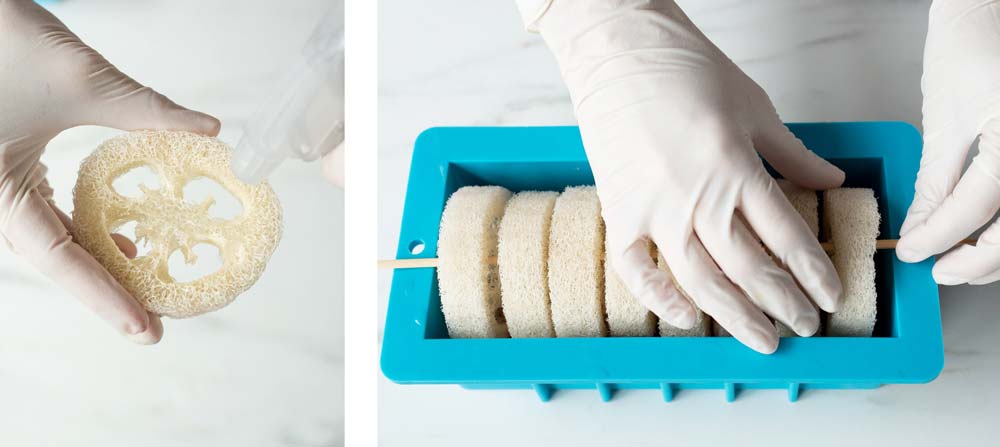
Step 2: Prepare the loofah
We purchased a large loofah, so we needed to cut it down into usable pieces.
To begin, cut the loofah into ¾” (19 mm) pieces with a serrated knife on a cutting board. For the particular mold used in this tutorial, you will need 8 pieces to fill the mold.
Once your loofah is cut, place the pieces in a deep mixing bowl filled with warm distilled water. Allow them to soak for about 5 minutes to give them time to soften.
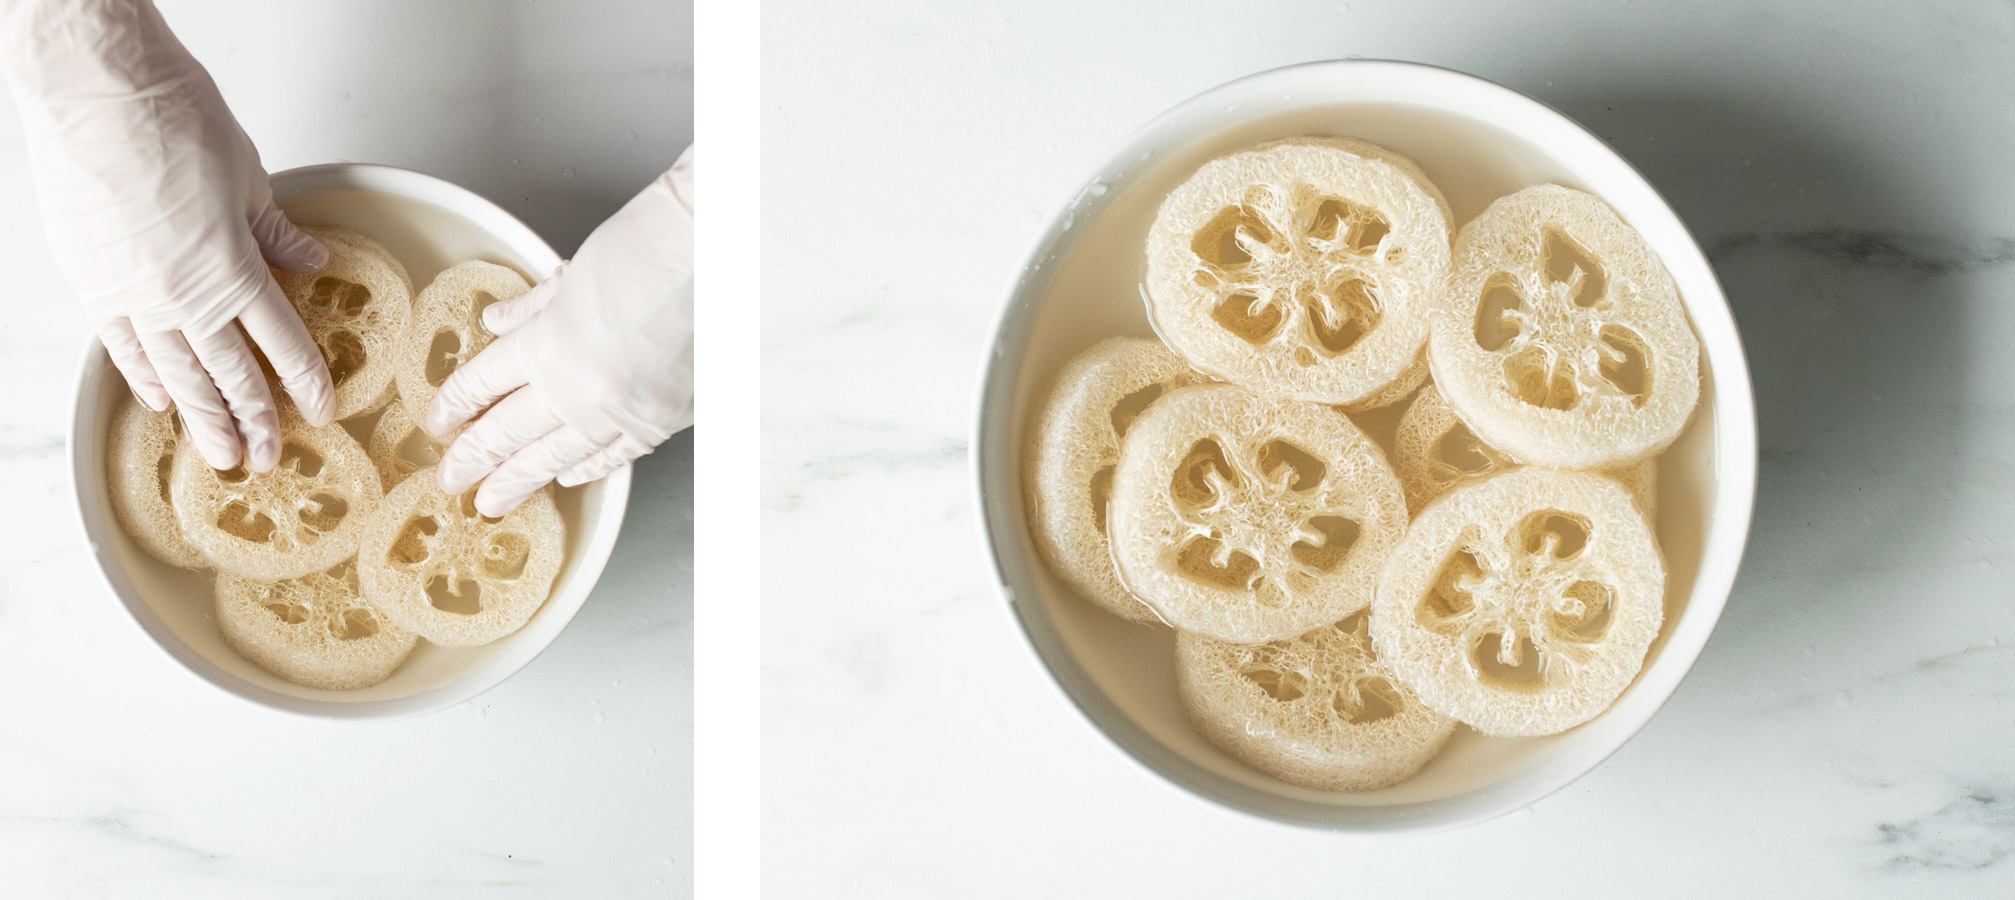
Squeeze any excess water out of the loofhas and place them on a paper towel to air dry.
Step 3: Prepare the soap base
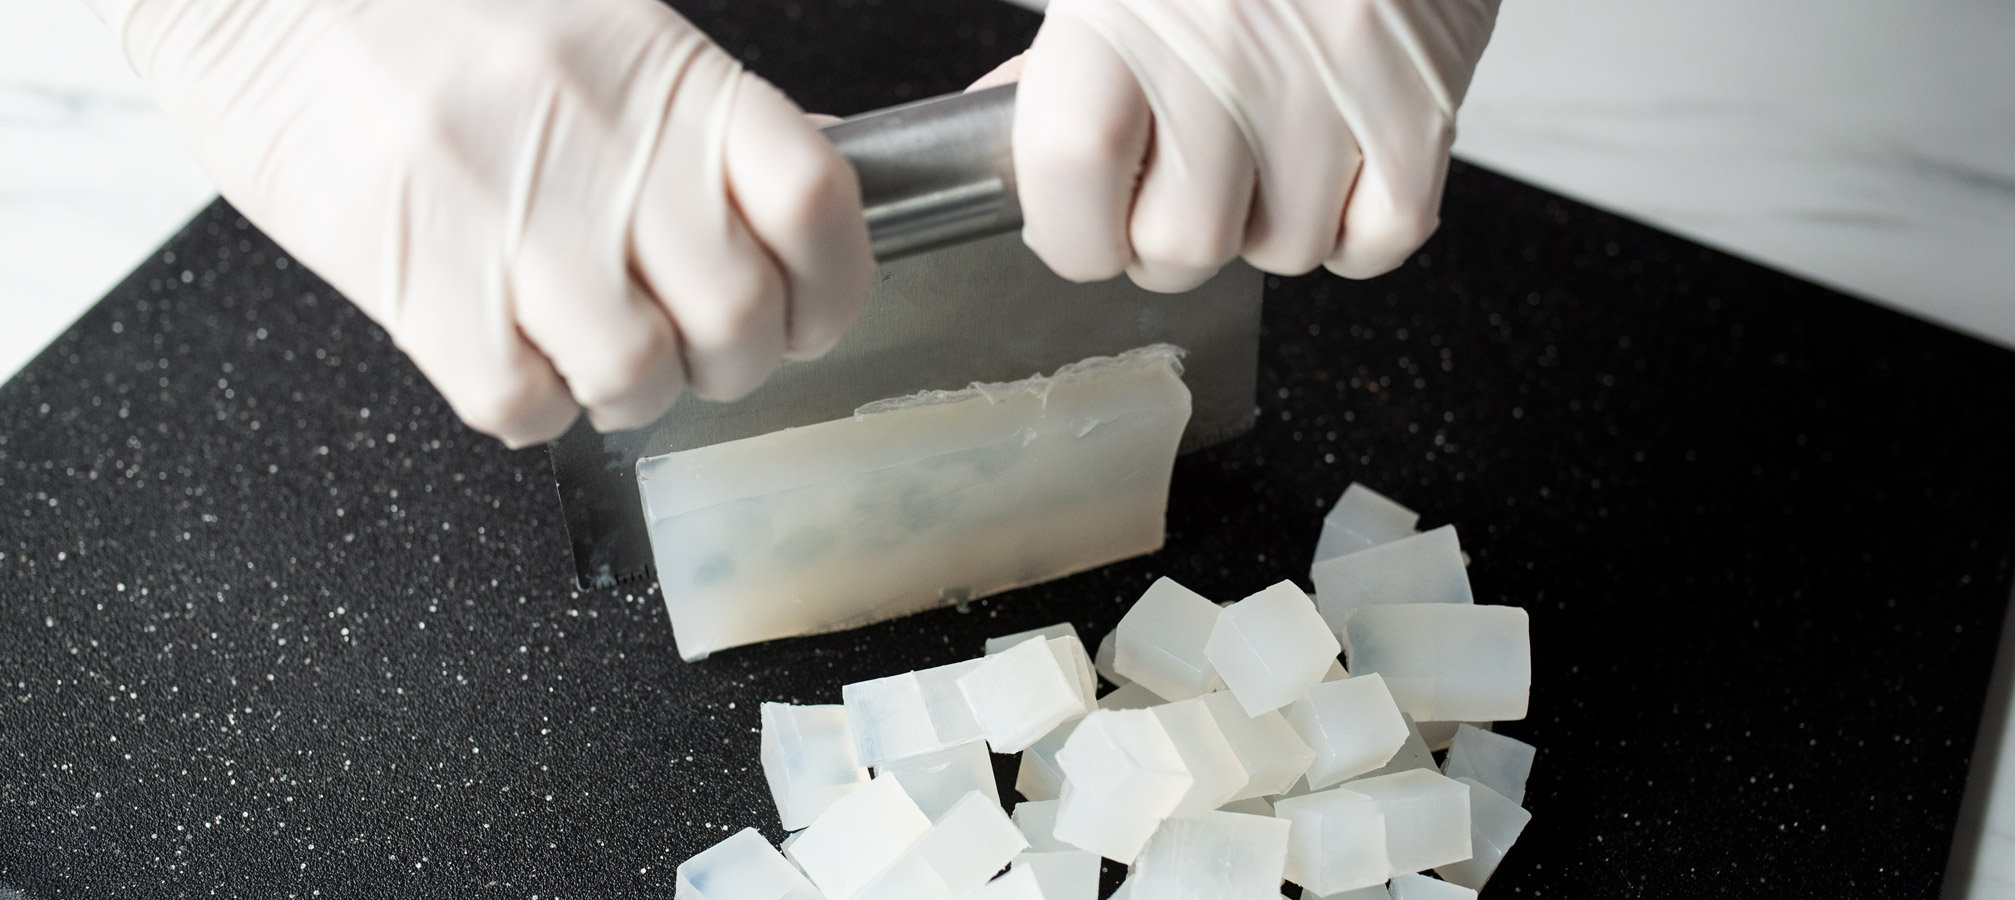
Remove the SLES free soap base from one of the 2 lb. containers. Cut the soap in half and return the other half to the container to use later.
Cut the soap into 1” (2.5 cm) cubes, place them in a microwavable safe container, and weigh out 16 oz. (454 g) of soap.
Microwave the soap for 1 minute, then give it a quick stir and continue heating in 30-second intervals until the soap is completely melted.
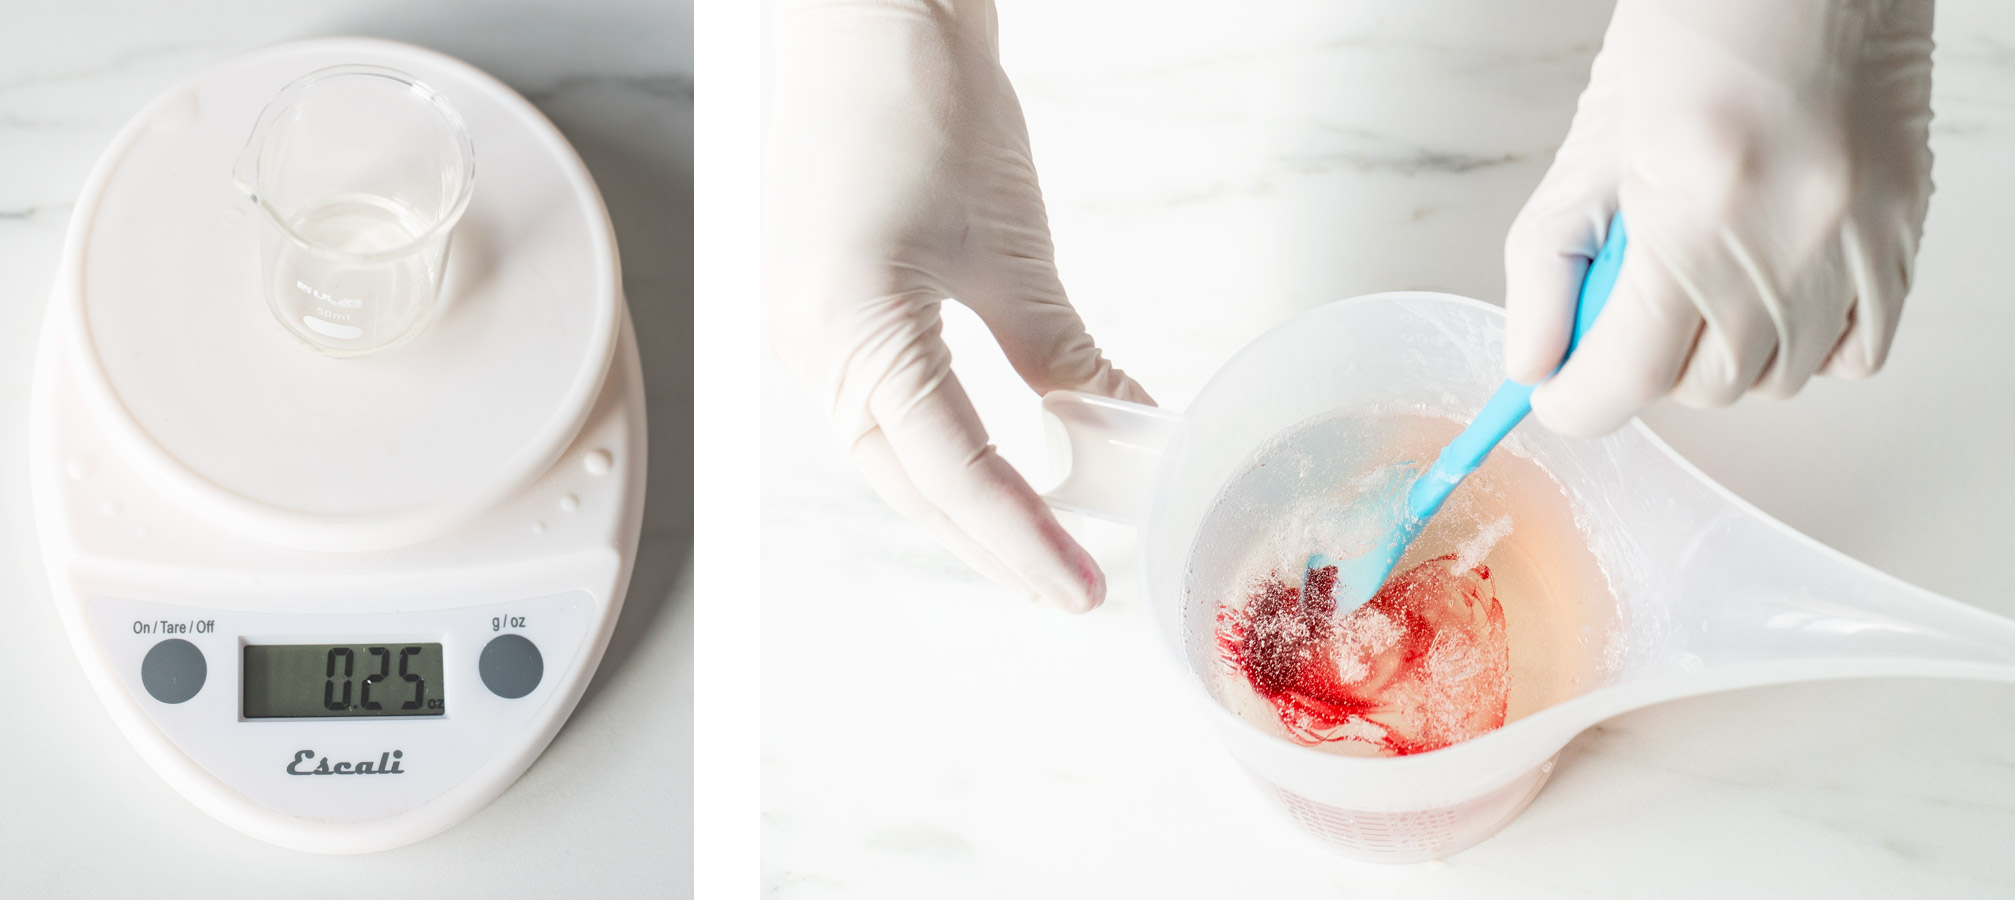
Weigh out 0.25 oz. (7 g) of Peppermint and Eucalyptus fragrance oil and add it to the melted soap base. Add 3 drops of Red Liquid Dye and stir gently but thoroughly, being careful not to create too many bubbles.
Allow the soap to cool for 10-15 minutes.
Step 4: Place loofah slices
Test the soap to see if it’s ready by gently pressing on the surface. There should be a slight give, but the surface should not break. Breaking indicates the soap has only cooled thinly on the surface.
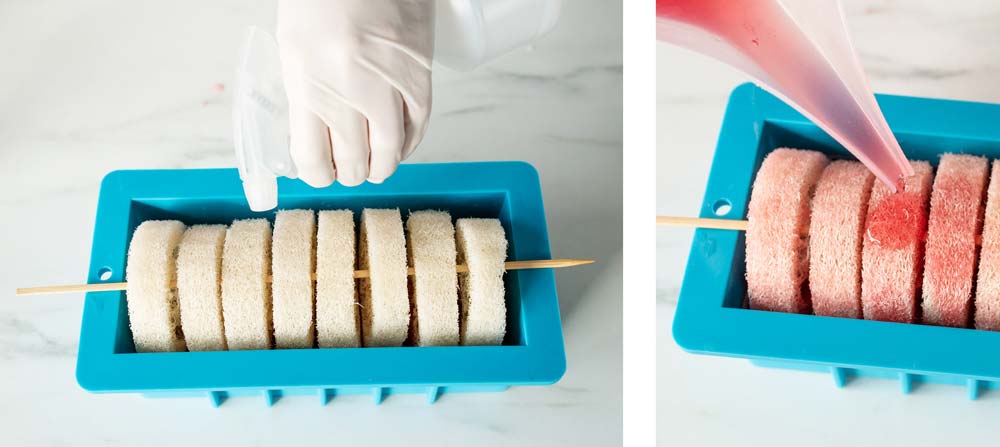
Spray a piece of loofah liberally with rubbing alcohol and gently press it into the layer of soap enough that it stays in place. Repeat this process until all 8 pieces have been placed. Be sure to allow a slight gap between each piece for cutting your bars later on.
We used a wooden bamboo skewer to hold the loofah pieces in place.
Allow the soap to set for 30 minutes.
Mark the mold with a permanent marker at 1” (2.5 cm) increments to use as a guide for placing the loofah.
Step 5: Fill in the mold
Cut the second half of the soap you set aside earlier into 1” (2.5 cm) square cubes and weigh 16 oz. (454 g) of soap. Microwave the soap for 1 minute, using the same method as before.
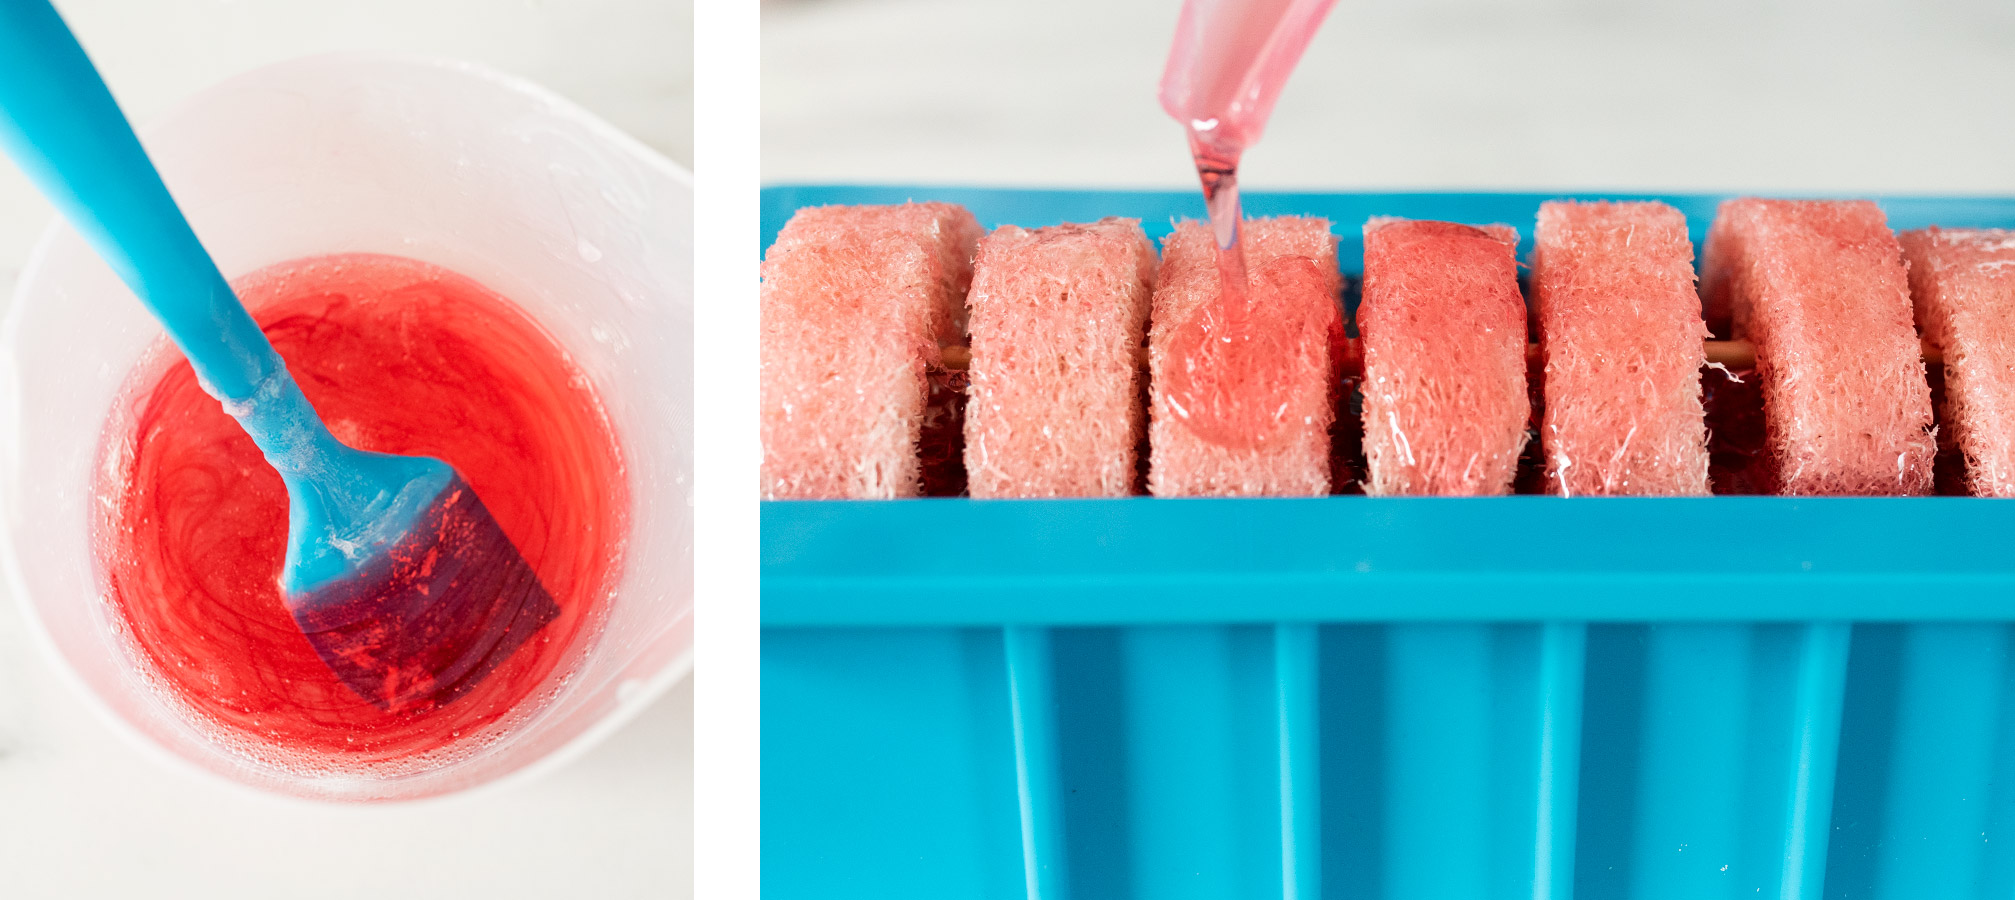
Weigh and add 0.25 oz. (7 g) of Peppermint and Eucalyptus fragrance oil and 3 drops of Red Liquid Soap Dye into the melted soap.
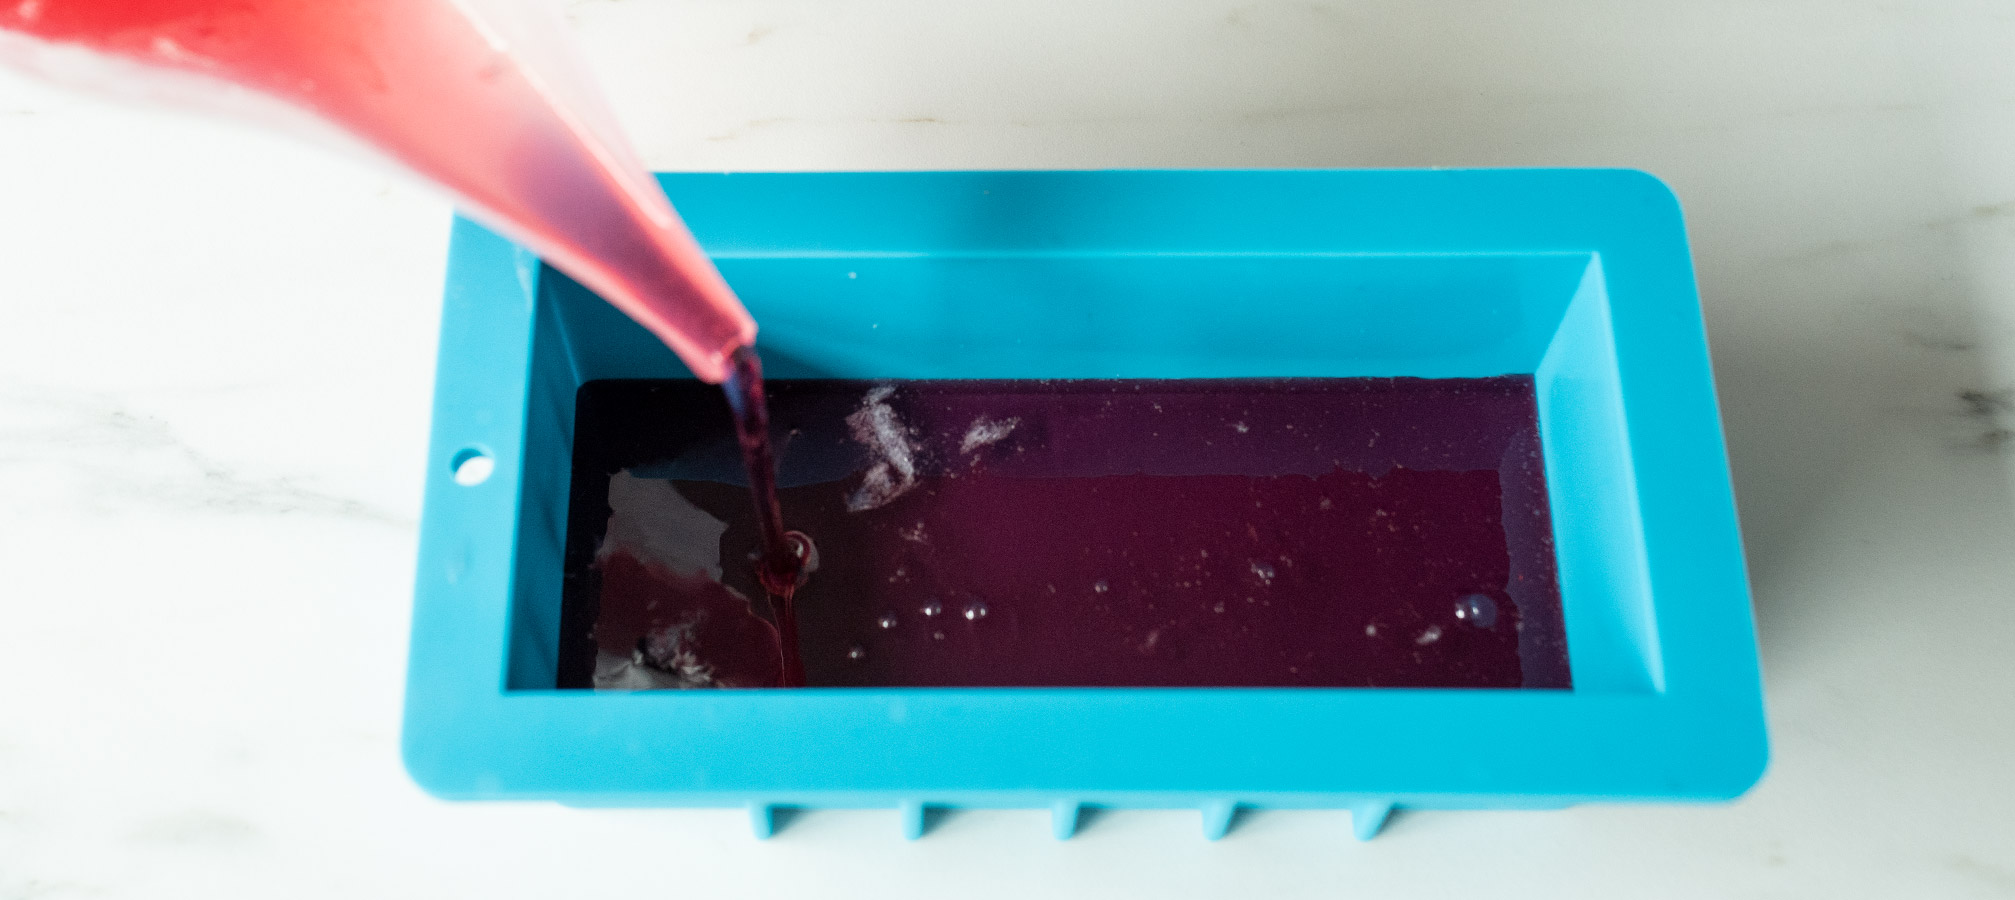
Spray the top of the soap with rubbing alcohol to remove any bubbles. Liberally spray the loofah pieces and surface of the cooled soap. This will help the layers bind together and help the soap seep into the loofah’s nooks more easily. Pour very slowly making sure to pour over and around each piece of loofah as much as possible.
Allow to cool for 20 minutes.
Step 6: Top off the soap mold
Open the second tray of soap base and cut off about ¼ of the block. Cut the soap into 1” (2.5 cm) cubes and weigh out 10 oz. (283 g) of soap. Microwave the soap for 1 minute, then stir again and continue heating melting in 30-second intervals until the soap is completely melted.
Mix in 2 drops of Red Soap Dye and 0.1 oz (2.8 g) of fragrance. Spray the surface with rubbing alcohol to remove any bubbles. Again, spray the top of the cooled soap and loofah pieces liberally.
Slowly pour the soap over the top of the loofah pieces. This step will help ensure the loofah is fully secured into the soap and will minimize the chance of air bubbles forming inside the loofah.
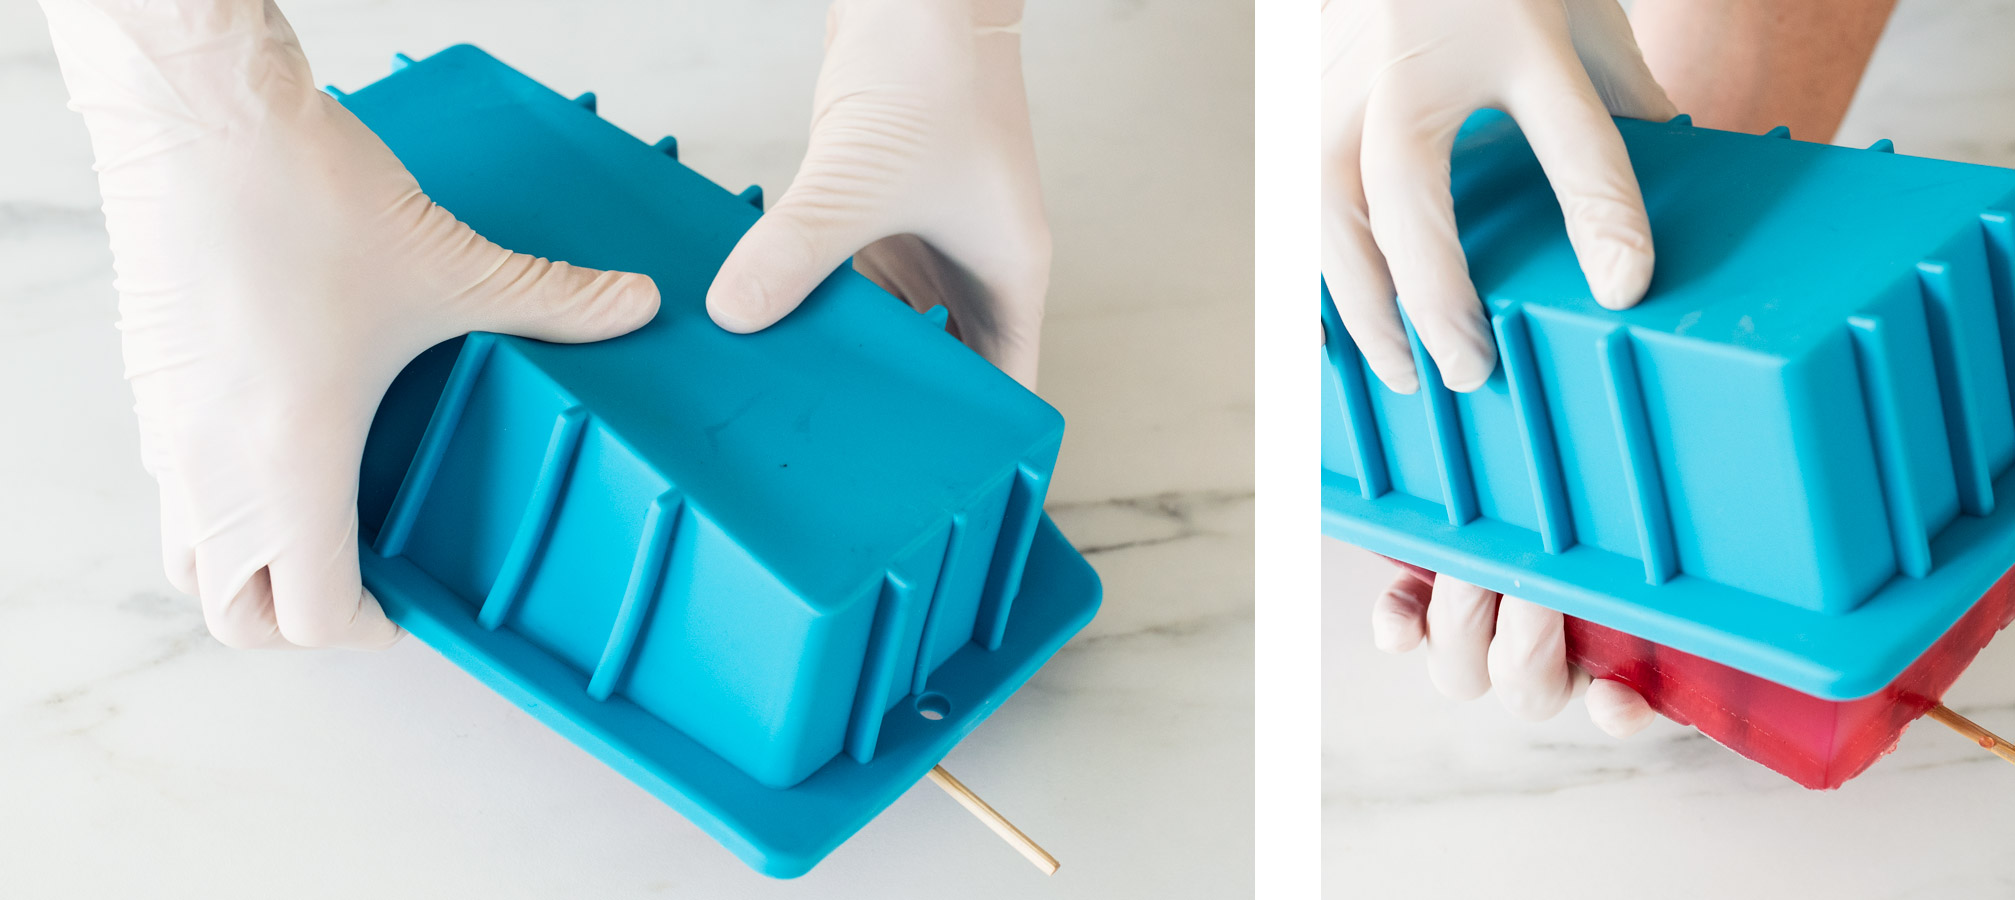
Step 7: Remove soap from the mold
Allow the soap to completely set up overnight. Remove the soap from the mold by gently pulling the sides away. Turn the mold over and use one hand to hold the soap and pull it out of the mold while using the palm of your other hand to push from the bottom of the mold. Don’t force the soap, if you have any resistance, pull at the sides of the mold while still holding the soap upside down.
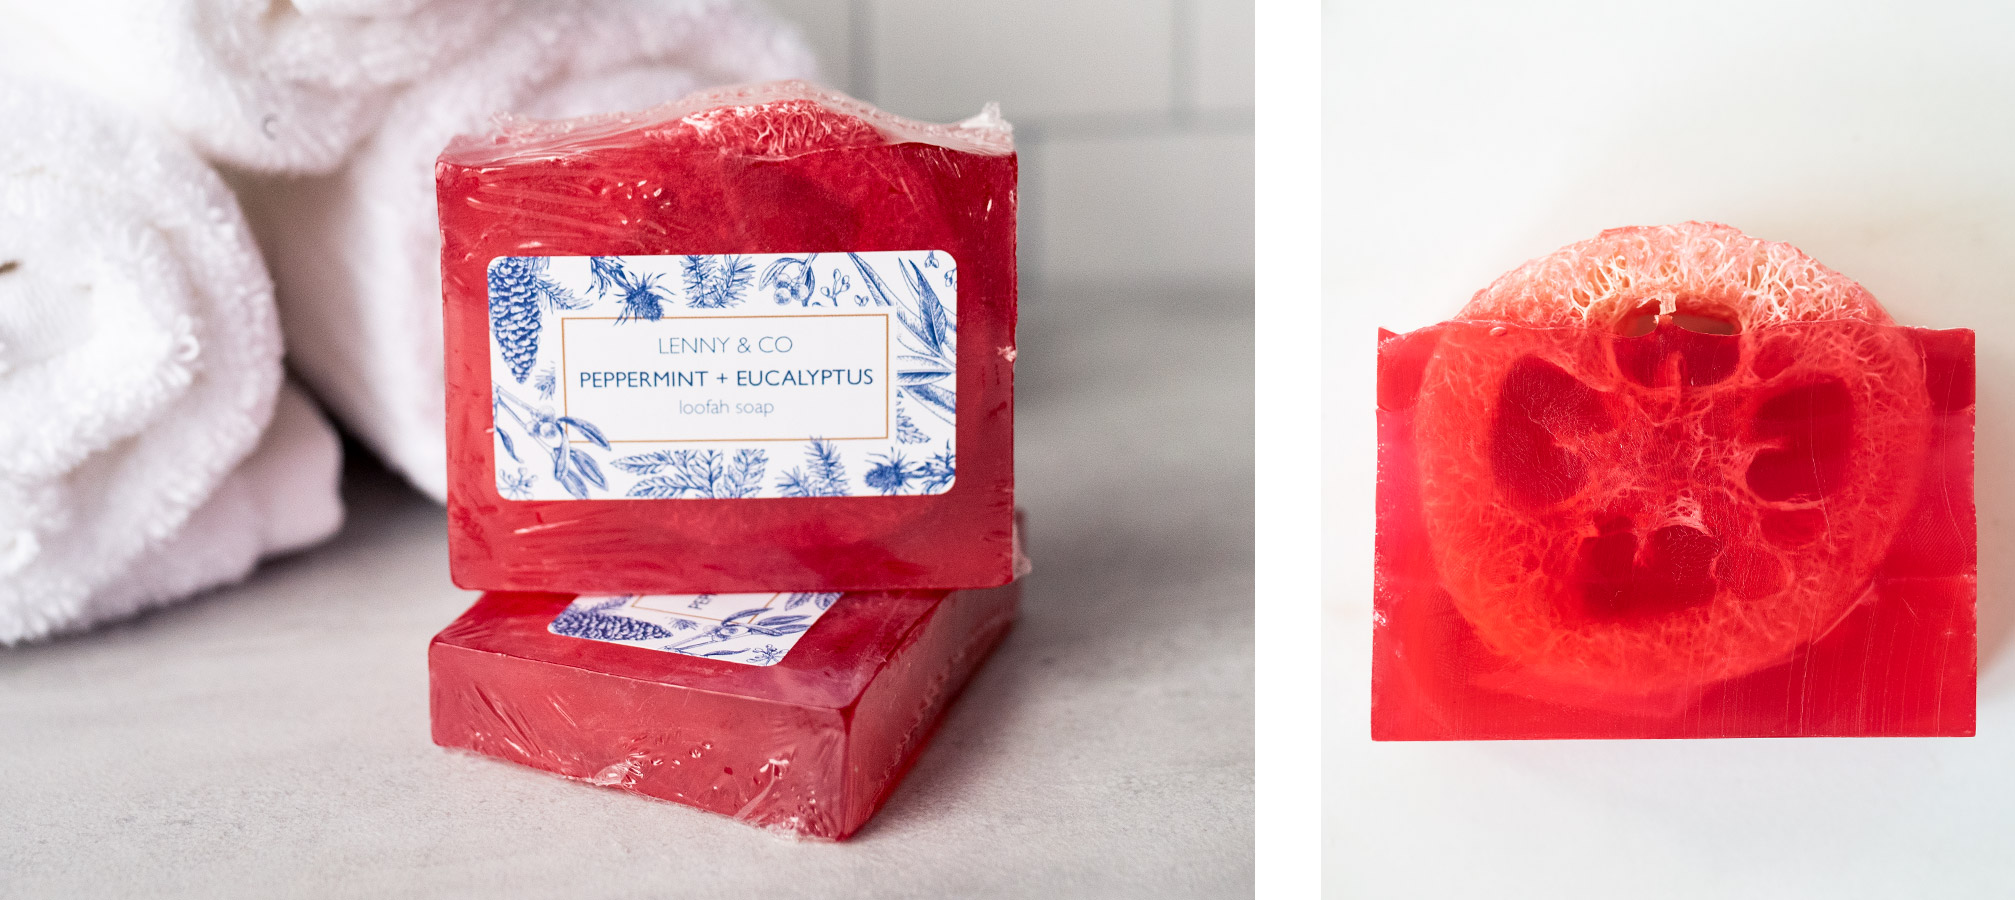
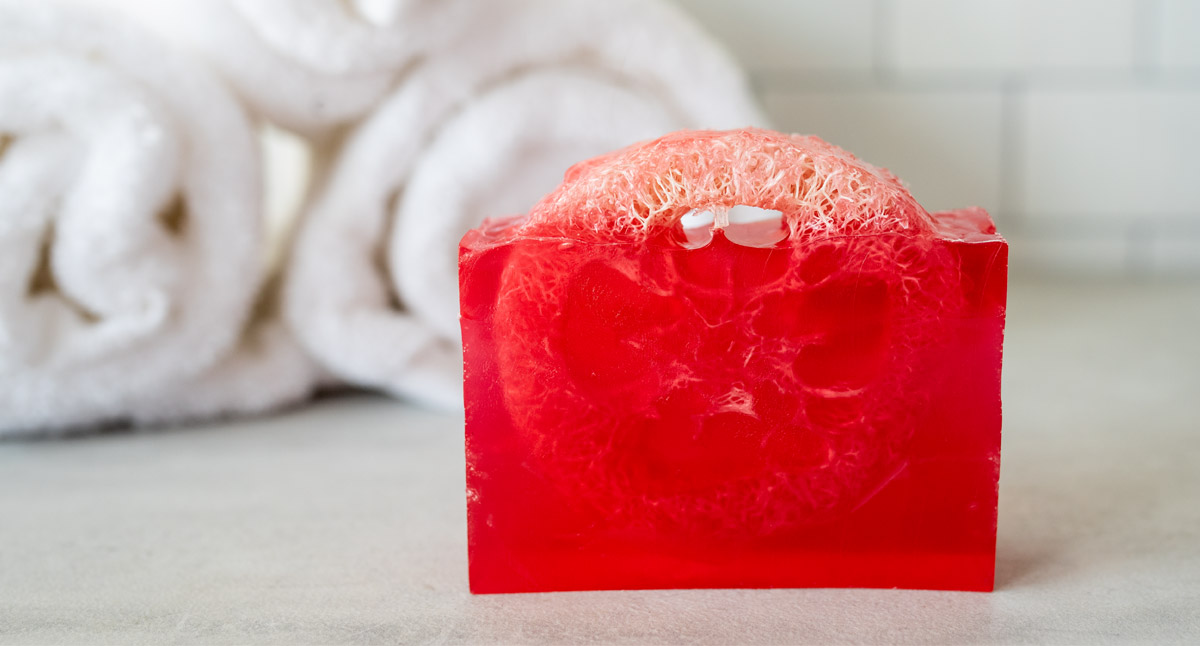
Step 8: Cut soap and package
Cut the soap between each loofah slice and package! We decided to shrink wrap the soaps and customize with a 1 ½ x 2 ¾” (3.8 x 7 cm) label from Avery WePrint - head over to avery.com/candlescience to get started designing your own and take 10% off your label order!