
Product photography: how to shoot with natural light
Show your candles in their best light
Natural light photography
You've decided to take your candle making from hobby to business and it's time to photograph your candles. What do you need? Where do you start? Don't worry, we have you covered.
This guide is written with the beginner in mind—to help you develop your product photography skills so that you can show off your candles and soaps in a polished and professional light.
While there are plenty of great cameras, artificial lighting, and studio setup options out there, you can take professional-looking images without emptying your piggy bank. The tips we’ve compiled here are useful for any camera including your cell phone.
So grab your cell phone, point and shoot, or DSLR, and let's get started!
Lighting is incredibly important in photography and can really make or break an image. There are a lot of artificial lighting options, but natural light is a great source and one that we use frequently in our own photography studio. Bonus? It's free!
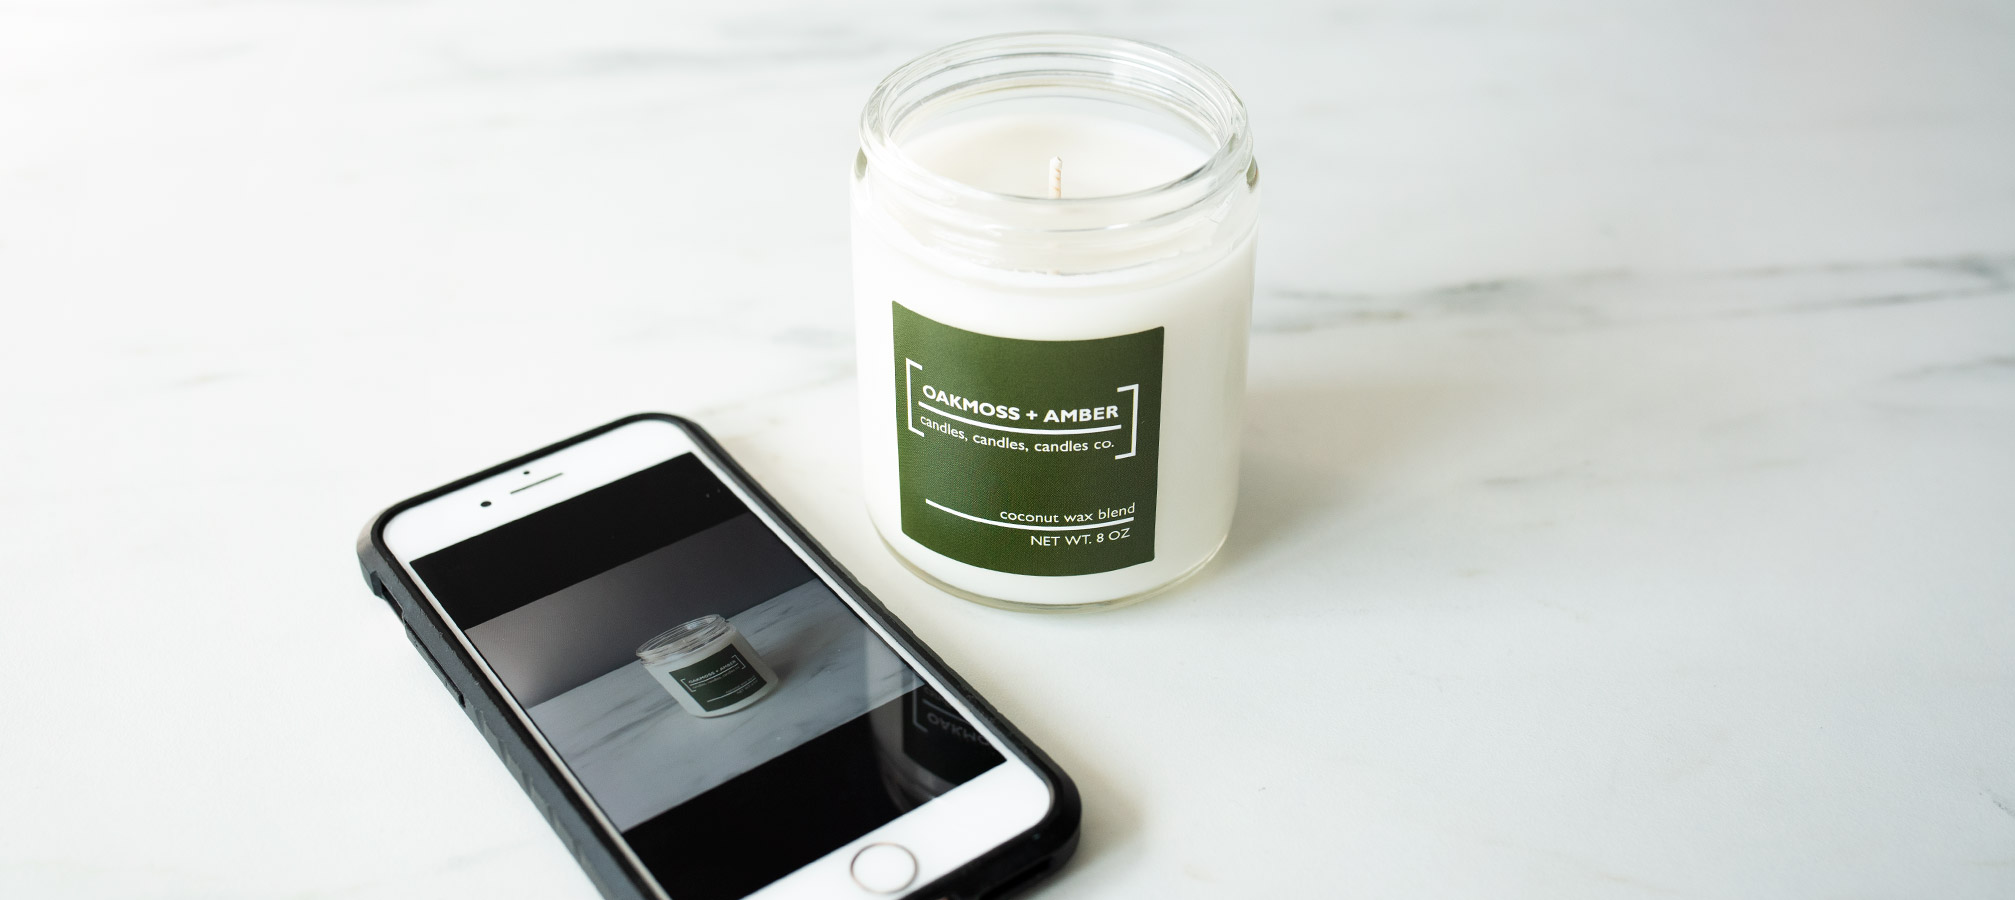
Natural light works well for showcasing your candles, soap, and other products that will live in a customer’s home; it provides the same look and feel they will experience with the actual products in their home environment.
What is 'natural light'?
In photography, natural lighting is the light source from the sun. When used correctly, it gives an even, soft-looking light with gentle shadows.
Where to find it?
Natural light can be found anywhere the sunlight reaches, but these are a few of the most common places to look for photography-friendly lighting:
1. Near a window
2. On a covered porch
3. Any shaded area outside
When using natural light, how do I position my candle?
The beauty of natural light is its softness. To take advantage of this, avoid placing your candle in what is called a "hot spot". A hot spot is a place where the sun is directly shining. Hot spots cause harsh shadows in your photos that aren’t aesthetically pleasing to the eye.
In this image, you can see where the sun is shining directly onto the countertop on the left and where it indirectly fills in the area of the shadow on the right.
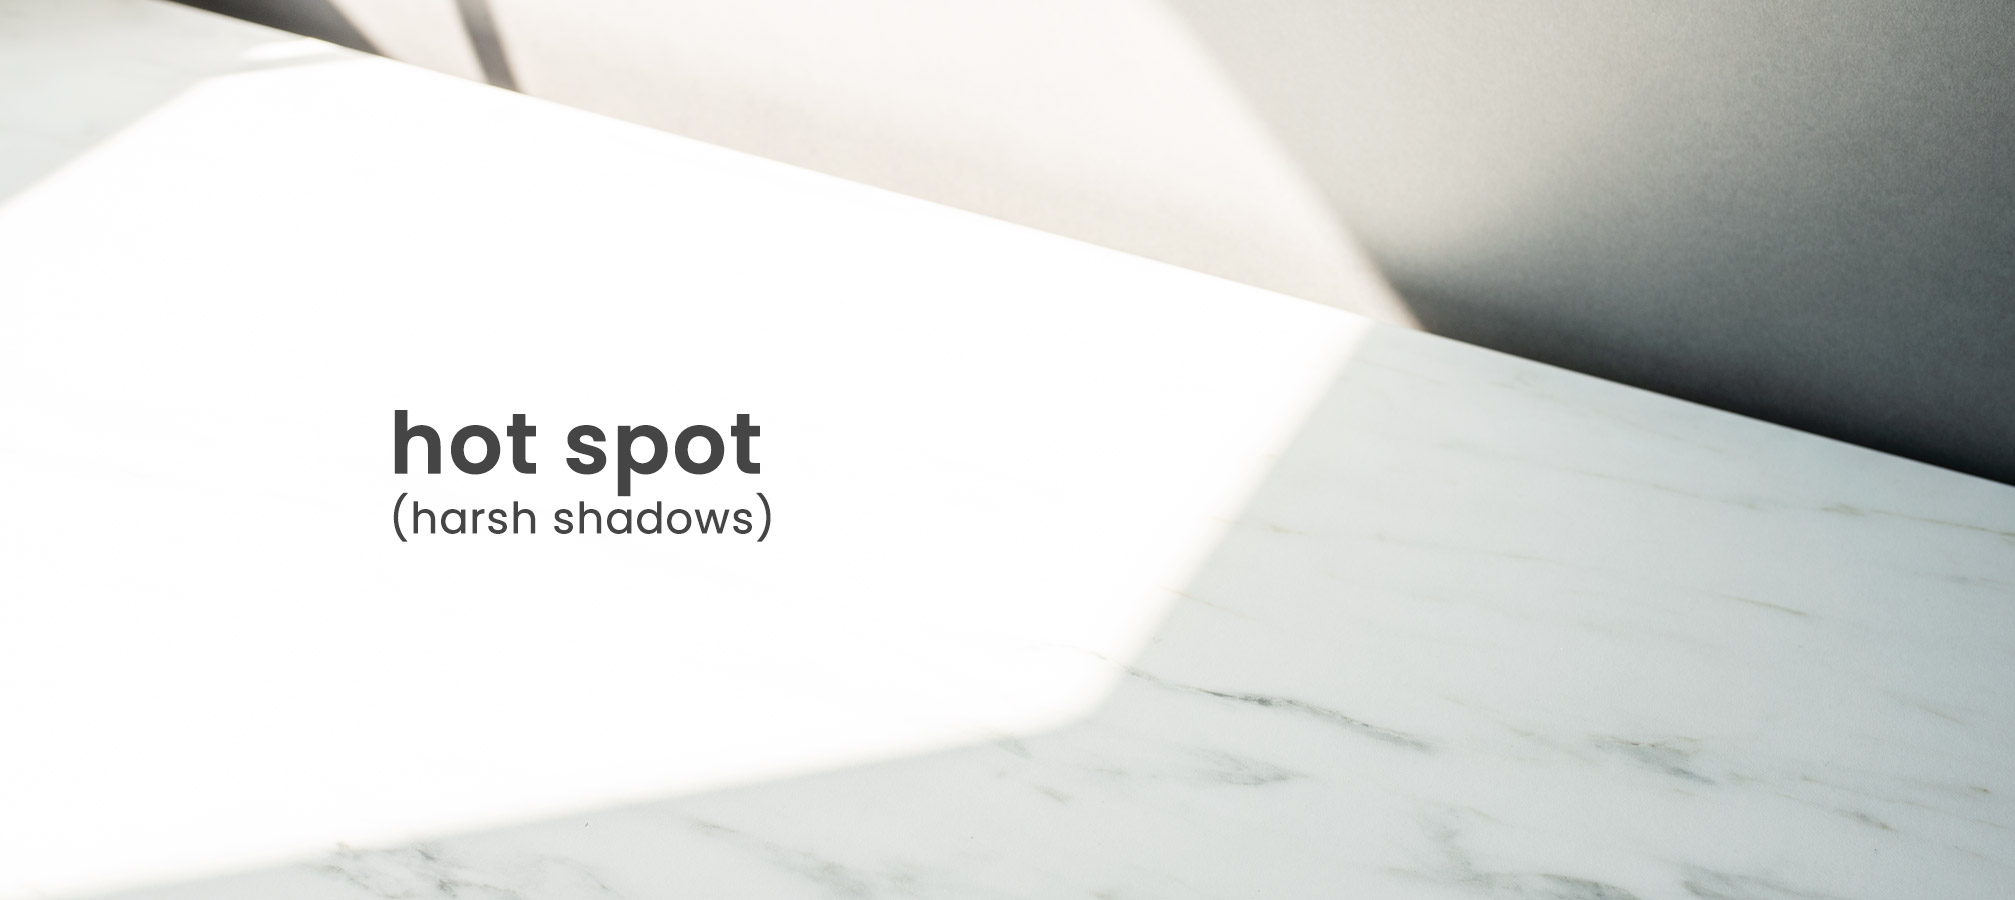
If you place your candle directly in the hot spot, you will get a lot of light. However, the lighting is too direct and will give you strong shadows. By placing the candle in the shadow area, the lighting is diffused creating shadows that are much softer. This allows the viewer to focus on your product instead of drawing attention away to the harsh shadow.
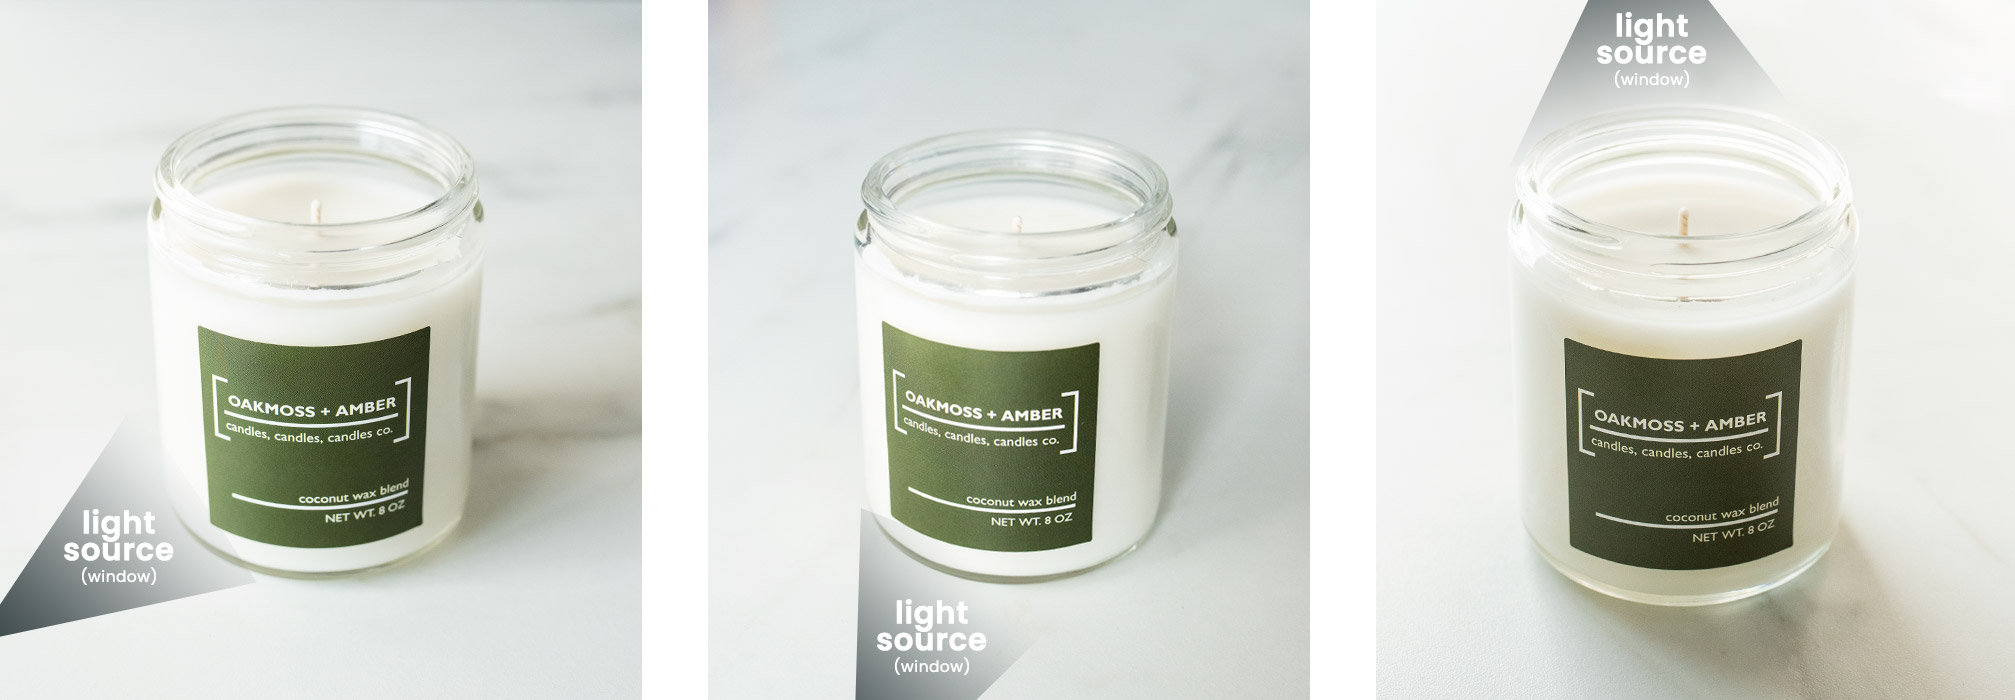
The images below were taken on the same countertop within minutes of each other. The left image was placed directly in the hot spot while the image on the right was shot in the shadowed area. Can you see the difference?

Planning your shoot:
The downside of working with natural light is that it can shift moment-to-moment. It will change throughout the day depending on the time and weather. Pay attention to areas where you plan to shoot and note the times of the day where lighting is the most ideal. Those periods of time help ensure you will have consistent and adequate lighting for your photos.
The type of surface you choose to shoot is also a key element to your product image and will go hand in hand with the way you use natural light. Different surfaces will reflect light differently, working for you or against you, depending on the look you are trying to achieve.
For light and airy images, try lighter surfaces that don’t have a lot of contrast in the pattern. If you’re looking for a more natural or contemporary look, try a dark slate surface or even a smooth wooden board. Keep in mind that glossy surfaces can have glare, which can be tricky to work with.
Angles.
Now that you know where to place your candle or soap, the next step is deciding on the angle you will position your candle facing the light. There are general photography rules for this, but it really comes down to what works for you.
A 45° angle is the recommended starting angle, but move your product and shoot it at different angles to find the look you like.
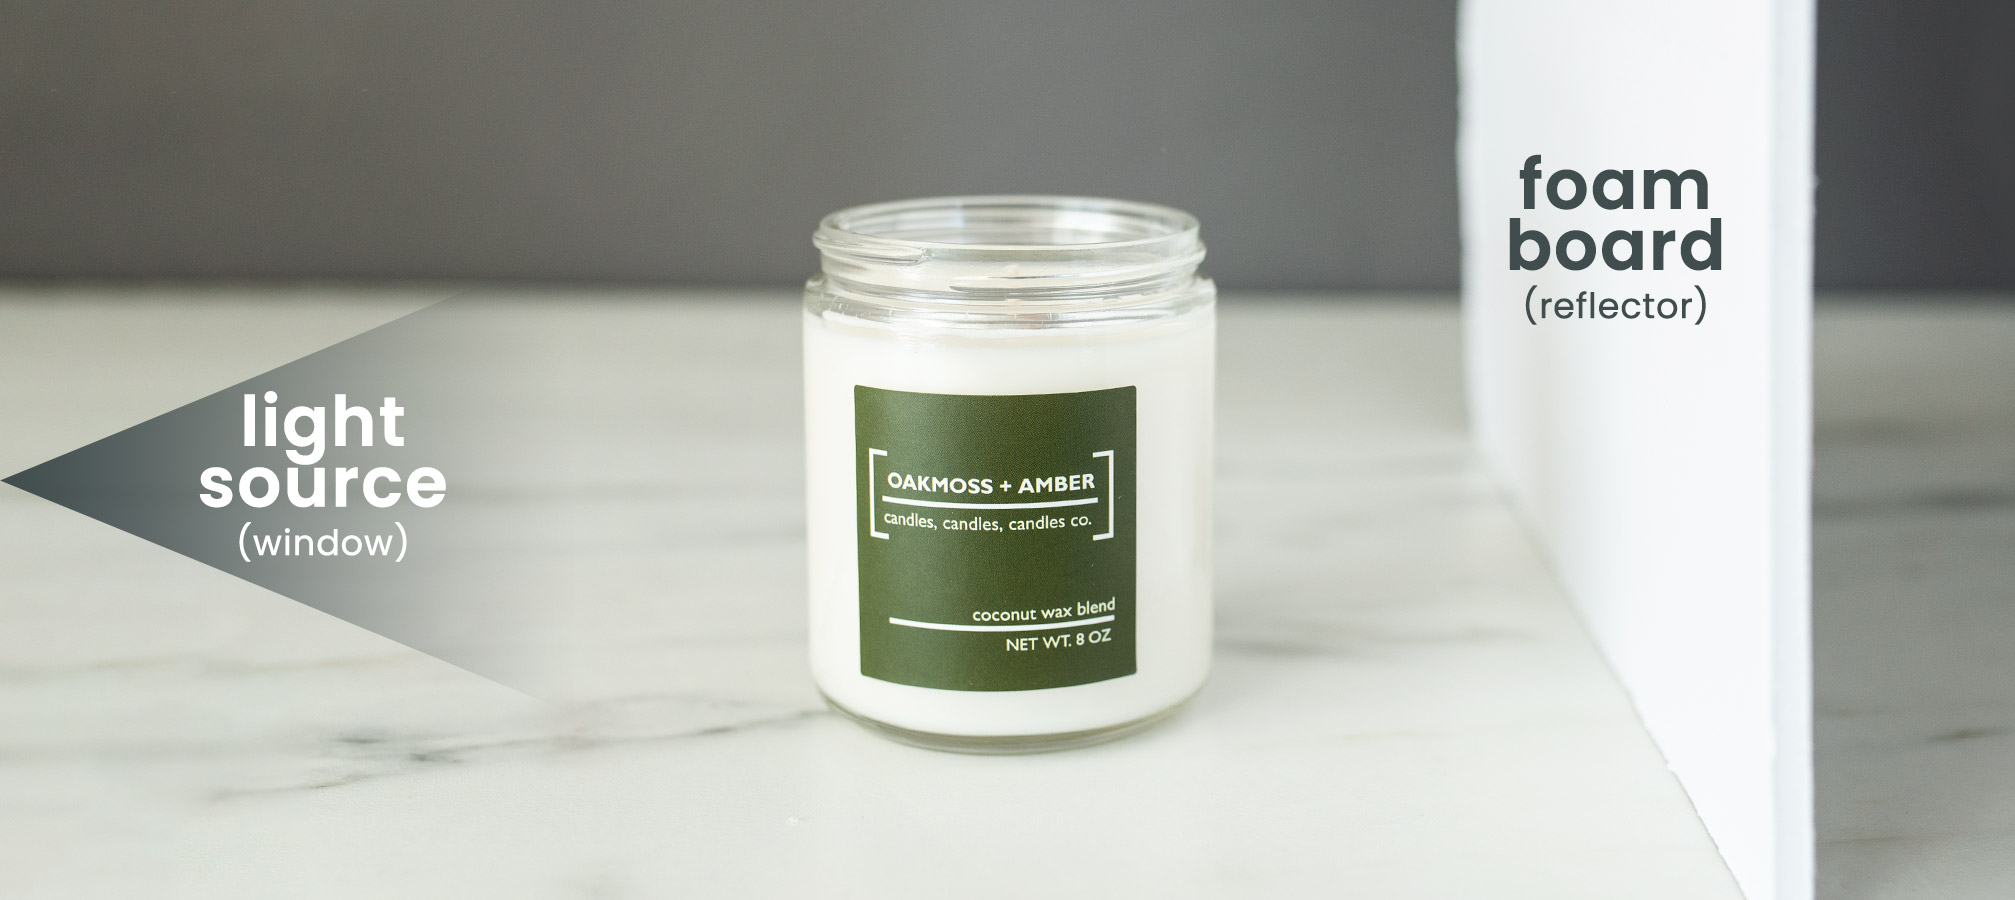
If you're finding that the shadows are too strong, or part of your product has too much shadow, try reflecting the natural light back onto it.
How do you do this? Take a piece of white foam board (white paper can work too!), place it next to your product, and face it toward your light source. You might need to try different angles and distances.
Practice. Practice. Practice.
A big part of photography is trial and error and lots and lots of practice. The more you shoot, the more you will figure out what setup works for you.
Try different camera angles, different distances, and different angles in relation to your lighting source. Shoot at different times of the day in various locations. You'll learn how each of these elements affects your image, and you will also be able to cultivate your own style and aesthetic that your customers will begin to identify with your brand.
If you loved these photography tips, be sure to check out Product Photography: Natural Light, Product Photograph: Backdrops and Surfaces, and Product Photography: How to Shoot Shiny or Reflective Candle Containers for more helpful ways to photograph your products.
Did you photograph your candles in natural light?
Show off your product images with the CandleScience community by tagging us @CandleScience and using the #CandleScientist hashtag on Facebook, Twitter, and Instagram. Leave any questions in the comments and we may answer your question in our Stories or in the next Photo Tips!