
How to make homemade soaps with melt and pour soap base
In just a few minutes you can learn how to use melt and pour soap base to create gorgeous soaps, without the use of lye.
This tutorial shares an easy way to get started in soap making. With this method, you can enjoy all the fun of making your own soap in the comfort of home, and get the best results with a beginner-friendly glycerin soap base . You can order all of the materials, products, and tools needed for this project by clicking the “Add Items to Cart” button below the supplies list.
This video and page was updated on 8/8/23.
Directions
Step 1: Cut melt and pour soap base into small 1" (2.5 cm) sized cubes
Remove the melt and pour soap base from the packaging and cut it down into 1” (2.5 cm) cubes using a knife or straight-blade soap cutter.
Step 2: Weigh out 1 lb (454 g) of soap base in a microwavable pouring pitcher
Place the plastic pouring pitcher or microwavable container on the scale and tare the weight. Add the soap cubes to the pitcher until you have 16 oz (454 g) in the pitcher.
Step 3: Melt the soap base in the microwave
Melt the soap cubes in the microwave for 1 minute. Stir and melt for 30-second intervals stirring in between until the soap is fully melted.
Step 4: Add fragrance and soap dye to the melted soap base
Select a soap-safe fragrance oil based on your personal preference. Add up to 0.5 oz (14 g) of oil to the soap base and stir well, being careful not to stir up too many bubbles.
Add soap dye in your favorite color to achieve the desired shade and stir gently.
Step 5: Pour soap base into a soap mold
Pour the melted soap base slowly into the soap mold to minimize bubbles. Quickly spray the surface with isopropyl alcohol to break up any bubbles that may have formed on the surface.
Step 6: Allow the soap to completely cool, then un-mold the soap bars
Allow the soap to cool completely. This can take up to 3 hours, but it's best to allow it to set overnight.
Carefully remove the soap bars from the mold, making any additional cuts to each bar to achieve the desired size.
Unlike cold process soap, which requires a cure time, this soap will be ready to use immediately. Be sure to package and label it appropriately if you plan to give your finished soaps as gifts.
You can also use soap-safe essential oils for this project. When using essential oils, be sure to check your essential oil's recommended usage percentage and IFRA Certificate. How to Make Melt and Pour Soap with Essential Oils.
Video transcript
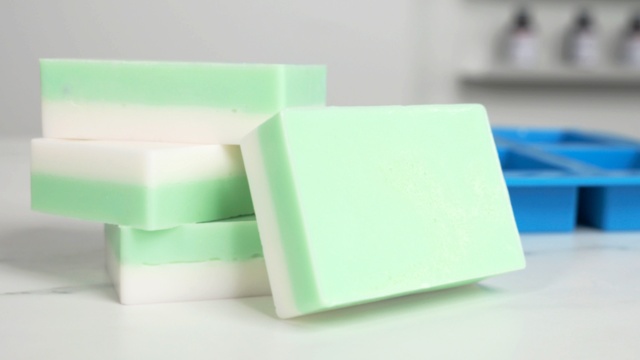
Hi, I'm Dana with CandleScience, and today I'm going to show you how easy it is to make your own handmade bar soap, using Stevenson's melt and pour soap base. This project is perfect for beginners and makes six bars of soap with two layers. Let's go over the items I'll be using.
Materials
- One 2 lb tray of Stevenson's White Melt and Pour Soap Base. This base is great because it's really moisturizing on your skin and hardens quickly, making it perfect for layering multiple colors.
- A 1 oz bottle of your favorite fragrance. I'm using our Lemongrass and Lime fragrance oil.
- One 1 oz bottle of liquid soap dye. I've chosen Kelly Green.
- A Funnel Pouring Pitcher.
- A glass container for pre-measuring fragrance.
- A soap mold. This is a six bar slab mold.
- A mixing utensil. I like to use a silicone spatula.
- A Digital Scale.
You'll also need gloves, paper towels, a stable surface for cutting, rubbing alcohol, and a spray bottle. And a utensil for cutting the soap. I'm using a wavy soap cutter. And easy access to a microwave. You'll need enough space to prepare your soap base, mix your favorites in color, and allow the soap to set in the mold. A large countertop or table works great.
Setup tips
It's a good idea to spray your workspace with rubbing alcohol to sanitize the area before you begin. You could also cover your work surface with parchment paper to make cleanup easier. We'd also recommend sanitizing your soap mold pitcher soap cutter and spatula before getting started. Now that we've prepared our materials in our workspace, let's begin.
Directions
First, remove the soap base from the tray and cut the two pound block in half.
For easy melting, cut the first half of the soap base into small cubes, about one inch in size. This will form the first layer of our soap and we'll be leaving it undyed.
Next, place your pitcher on the scale, tare the scale to zero and measure out 10.8 oz of soap. After you've weighed your soap base, measure out your fragrance. It's important to have this step done before heating the soap base, because once the base is melted, you'll have a short window to add your scent and color before the soap starts to set.
Place the jar on the scale, tare the scale, and weigh out 0.43 oz of the fragrance. This will set the first layer of soap. Then set the pre-measured fragrance in a safe spot off to the side until you're ready to use it. Place the funnel pitcher in the microwave and melt the first batch of soap cubes for 30 second intervals, stirring in between until the soap is fully melted.
You'll want to keep a close eye on the base during the melting process and be careful not to overheat it as this can cause the soap to have a rubbery texture. Once the soap base has completely melted, it's time to add the fragrance oil. Pour the fragrance in the base and stir slowly for about twenty to thirty seconds.
Once the fragrance has fully mixed in, it's time to pour. Slowly pour the base into the soap mold to create the first layer. You'll want to fill each cavity only halfway to leave enough room for the next layer.
If air bubbles form on the surface, spray alcohol on them to break them up. You can spray multiple times if needed. After the first layer has been poured, wait five to 10 minutes for it to start setting. This will allow the first layer to set and will produce two distinct layers by the time the second one is poured.
You can check the first layer by lightly touching the surface. If it holds without breaking or rippling, it's ready for the second core. Measure out another 0.43 oz of fragrance oil, set it aside, and then repeat the melting process with another 10.8 oz of cube soap. Once the base is fully melted, you can add the fragrance as well as the dye.
I'll be adding two drops of the Kelly green liquid soap dye here.
Once the second batch is ready to pour, quickly apply an even coat of alcohol with a spray bottle. This will ensure that the two layers will bind together. Then slowly and evenly pour the green color base across the white layer.
Again, spray the surface of the soap with alcohol to remove any bubbles. Keep the mold in a place where it will be undisturbed and allow the soap to set for twenty four hours to harden. Once the soap has completely hardened, give each side of the mold a light tug, allowing the soap to pull away from the mold. Apply gentle pressure on the bottom of the bars to pop them fully out of the mold.
The soap is now ready to use. Grab it tightly with plastic and store it in a cool place. For gifting or selling, you can add an ingredients label and a decorative bag or box. I hope you enjoy making your first batch of soap. Thanks for watching.