
Product photography: focusing and composing your shot
Learn how to compose a strong product image
When you're starting an e-commerce business, professional product images are essential for showcasing your products and brand. Learn the basics of identifying your image focal point, how to achieve a "blurry" background, and factors to consider when composing your shot.
Keep it in focus
Keep your image in focus and be sure to focus on the correct spots to achieve a strong image that will entice potential customers.
Pick your focal point.
The focal point is where you want the camera to set its focus. There are a few things to consider when picking your image focal point.
What is the purpose of your image?
- A product listing?
- A closeup to show details?
- An environment shot?
The purpose may be more than one of these, but here is a general rule of thumb for each.
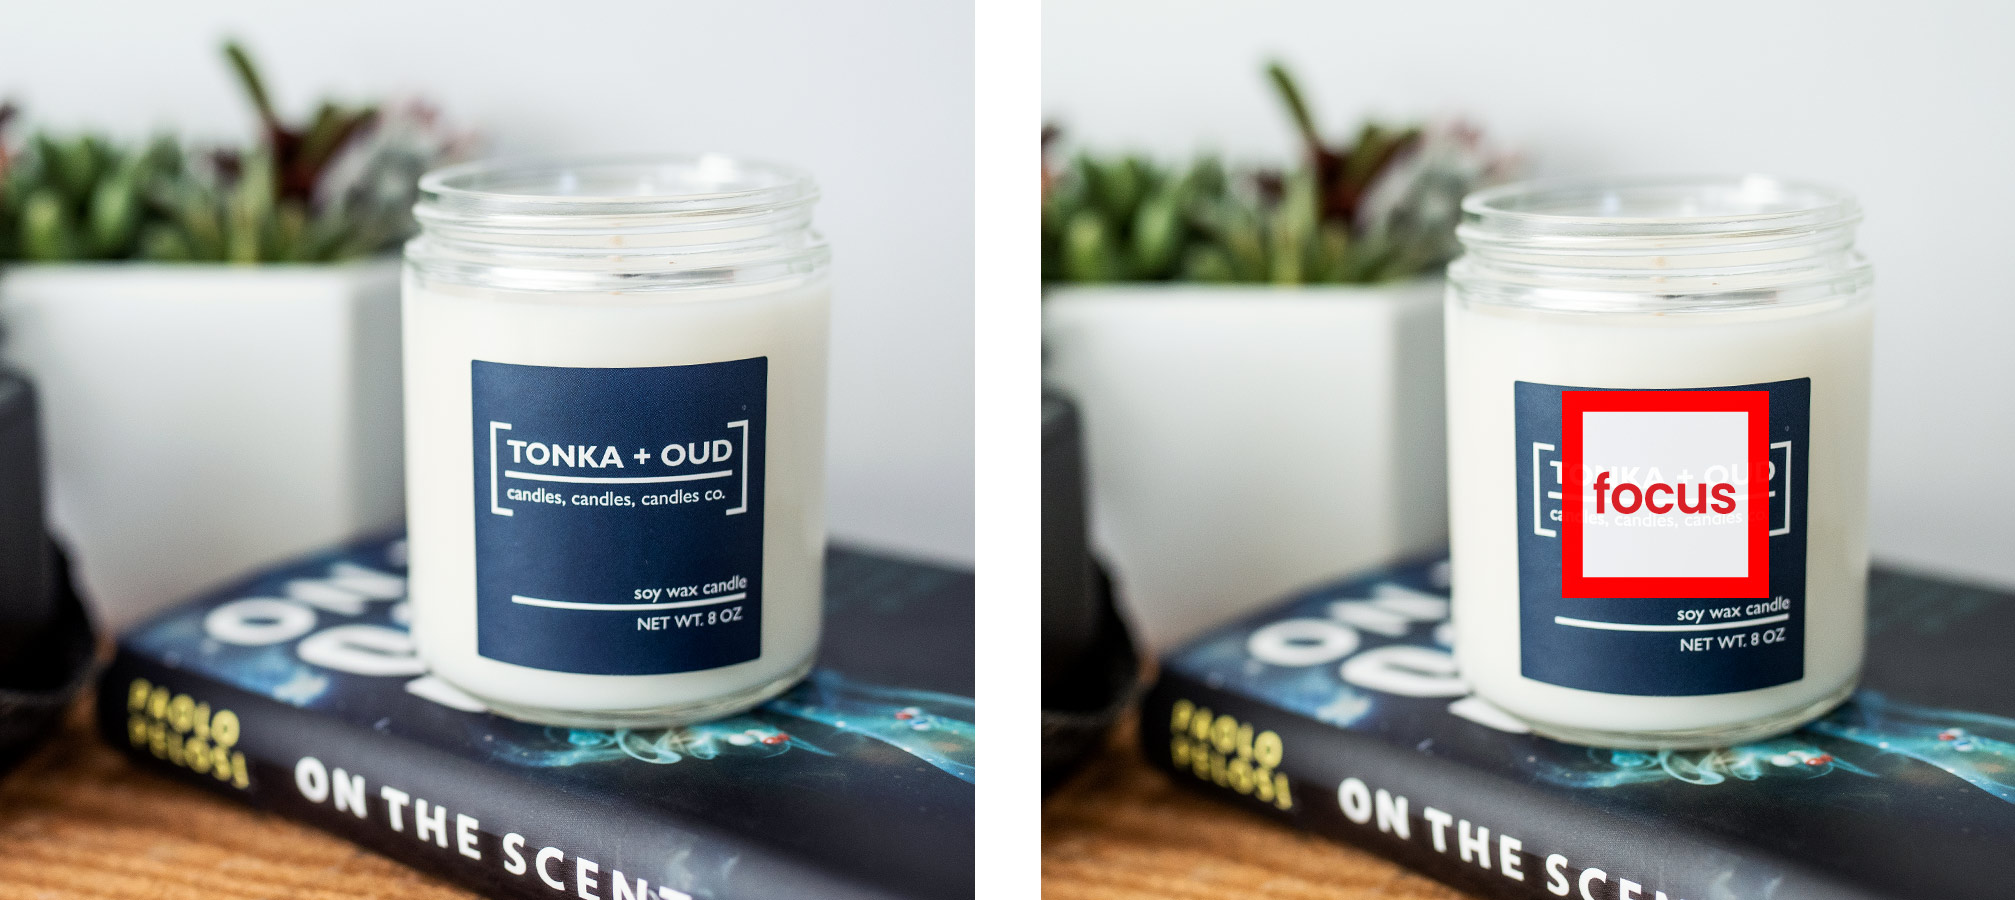
Product Listing: Photographs should be focused on your candle as a whole, especially on the label. The text of the label should appear sharp and clear because that is where you want to first draw the eye.
The focal point is set on the main text on the label in this product listing example.

Closeups: The focal point should be set on what detail you are trying to show in your image.
Here, this image is focusing on the top of the candle so the focal point was set on the wick.

Environment: Similar to the listing photo, you will generally want to put the focus on the candle as a whole, but always be sure to keep the label in focus.
Here, this image is focused on the candle label. You can see that the background is not in focus so it doesn't draw the attention away from the candle, but does add to the overall image.
Those "blurry" backgrounds.
In addition to making sure your camera has focused on your focal point to give you a sharp image, you want to make sure the viewer's eye is drawn to the product as a whole.
This is where the environment around your product can play an important role. If you look at a lot of product images, you'll notice that the background isn't usually in focus. A lot of the time, it will be fairly blurry.
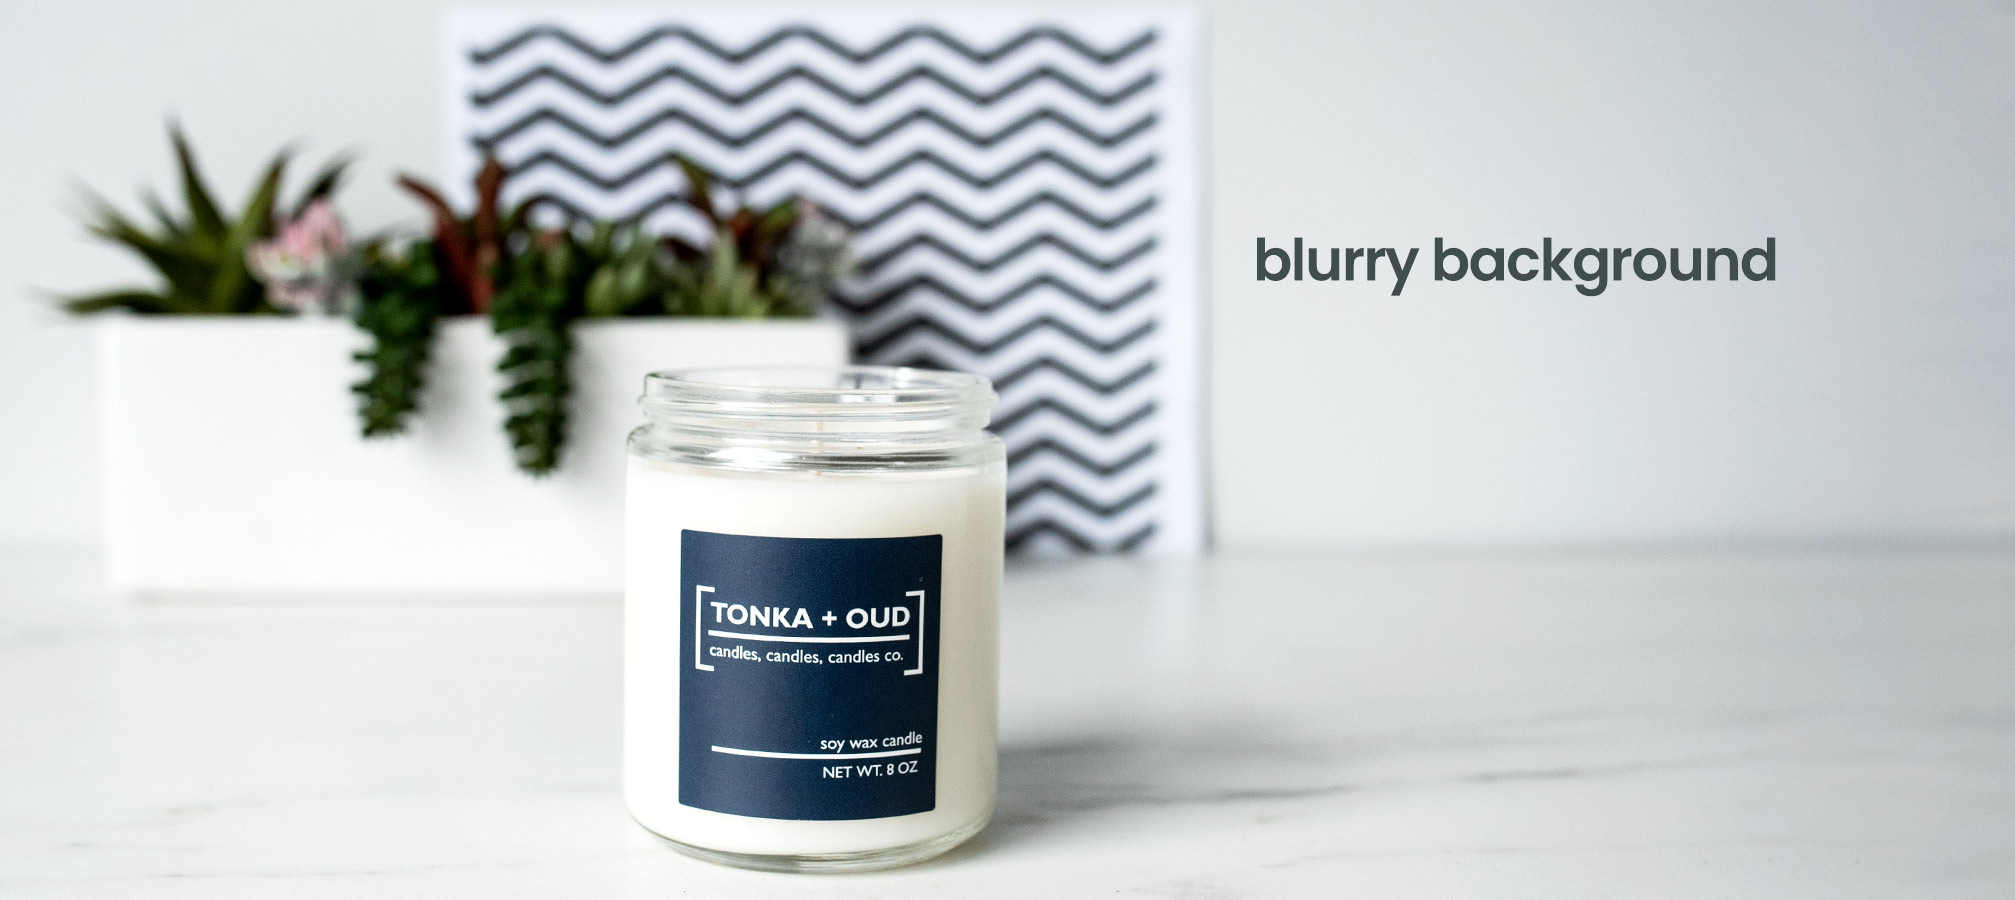
The blurry background (called "bokeh") keeps focus on your product.
So how do you achieve this? There are a lot of factors to consider, but we’re going to keep it pretty simple.
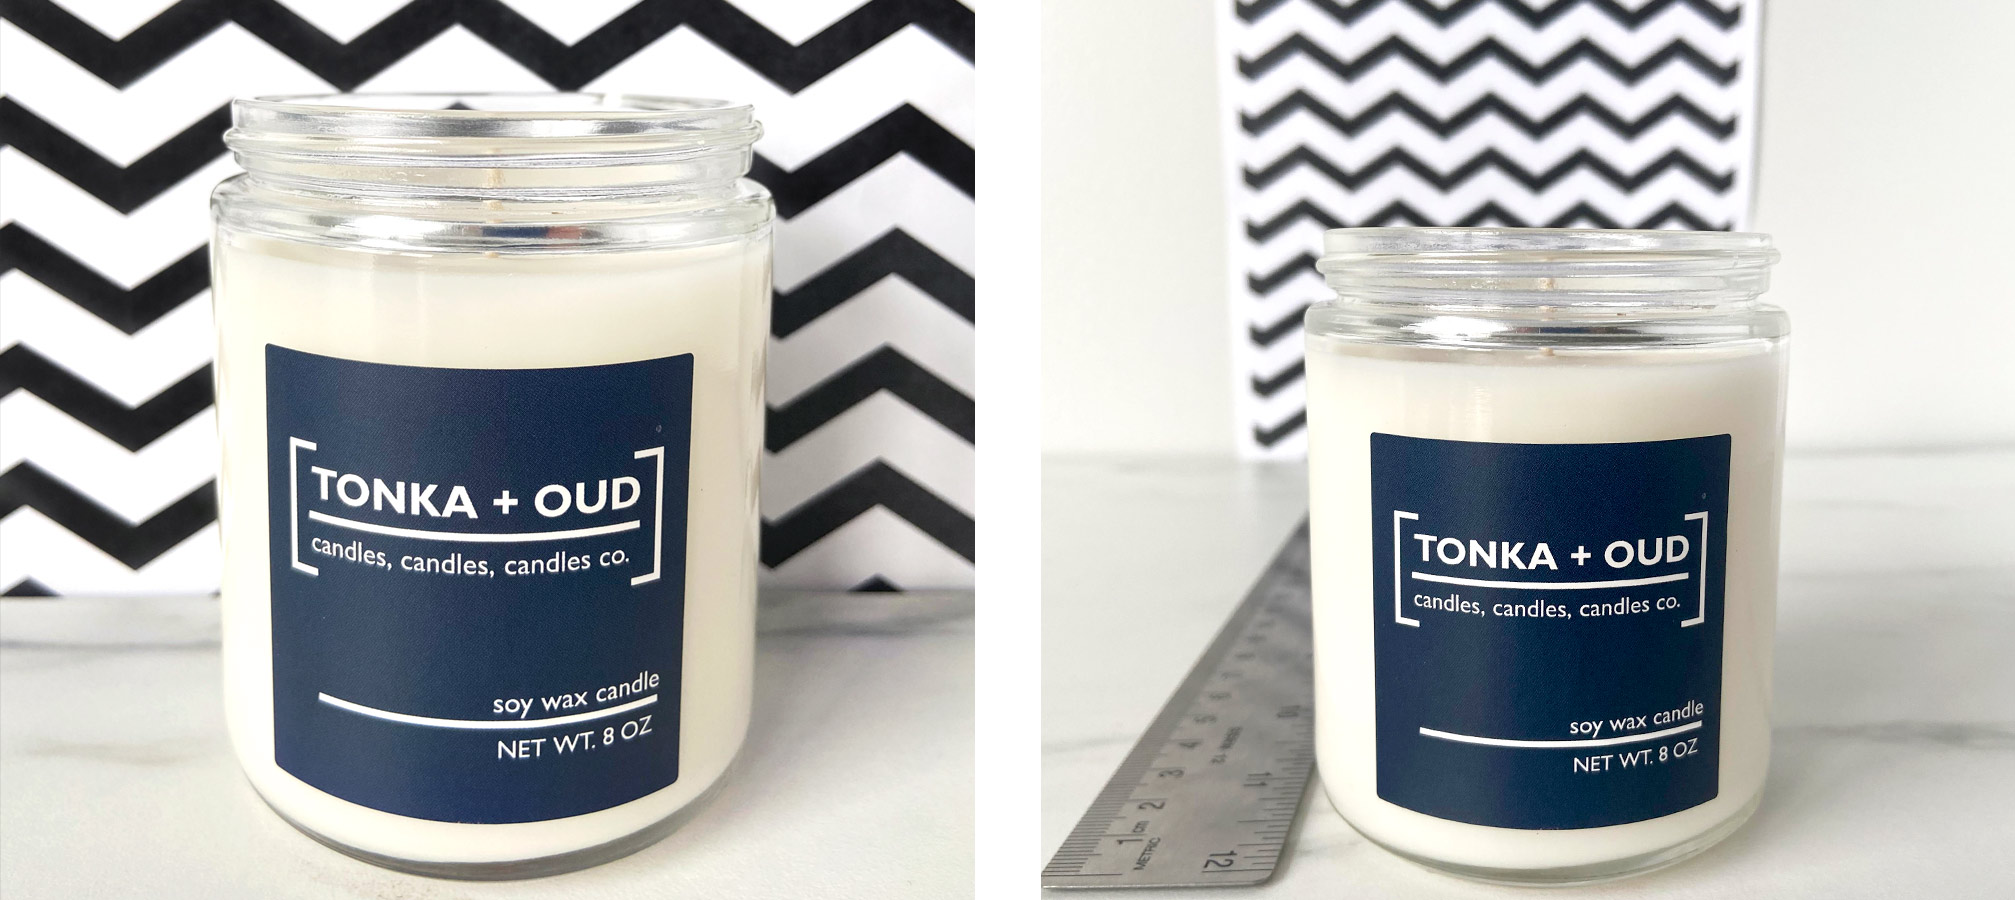
Without getting super technical, distance is important. The more distance between your product and the background, the more depth of field. This will put more focus on your product and leave the background less in focus, achieving the "blurry" look.
PRO TIP: The amount of blur will vary with the type of camera you are using.
Cell phones: Newer cell phones do a pretty good job of giving you a blurry background if you give enough distance between your product and the background. Try portrait mode for even more "blur" if your phone has that setting.
DSLR cameras: These have different auto settings that will give you more blur especially paired with a lens. For a more in-depth lesson on settings, find photography tutorials that discuss "aperture".
The examples below are taken with an iPhone 11. In the image on the left, the candle was placed directly in front of the chevron pattern. The image on the right was placed 12 inches in front of the pattern. The phone was held at the same distance in front of the candle. Do you see the difference in the sharpness of the chevron?
The more distance between the background and your product, the less in-focus the background will get.
Stabilize.
If you’re having trouble keeping your hand steady while you’re shooting, try using a tripod to keep your camera or phone steady. This will help ensure that your image is crisp.
The rule of thirds.
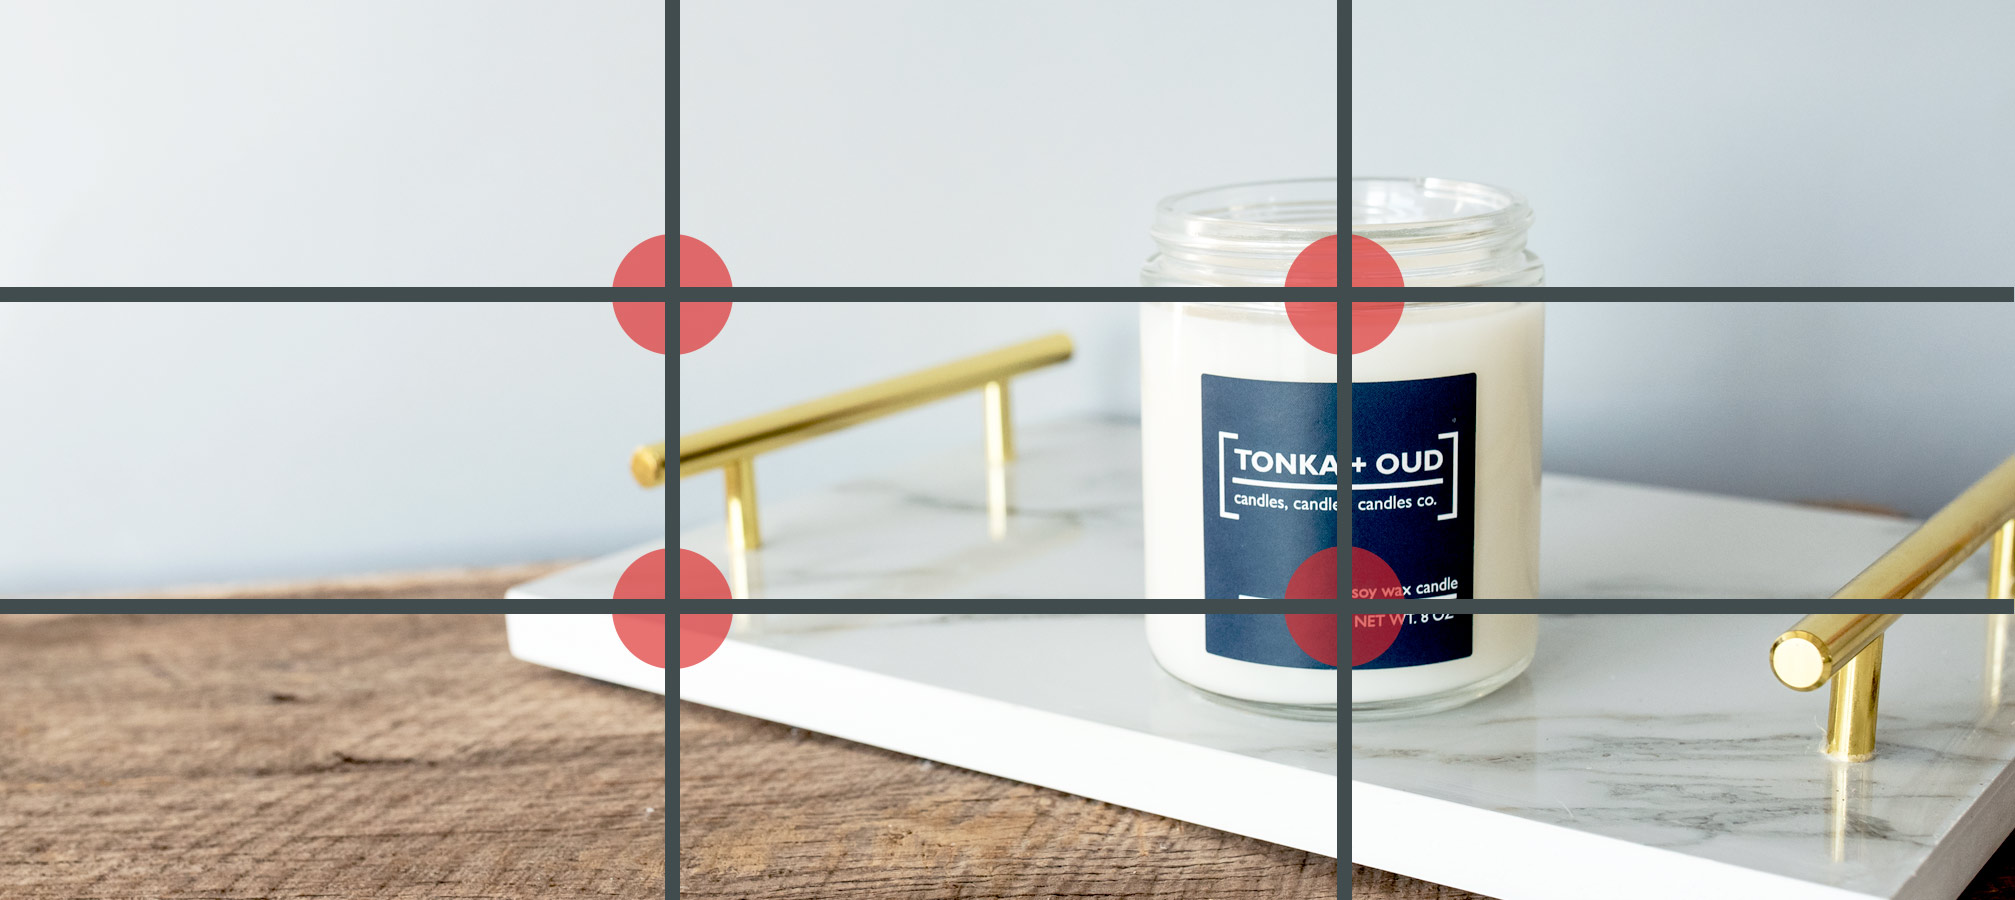
The Rule of Thirds is a compositional rule in photography that breaks your image into thirds. It is a guideline of where to place your subject (in this case, your product) in the image. It helps create a more interesting image that the eye will be more drawn to.

When starting out, a lot of people will place their product directly in the center of an image. This works for certain product images, such as product listings. If you are taking an image that shows your product in an environment (on a bookshelf, bathroom, etc.), you may want to consider the Rule of Thirds to create a more professional and eye-catching product image.
Let's apply it to an image.
The lines show where the thirds fall on the image. Keeping your product along any of these lines is considered correct, but see where the intersections occur (noted by the red circles)? These are considered the most ideal focal points for your image. The eye naturally goes to these spots when looking at a photograph and makes the image more pleasing to the viewer.
We placed the candle directly on one of the 1/3 lines. Due to the candle's height and wanting it to be a more close up image of the candle, we did not set the focus directly onto one of the intersection points. Instead, we made sure to keep the candle centered horizontally in the image and kept the interest by placing it in one-third of the image vertically.
As with any rule in photography, sometimes rules are meant to be broken. It’s good to keep this rule in mind, but it isn’t necessary for every image you shoot. Have fun shooting and experiment until you get an image you’re happy with.
If you loved these photography tips, be sure to check out Product Photography: Natural Light, Product Photography: Backdrops and Surfaces, and Product Photography: How to Shoot Shiny or Reflective Candle Containers for more helpful ways to photograph your products.
Did you photograph your candles using these new focusing and composing tips?
Show off your product images with the CandleScience community by tagging us @CandleScience and using the #CandleScientist hashtag on Facebook, Twitter, and Instagram. Leave any questions in the comments and we may answer your question in our Stories or in the next Photo Tips!