
How to make wax melts: DIY bleeding hearts

Beneath their smooth, white surface, these little soy wax melts hide a bloody secret! If your tastes align more with the sanguine than the saccharine, these DIY wax melts are the Valentine’s Day project for you.
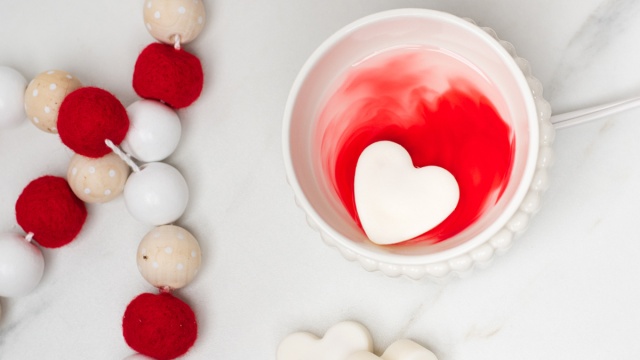
In this tutorial, you’ll learn how to create your own wax melts shaped like hearts that “bleed” as they melt. Crimson red soy wax embeds are hidden inside uncolored soy wax, only to reveal themselves when popped into a wax warmer. Scented with fragrance oil, these bleeding hearts would be a cheeky Valentine’s Day gift or an irreverent addition to an anti-Valentine’s party.
This wax melt recipe is easy to follow and will show you exactly how to make wax melts. While we demonstrate these techniques with soy wax, you can make wax melts with paraffin wax and paraffin-natural blend waxes.
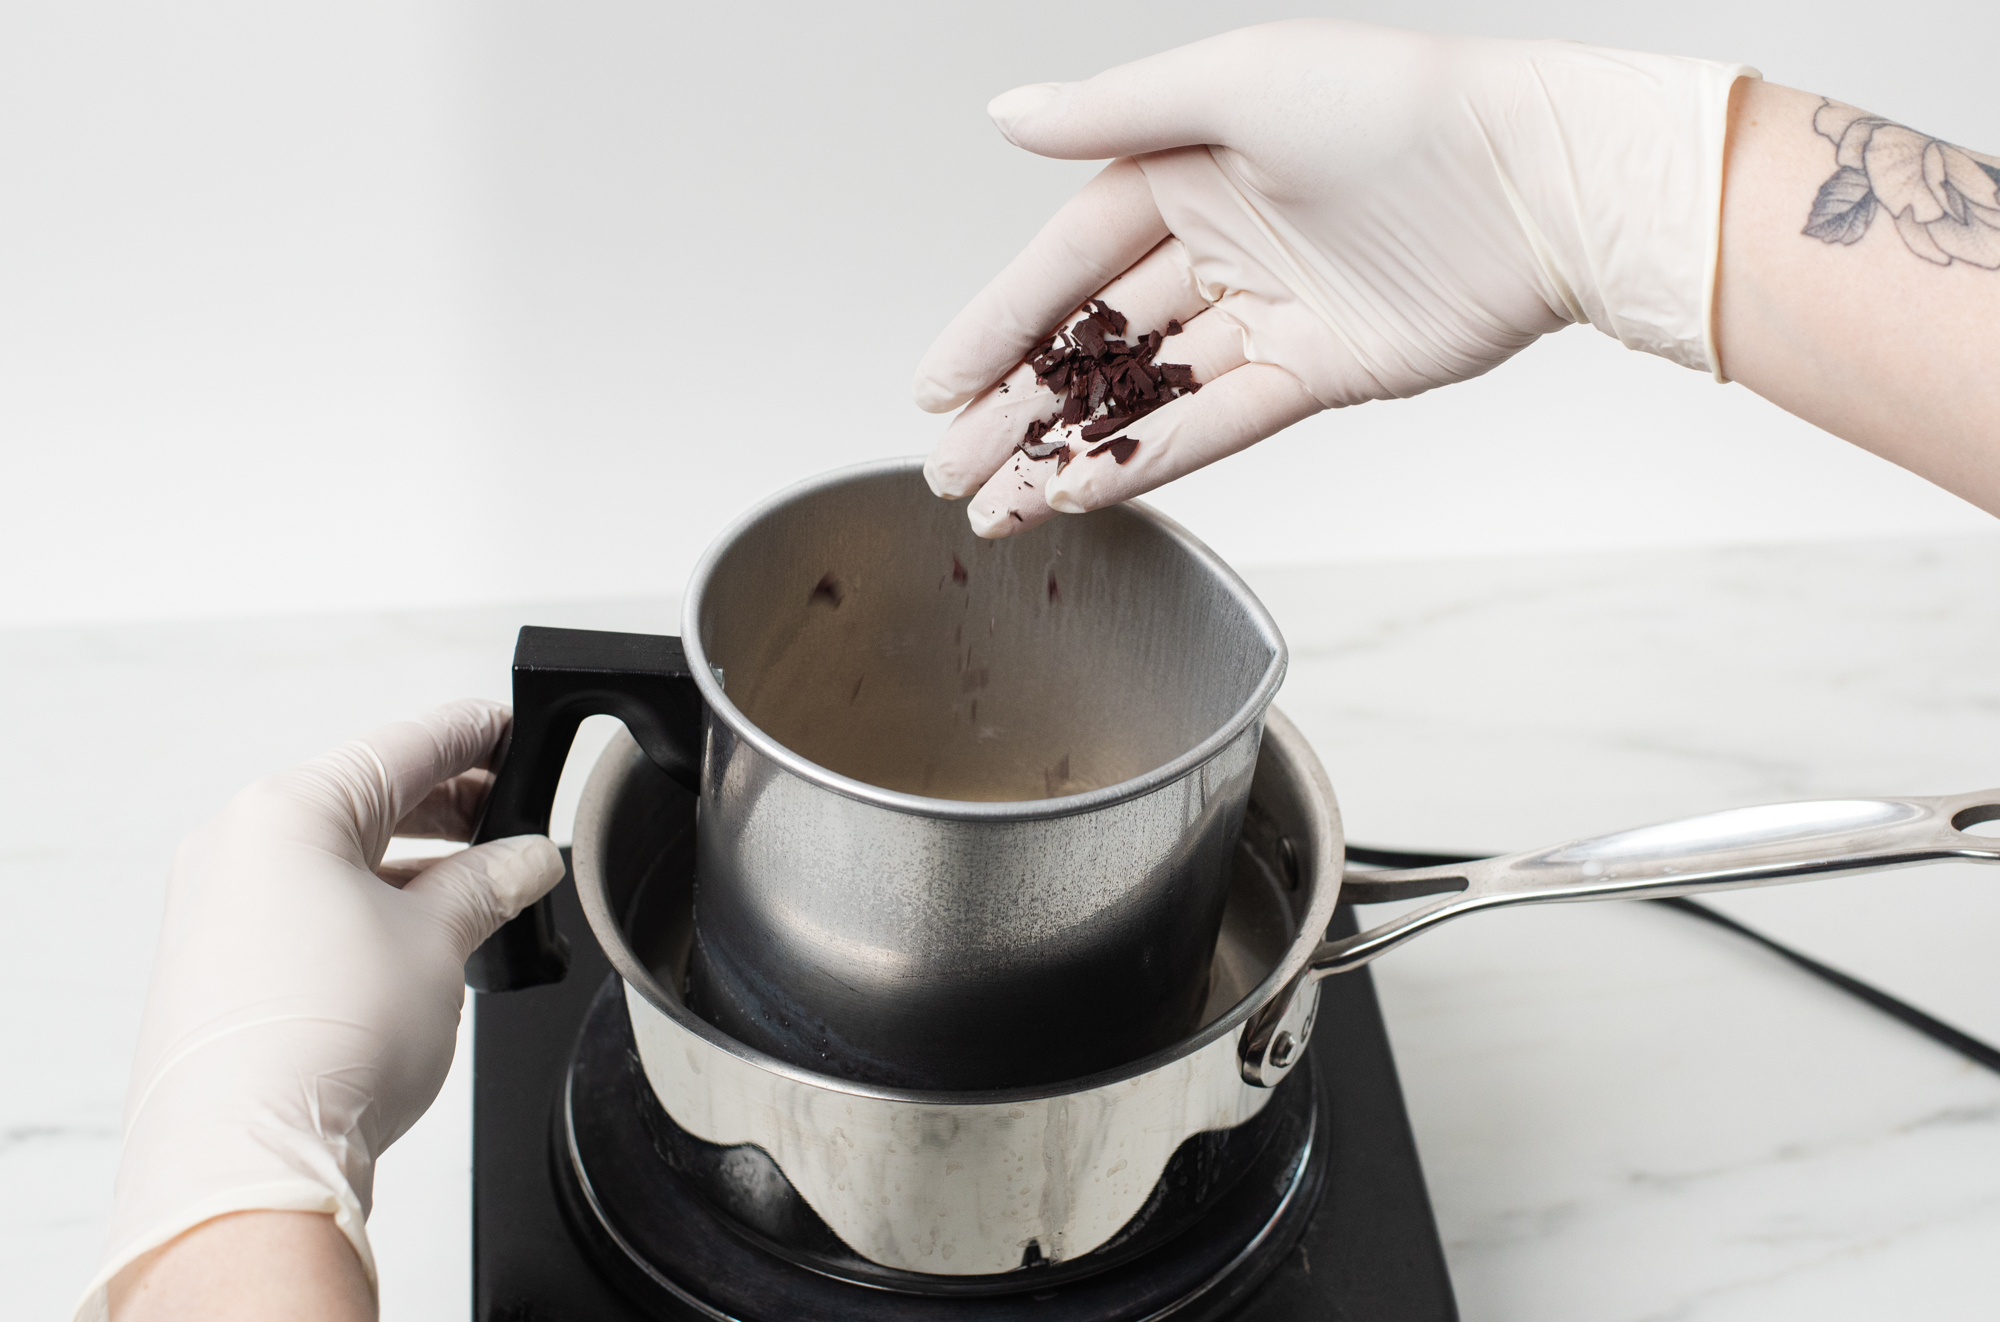
In order to keep our projects up to date and on trend, we will sometimes make adjustments or updates. We originally shot this tutorial using Red Dye Blocks, but they have been discontinued. We suggest using Red Liquid Candle Dye in place of the dye block, around 2-4 drops depending on the color of red you want. This tutorial was updated on 1/13/26.
Essential Oil Notes: In addition to fragrance oils, you can also use candle-approved essential oils to make wax melts. Check the recommended usage percentage on the essential oil product page and start with low percentages.
Feeling extra creative? Combine two or more essential oils to make wax melts with your own essential oil blend!
Discover the art of crafting naturally scented wax creations in How to Make Soy Candles with Essential Oils
Additional Items Needed:
- Stirring utensil
- 9 oz. wax-lined paper cups for pouring wax
- Paper towels
- 1 Heart Shaped Silicone Mold (available at most craft stores)
Optional Items:
Directions:
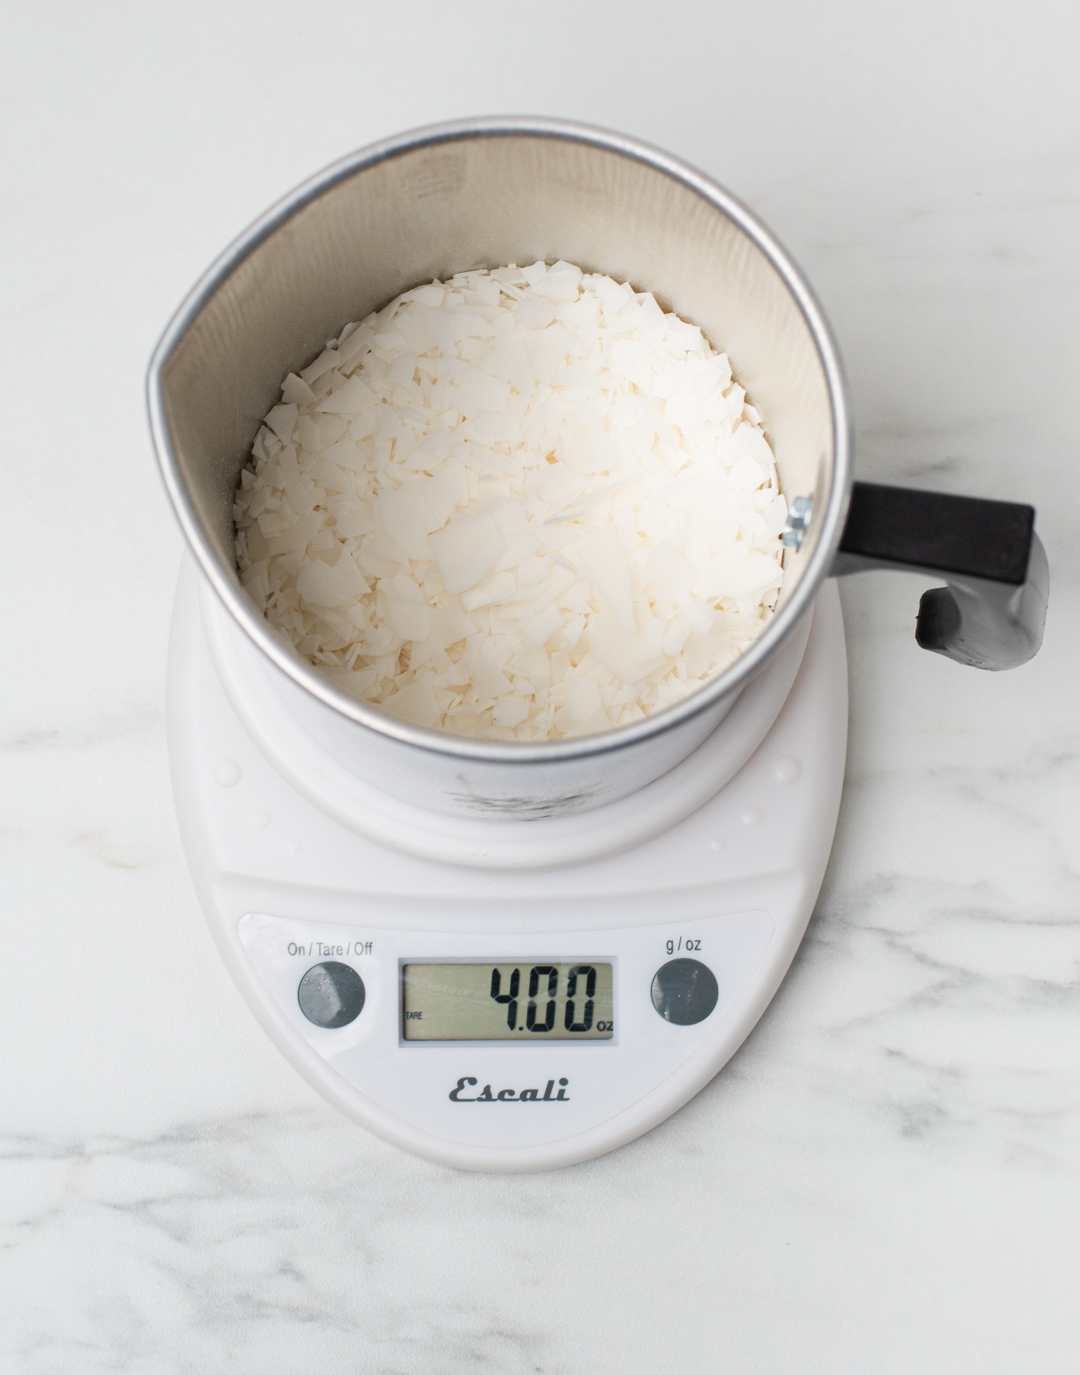
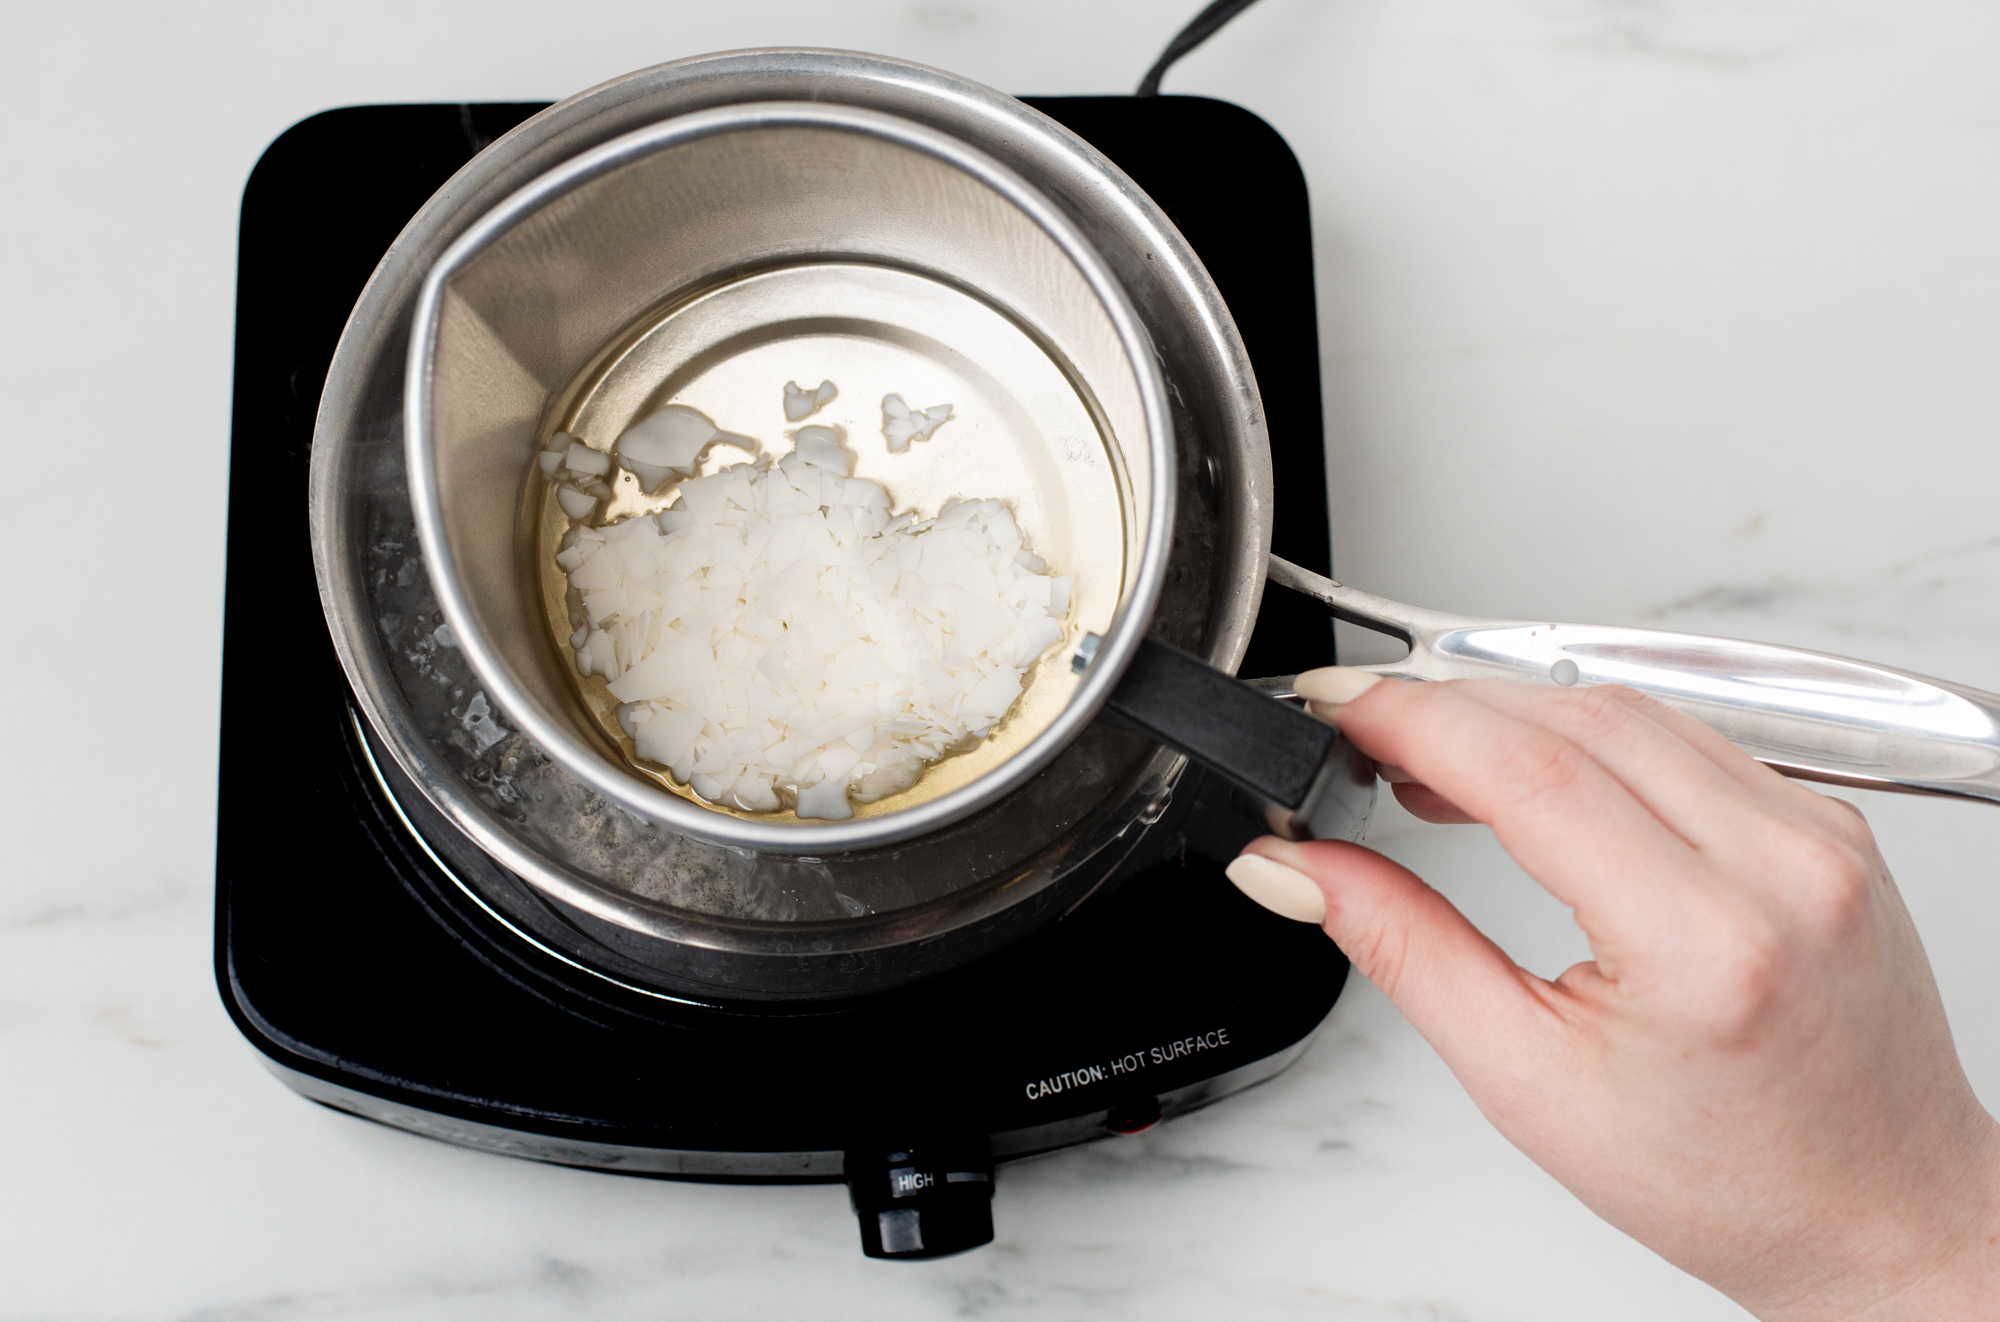
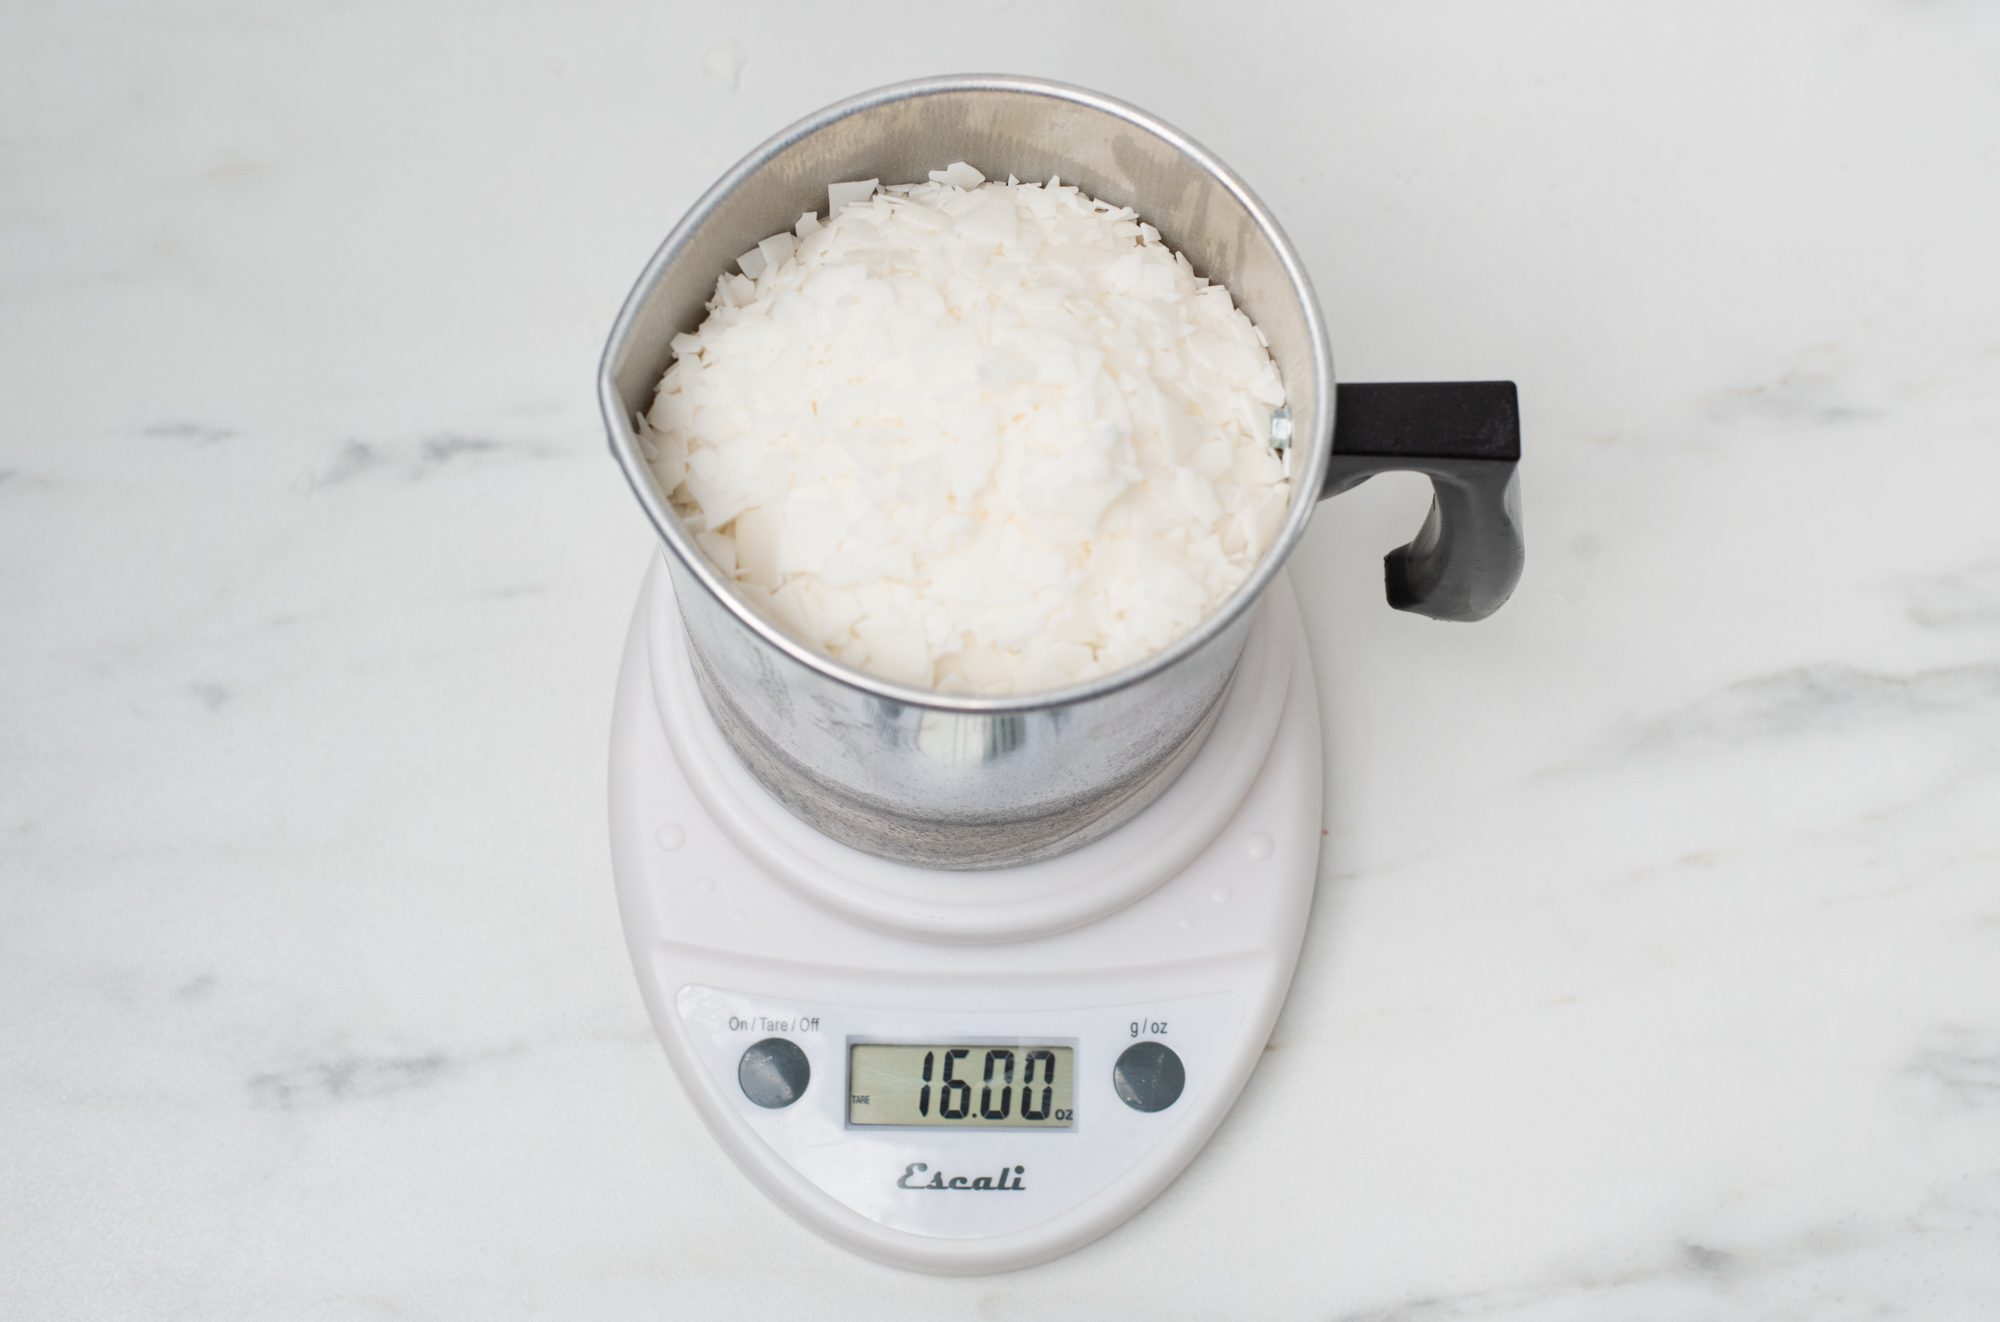
Step 1: Weigh and melt wax
Place a clean pouring pitcher on the digital scale and tare the weight. Add 4 oz (113 g) of CandleScience CocoSol Soy Pillar Wax to the pitcher. Melt the wax with a double boiler or on a hot plate until the wax reaches 185ºF (85°C).
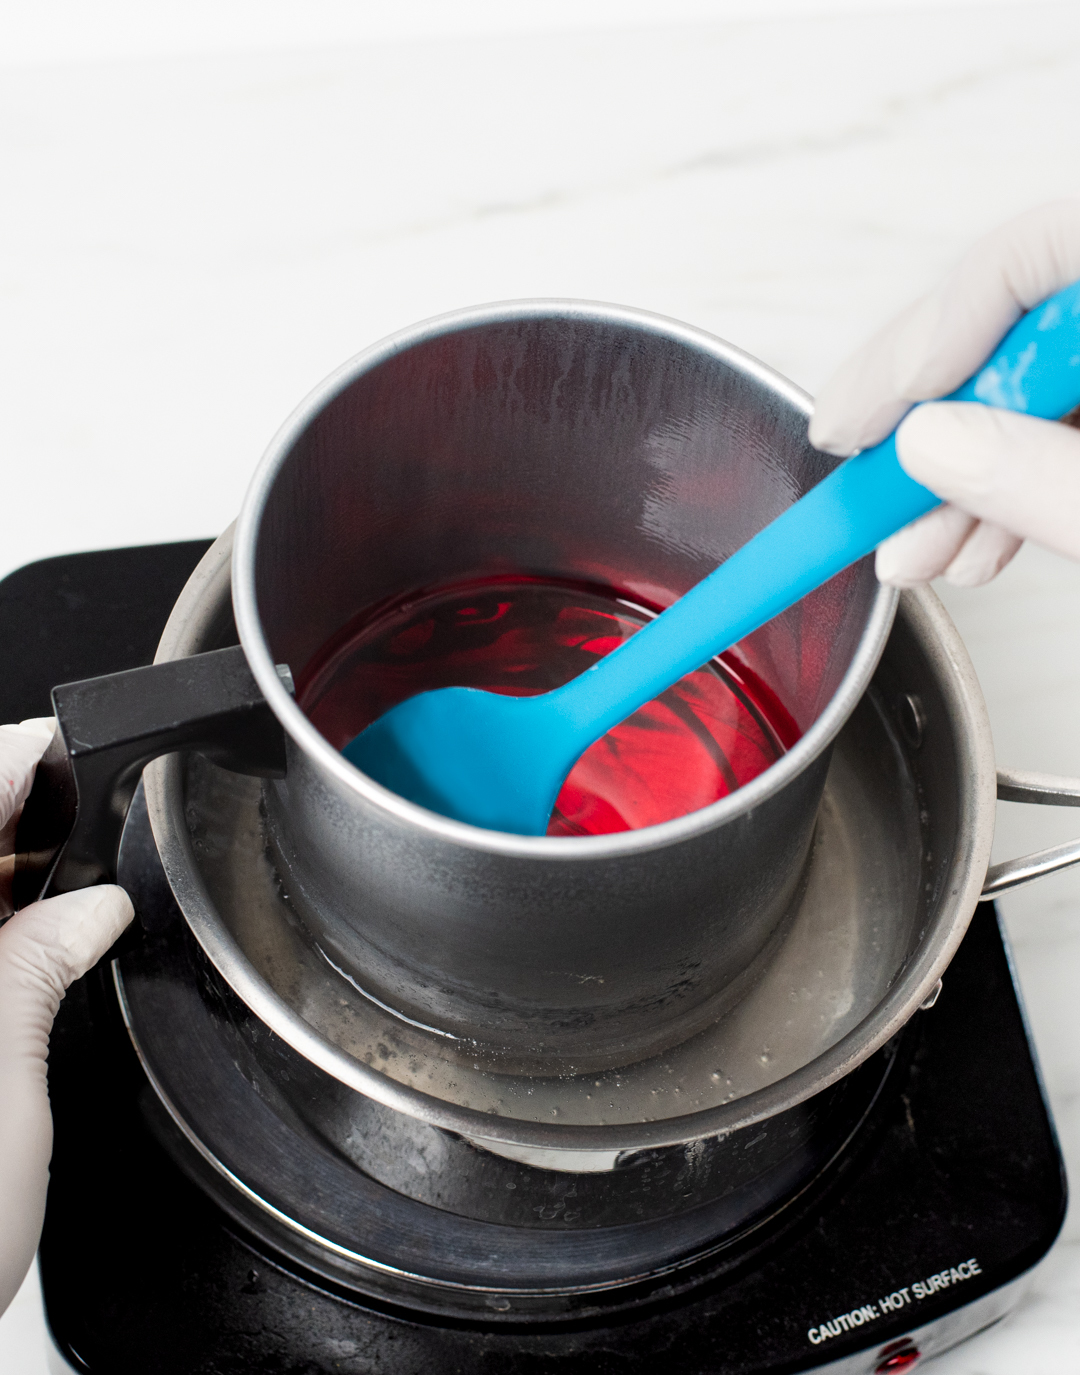
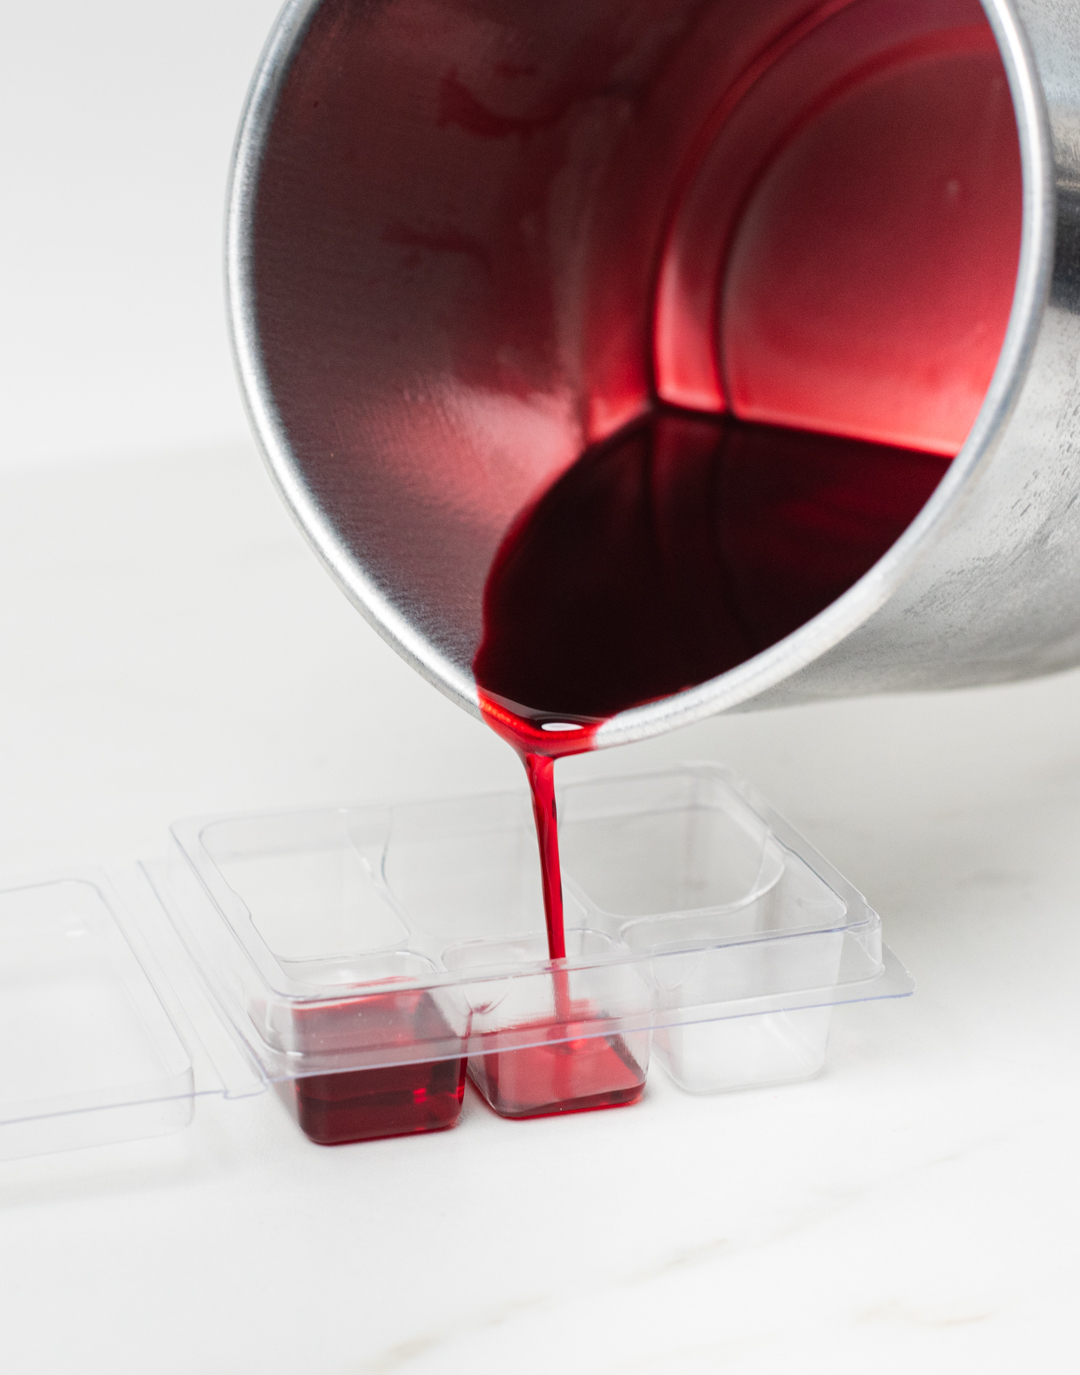
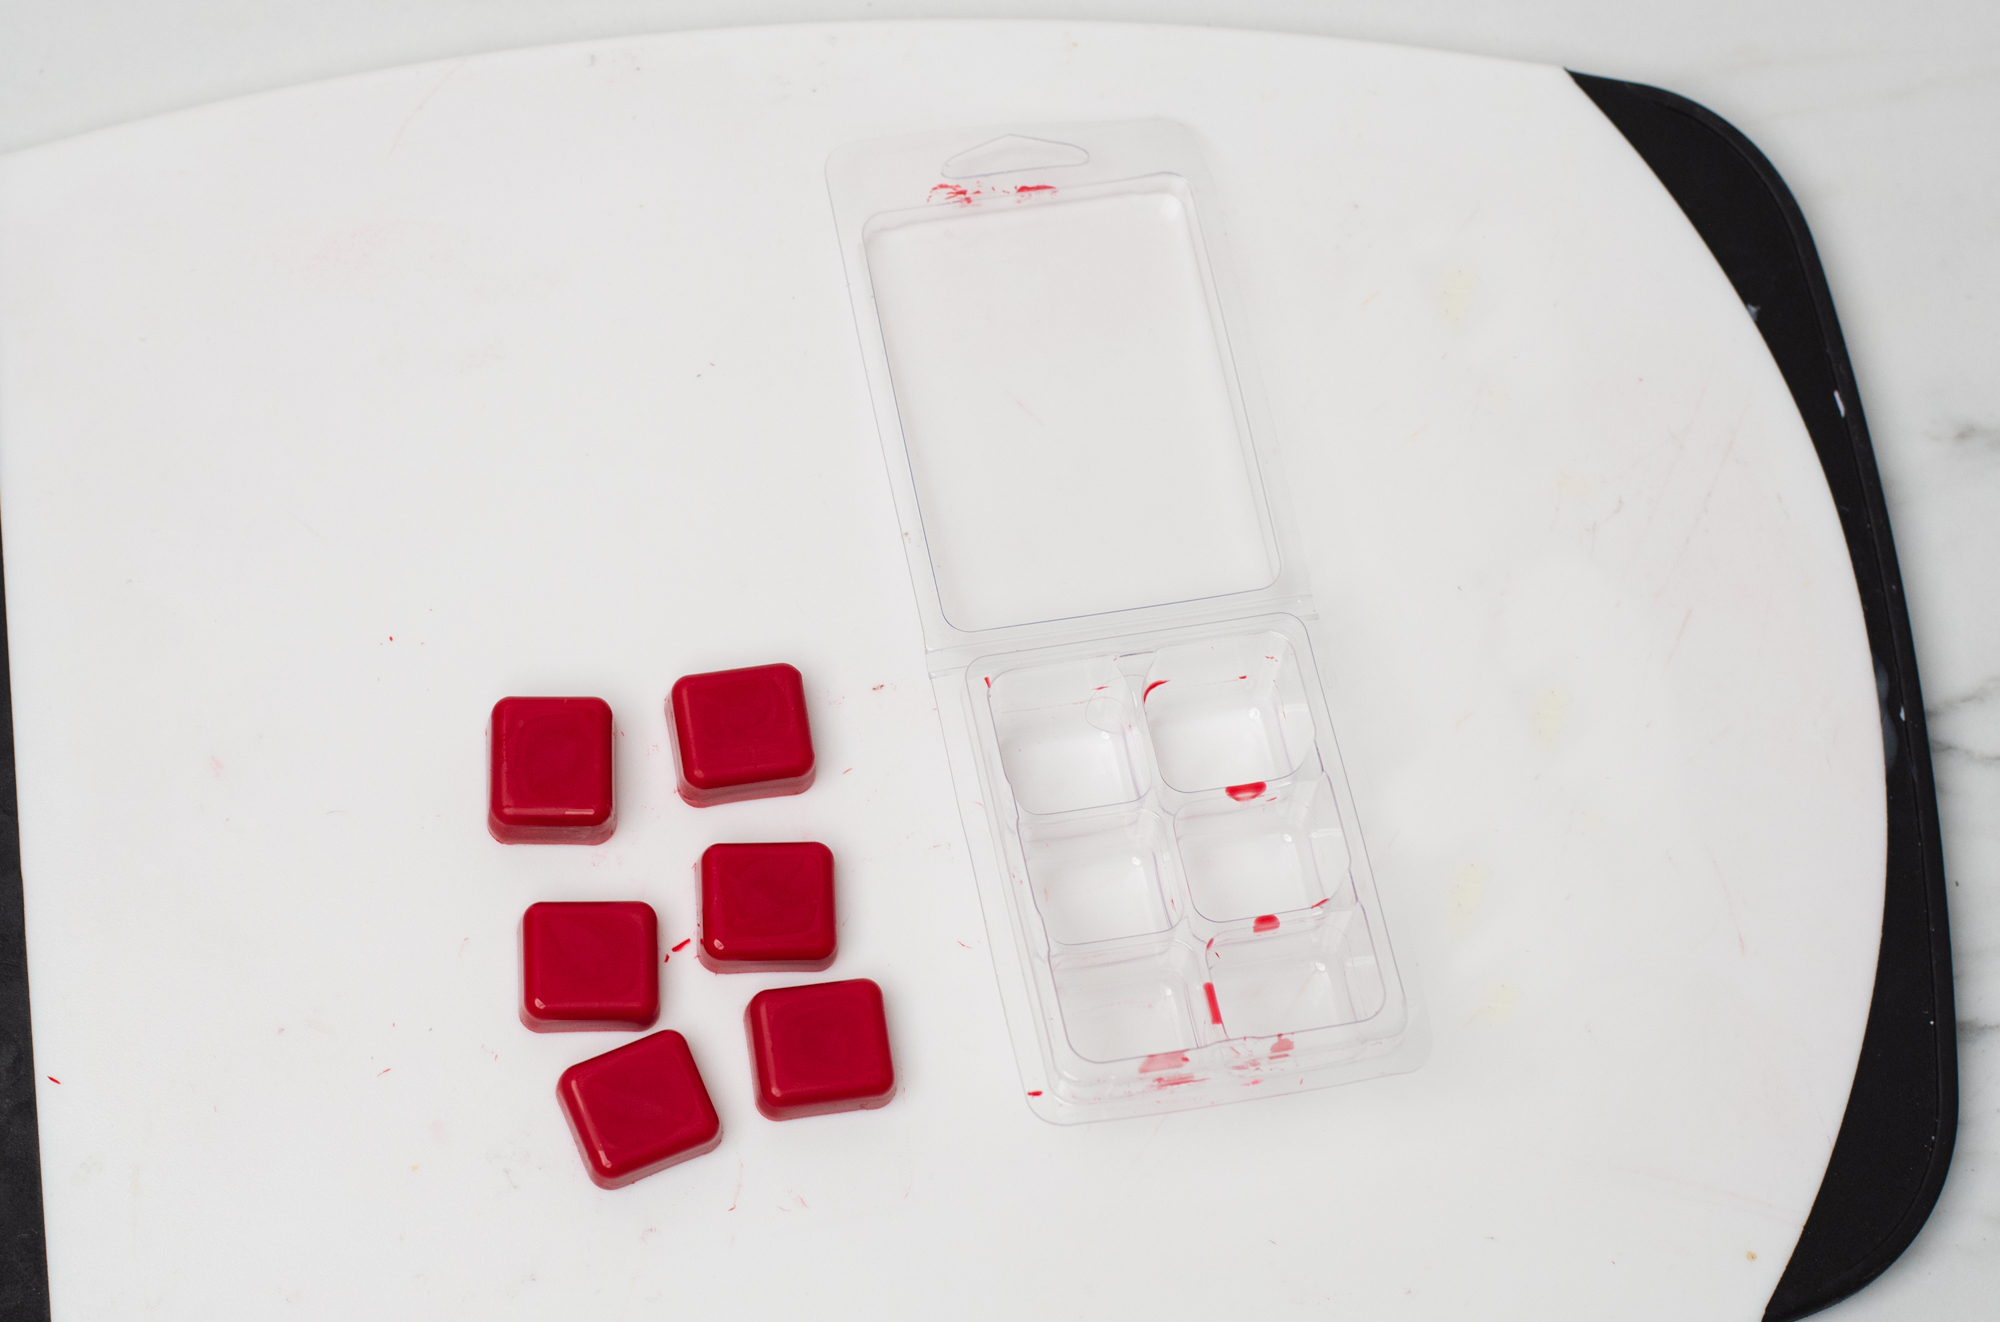
Step 2: Pour wax embeds
Carefully pour the embed wax into the clamshell molds. Fill each cavity with ¼ - ½” (0.6-1.3 cm) of wax. The embeds should be about half the height of your heart-shaped silicone mold.
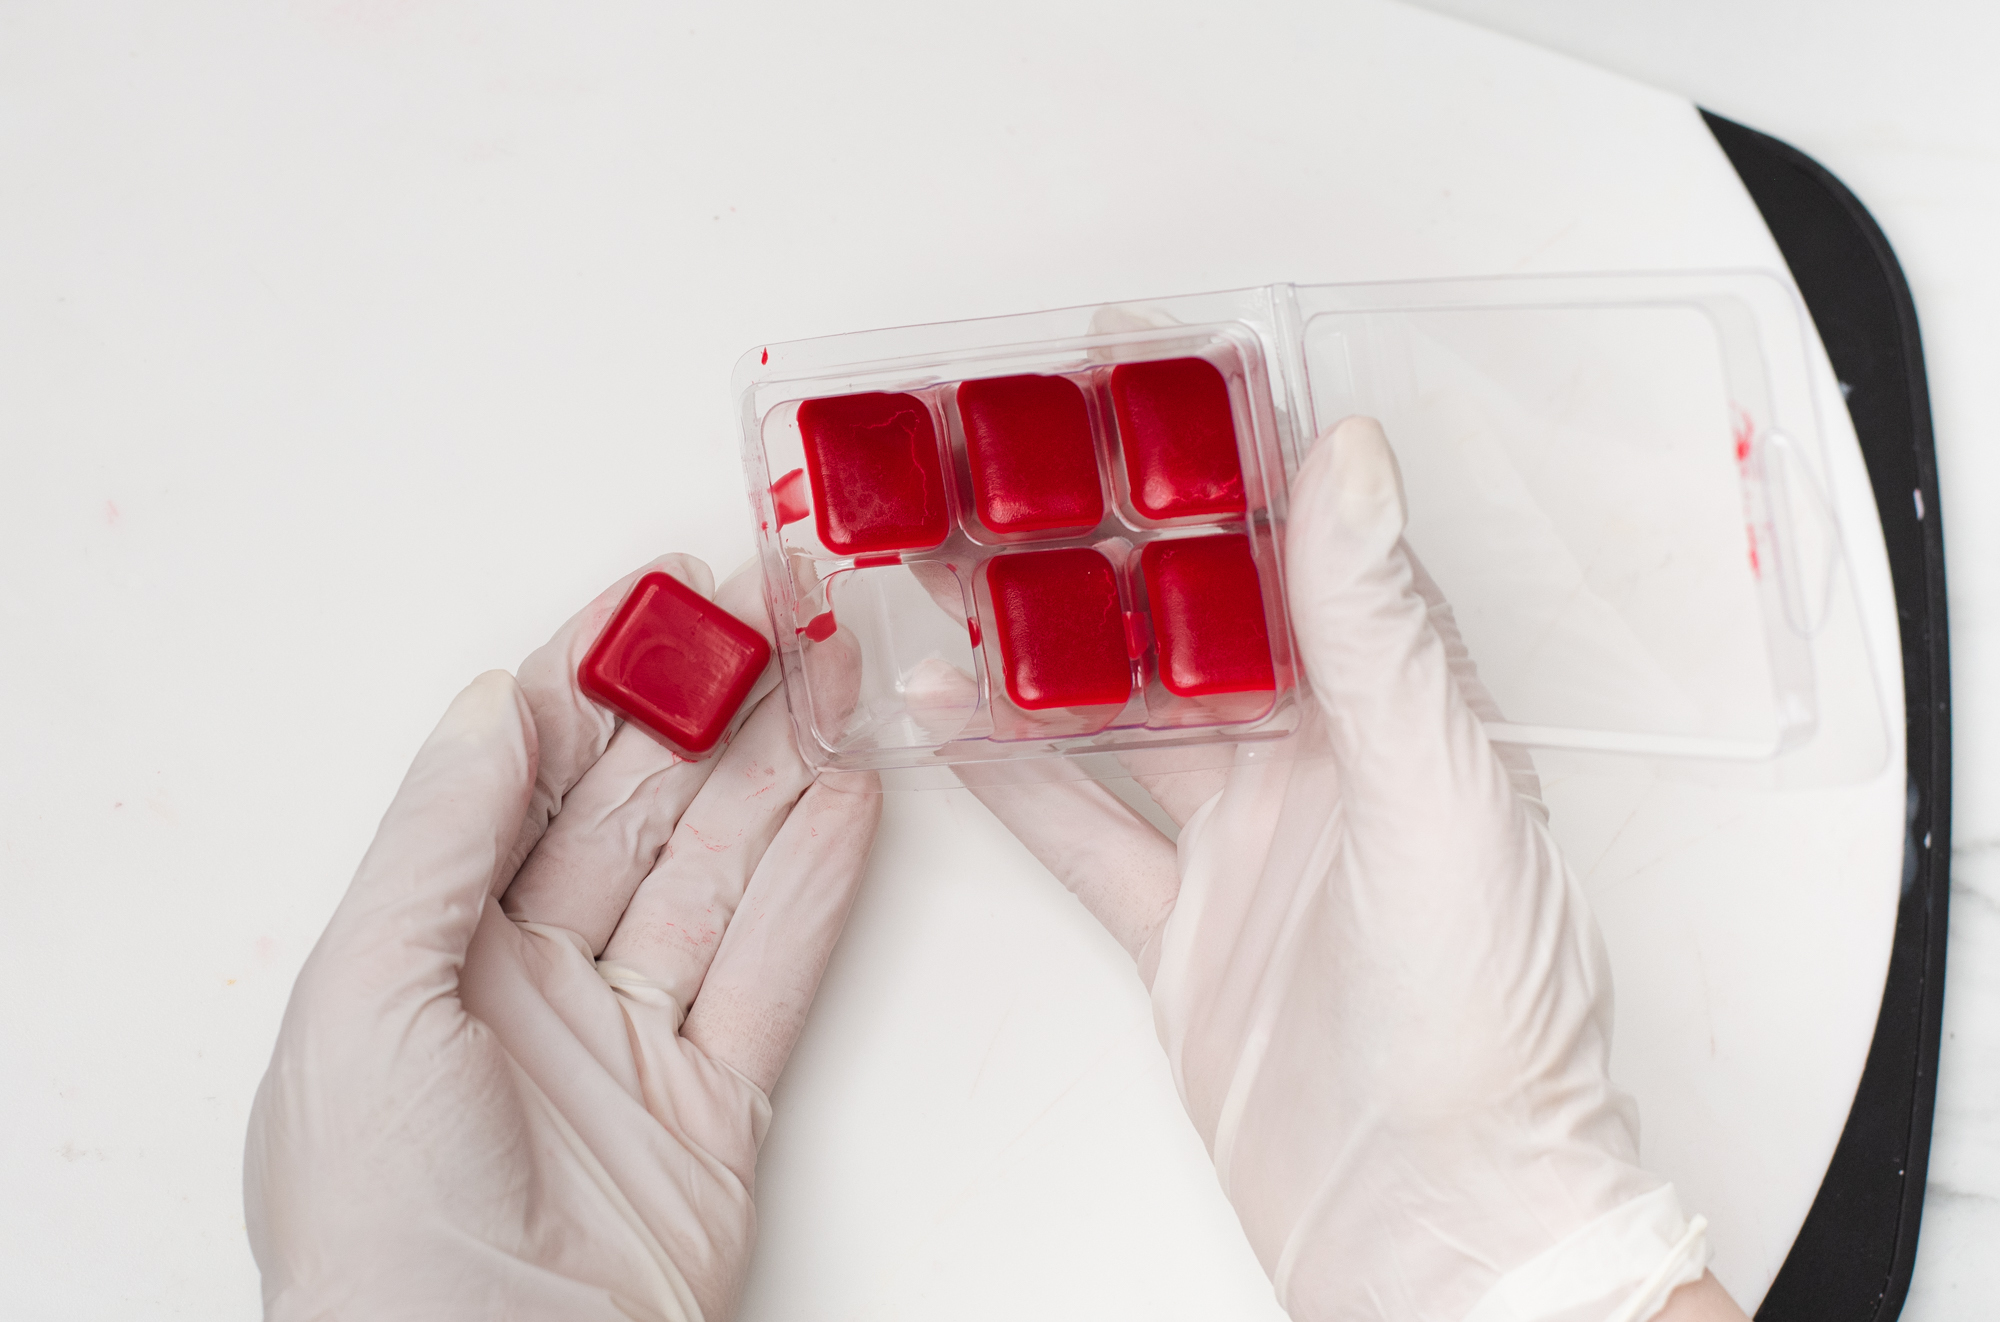
Allow the red wax embeds to cool to room temperature. Remove from the clamshell and set aside for later.
Note: If they break, that’s ok! No one will see these except you.
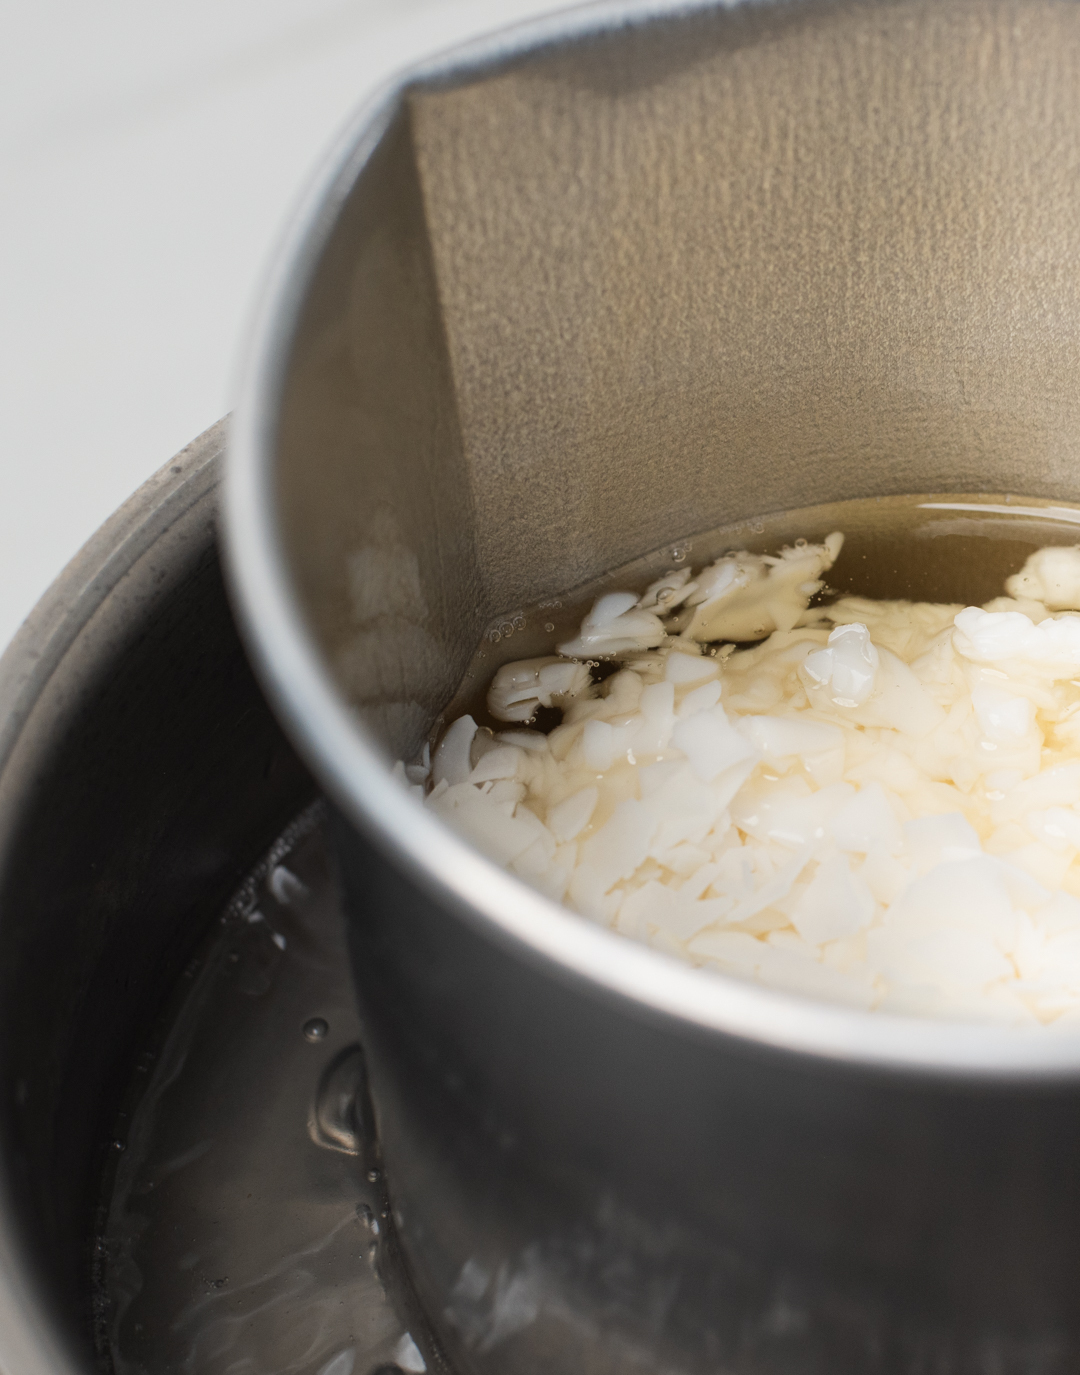
Step 3: Weigh and melt wax for hearts
Place the pouring pitcher on your digital scale and tare the weight. Weigh 16 oz (454 g) of CandleScience CocoSol Soy Pillar Wax in the pouring pitcher. Begin to melt the wax with a double boiler or on a hot plate.
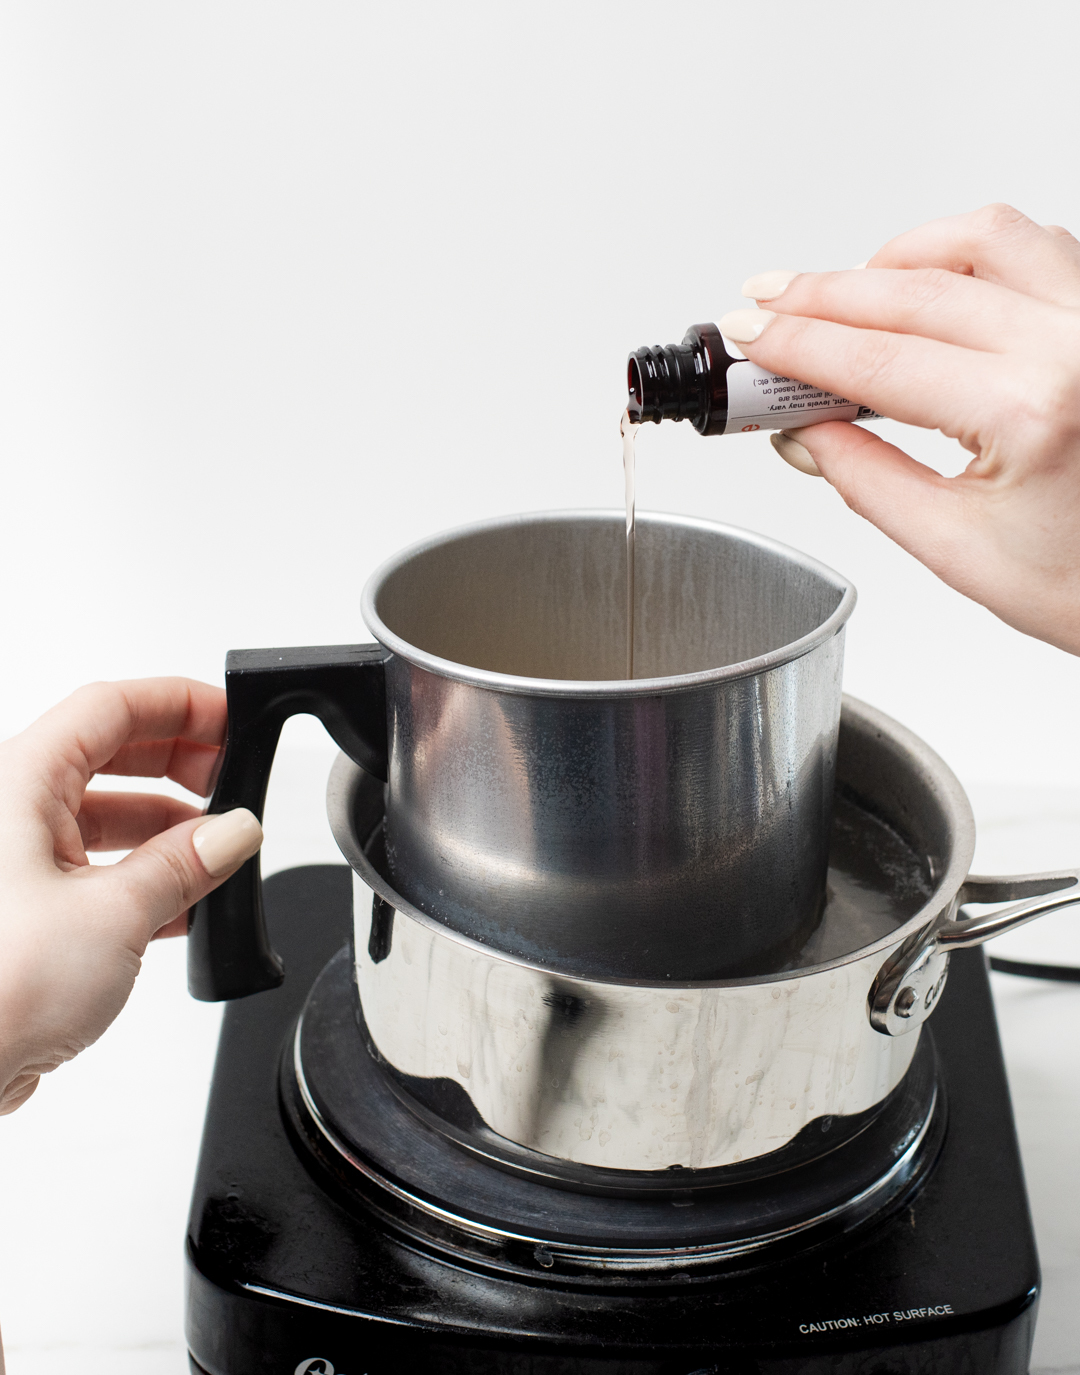
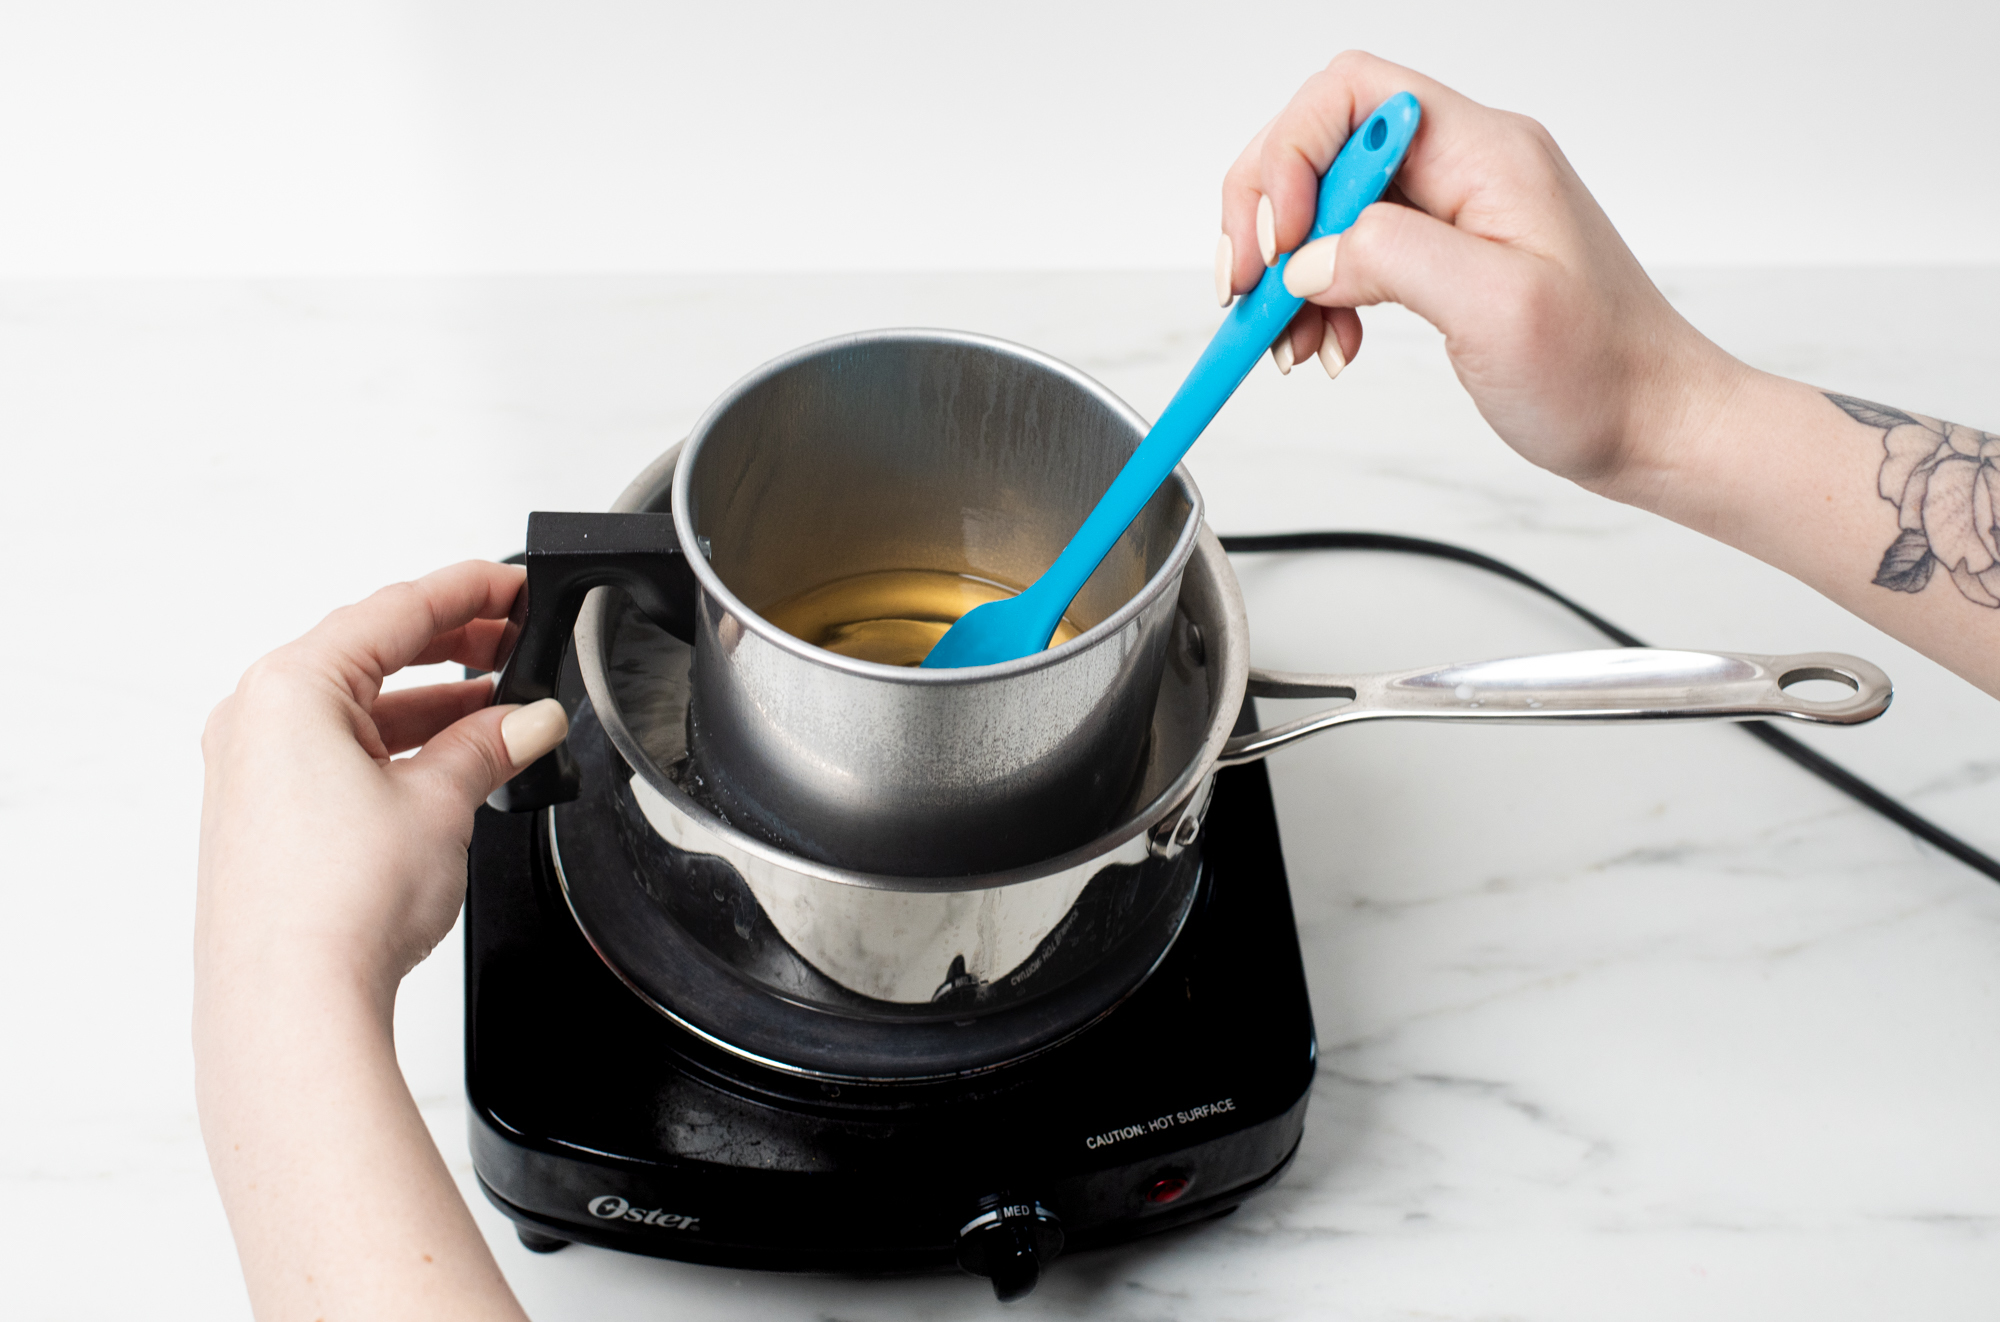
Step 4: Add the fragrance oil
Once your wax has reached 185°F (85°C), add 1 oz (28 g) of Bohemian Rose fragrance oil or the fragrance oil of your choice. Stir gently for 2 minutes to ensure that the oil is able to bind with the wax.
Step 5: Pour first layer of wax for hearts
Carefully pour the first layer of wax into the bottom of the silicone heart mold. This layer should be thick enough to cover the entire bottom of the mold, but allow for enough room to add and conceal the red wax embed.
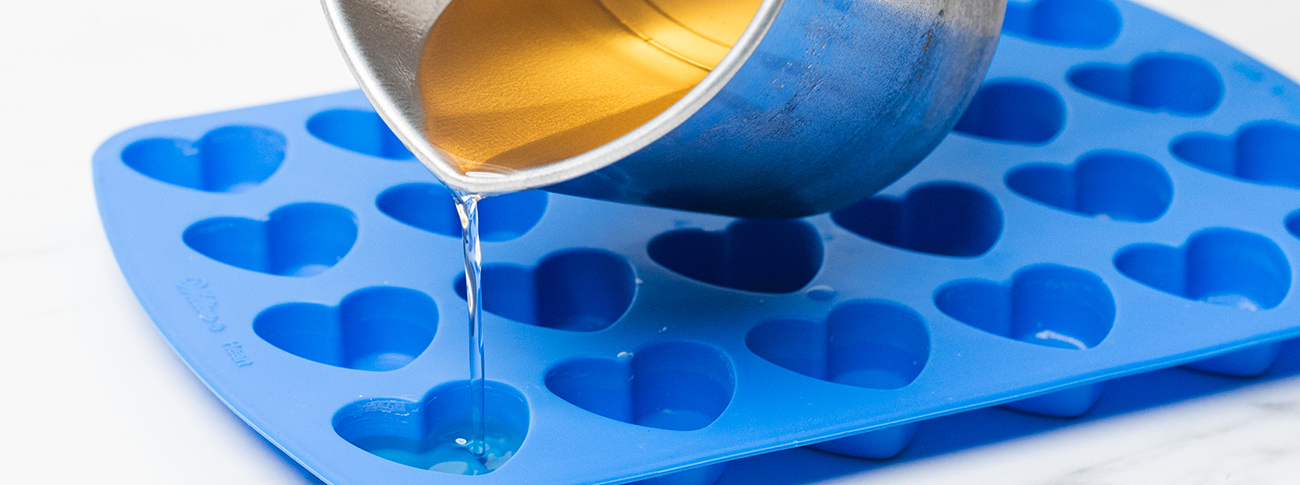
Allow the wax to cool slightly. Depending on the thickness of the layer it should take about 10 minutes. Be cautious not to let this layer cool completely.
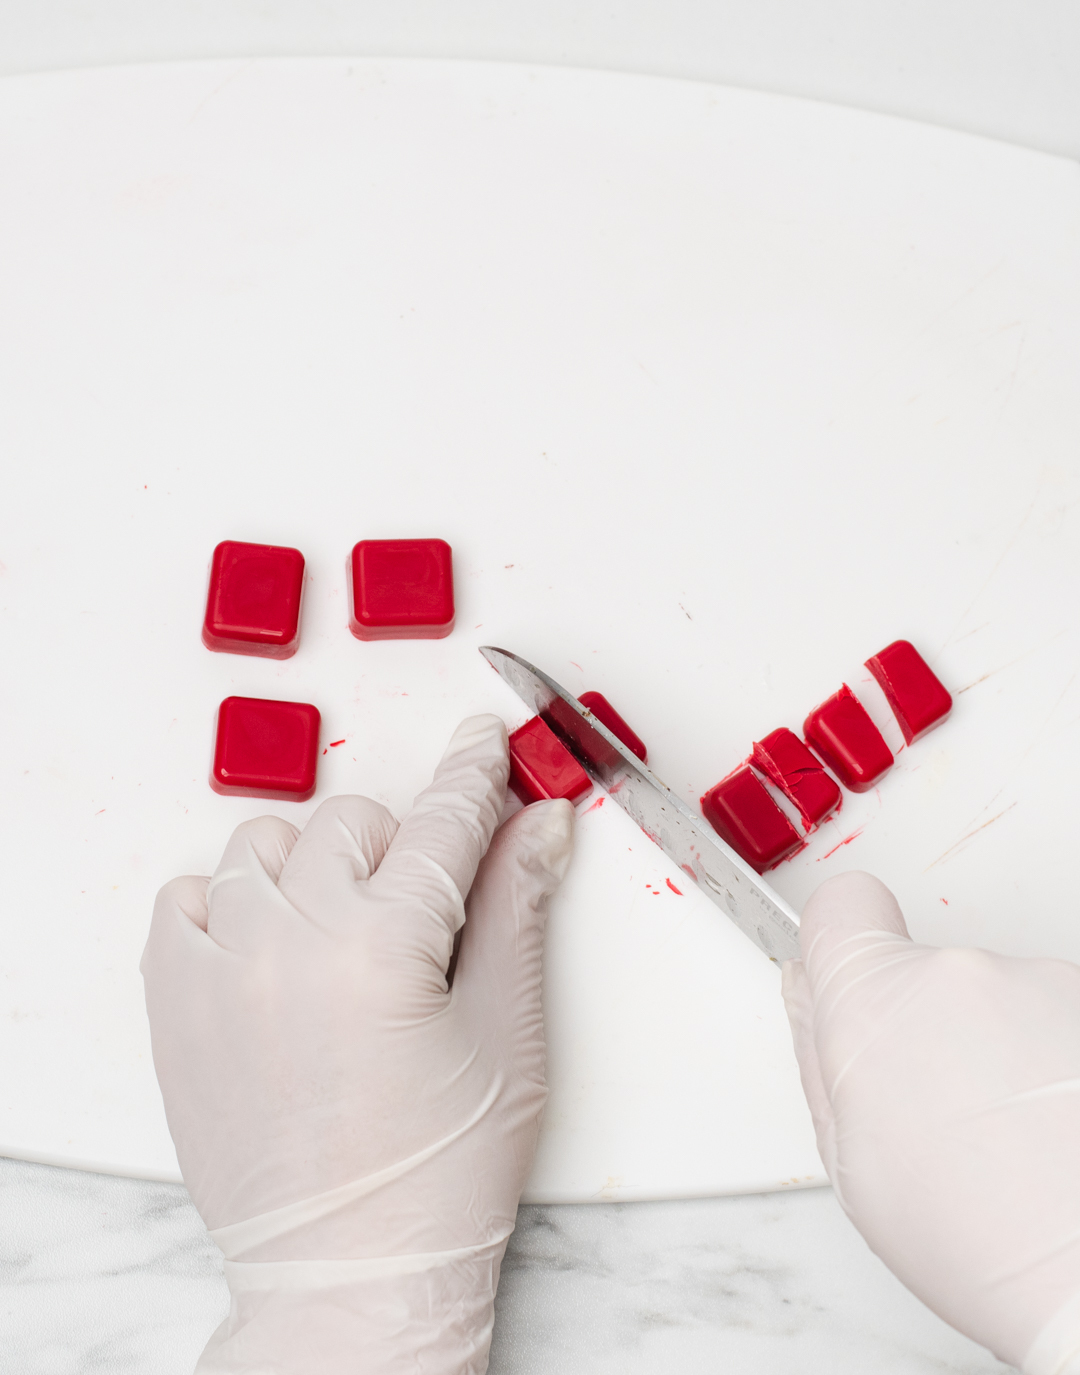
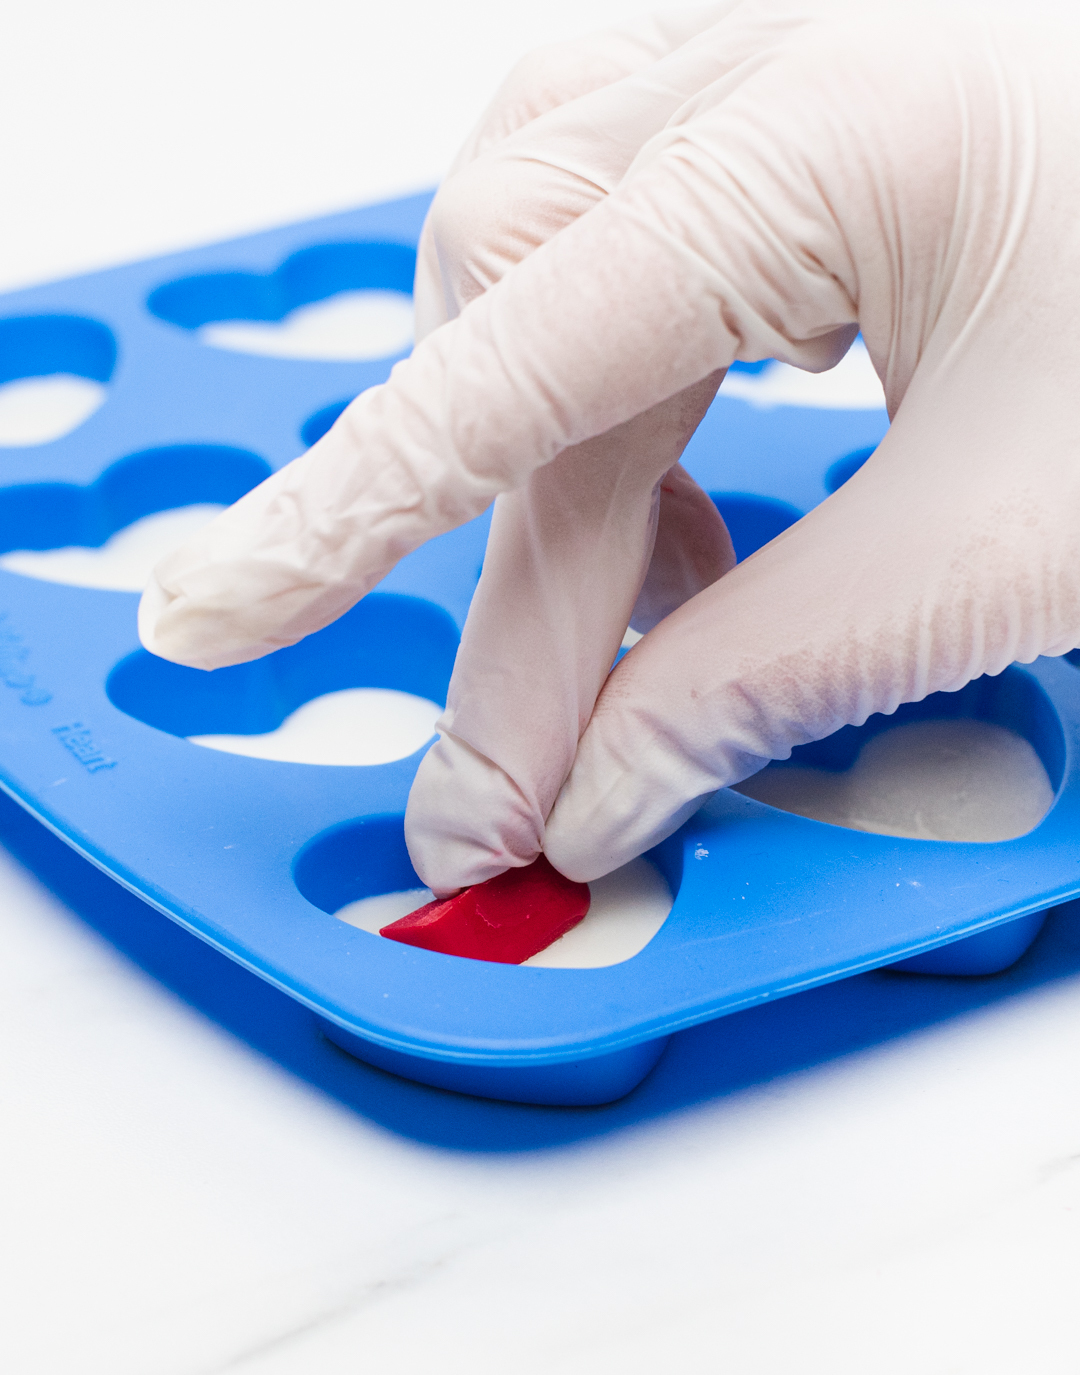
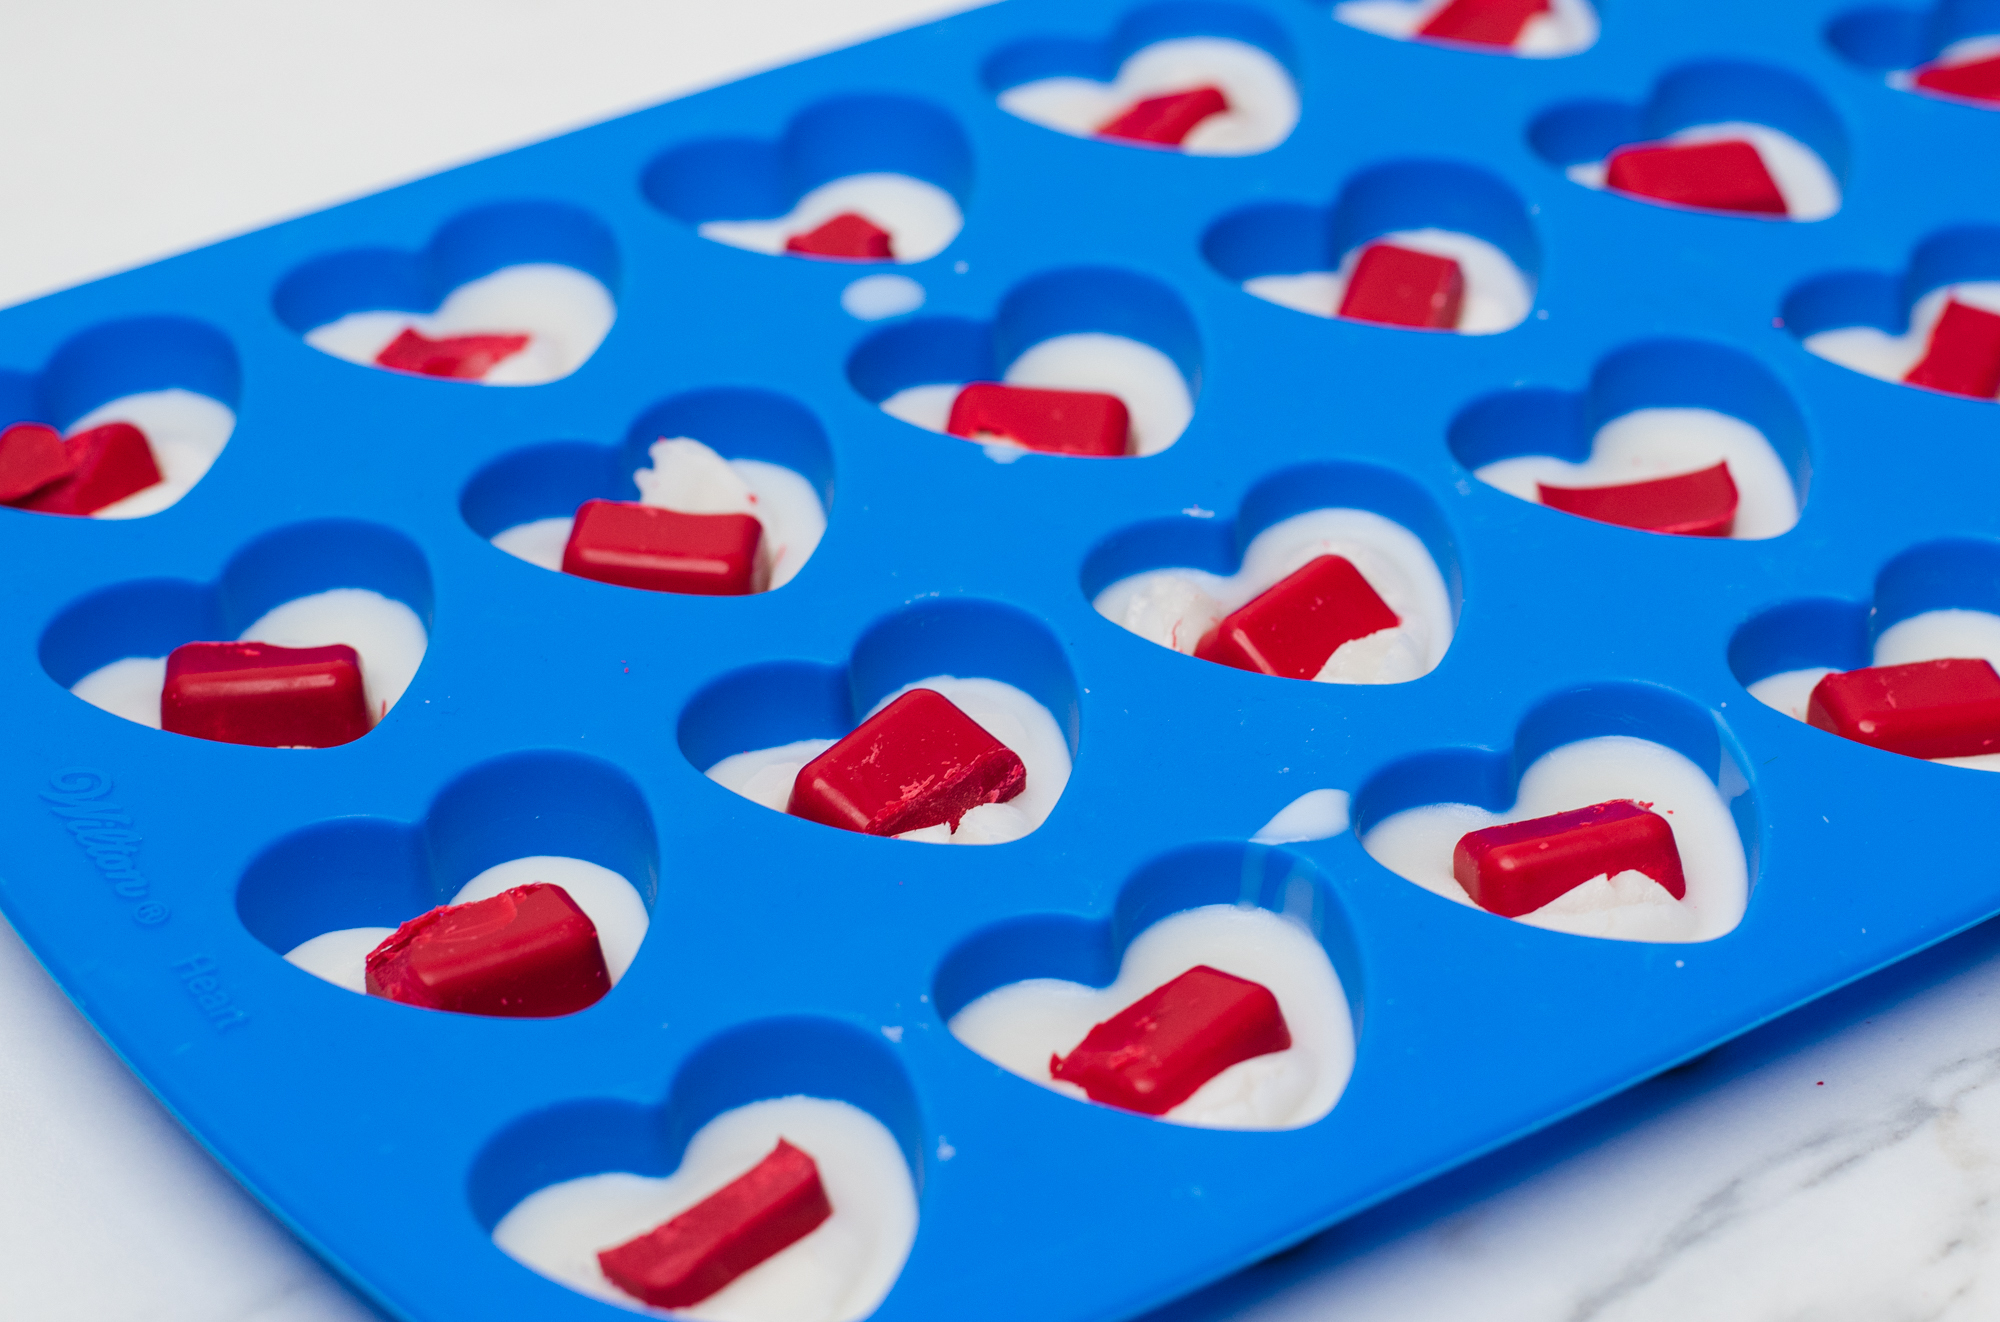
Step 6: Place the wax embeds
Cut the wax embeds in half to fit the mold.
Note: If you have a larger mold, you may be able to use the full embed.
Place one red wax embed into the center of each heart. Press the embed down slightly so that it does not shift when pouring the next layer.
Step 7: Pour second layer of wax for hearts
The pitcher of uncolored wax should have cooled slightly, but still be liquid enough to pour. If the wax has solidified too much, return the pitcher to the double boiler and allow the wax to melt. Make sure the wax does not get hotter than 130ºF (54.4°C).
Working slowly, pour the wax over and around the red embeds.
Note: You can pour the wax into a paper cup if you need more control for pouring small amounts into each heart cavity.
Note: If you see the embed begin to melt, don’t panic! Stop pouring and allow the wax to cool 1-2 minutes, and then continue filling each cavity.
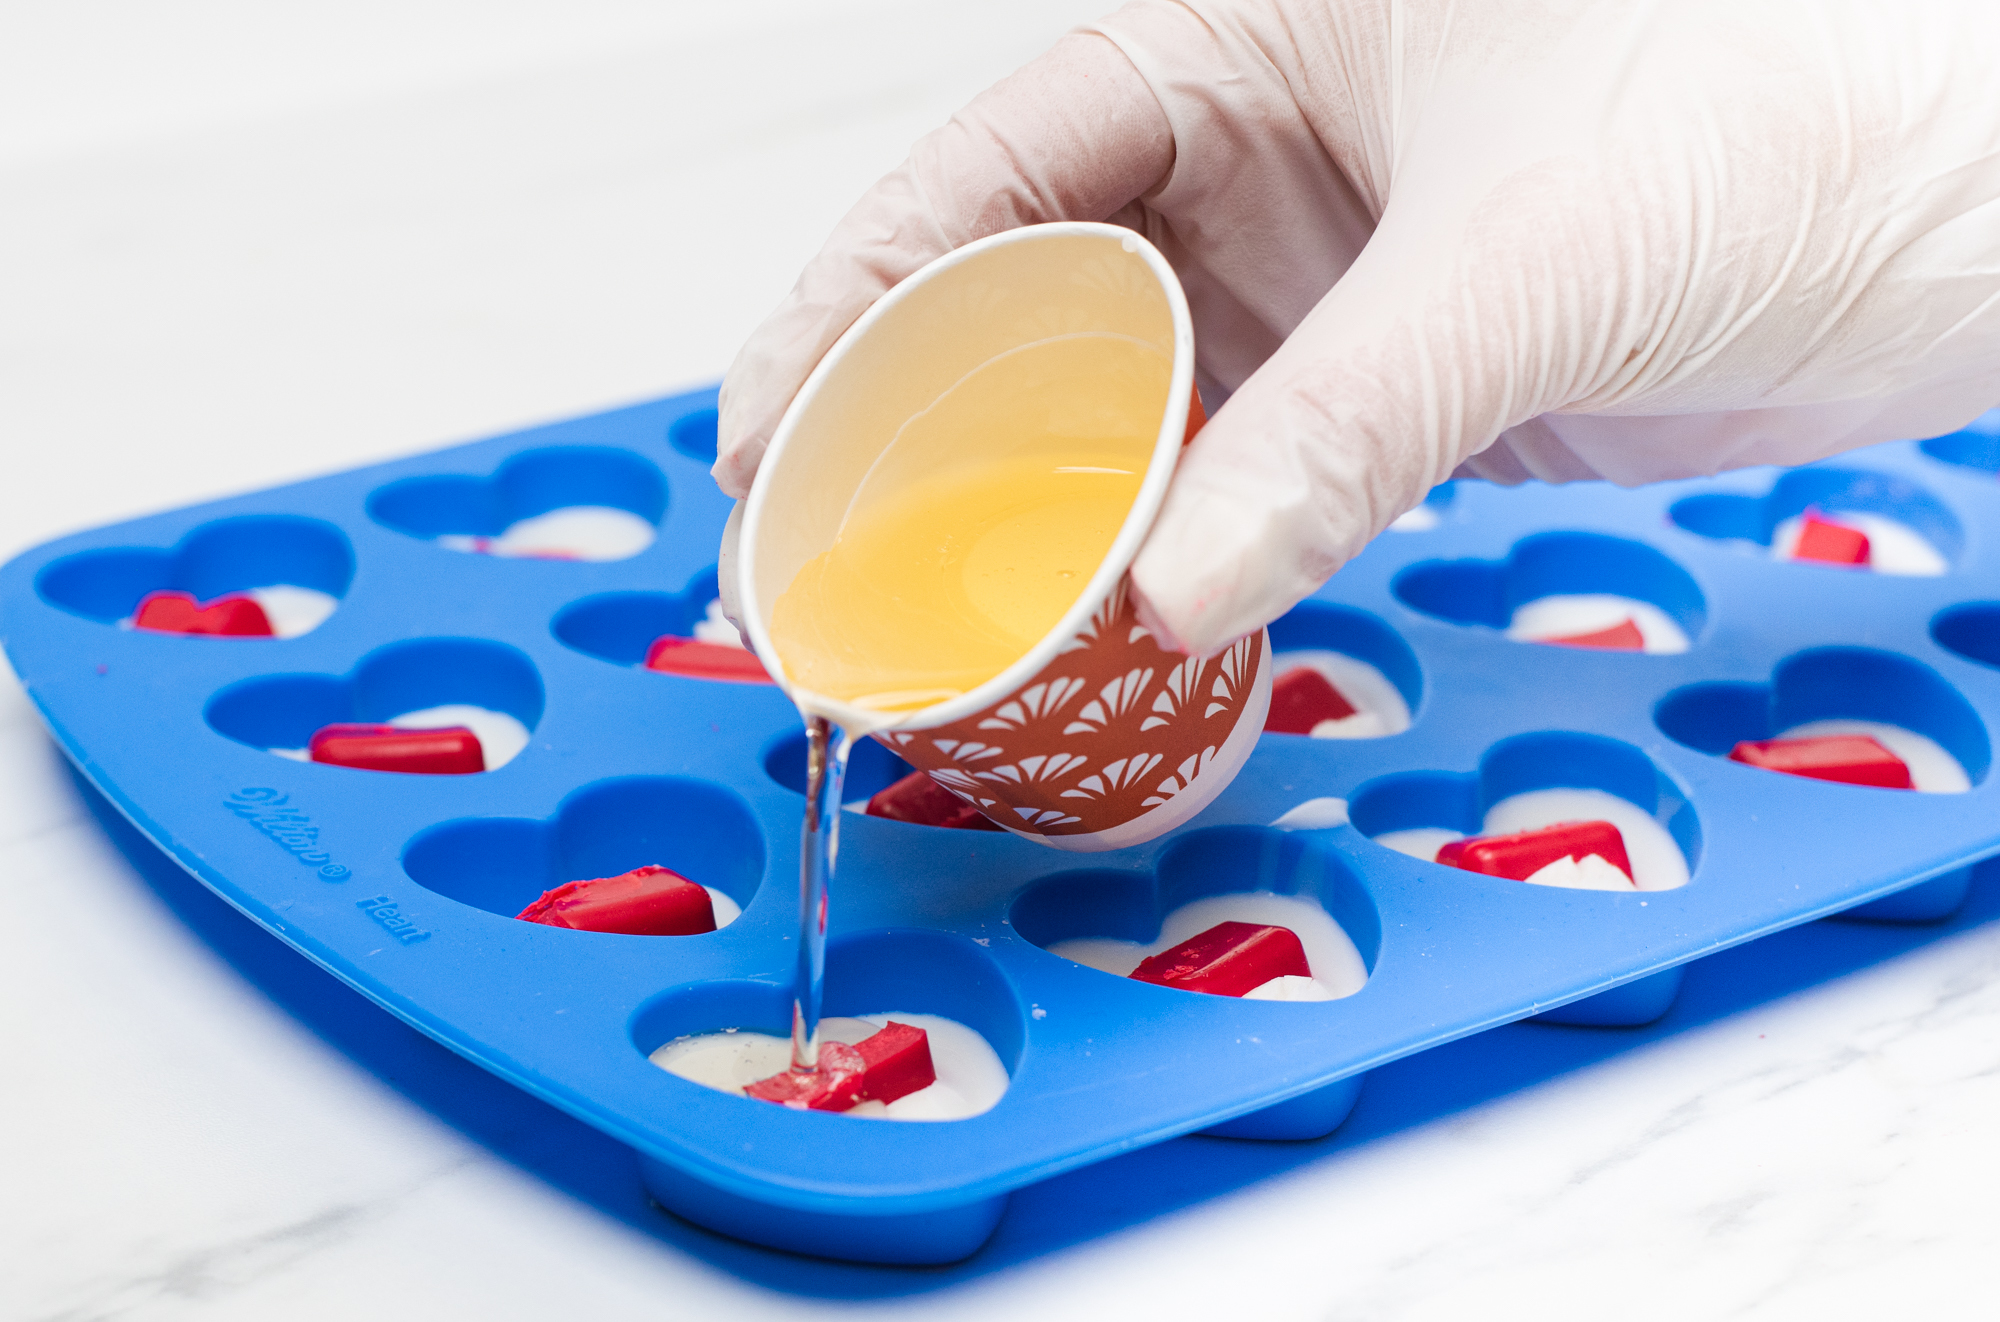
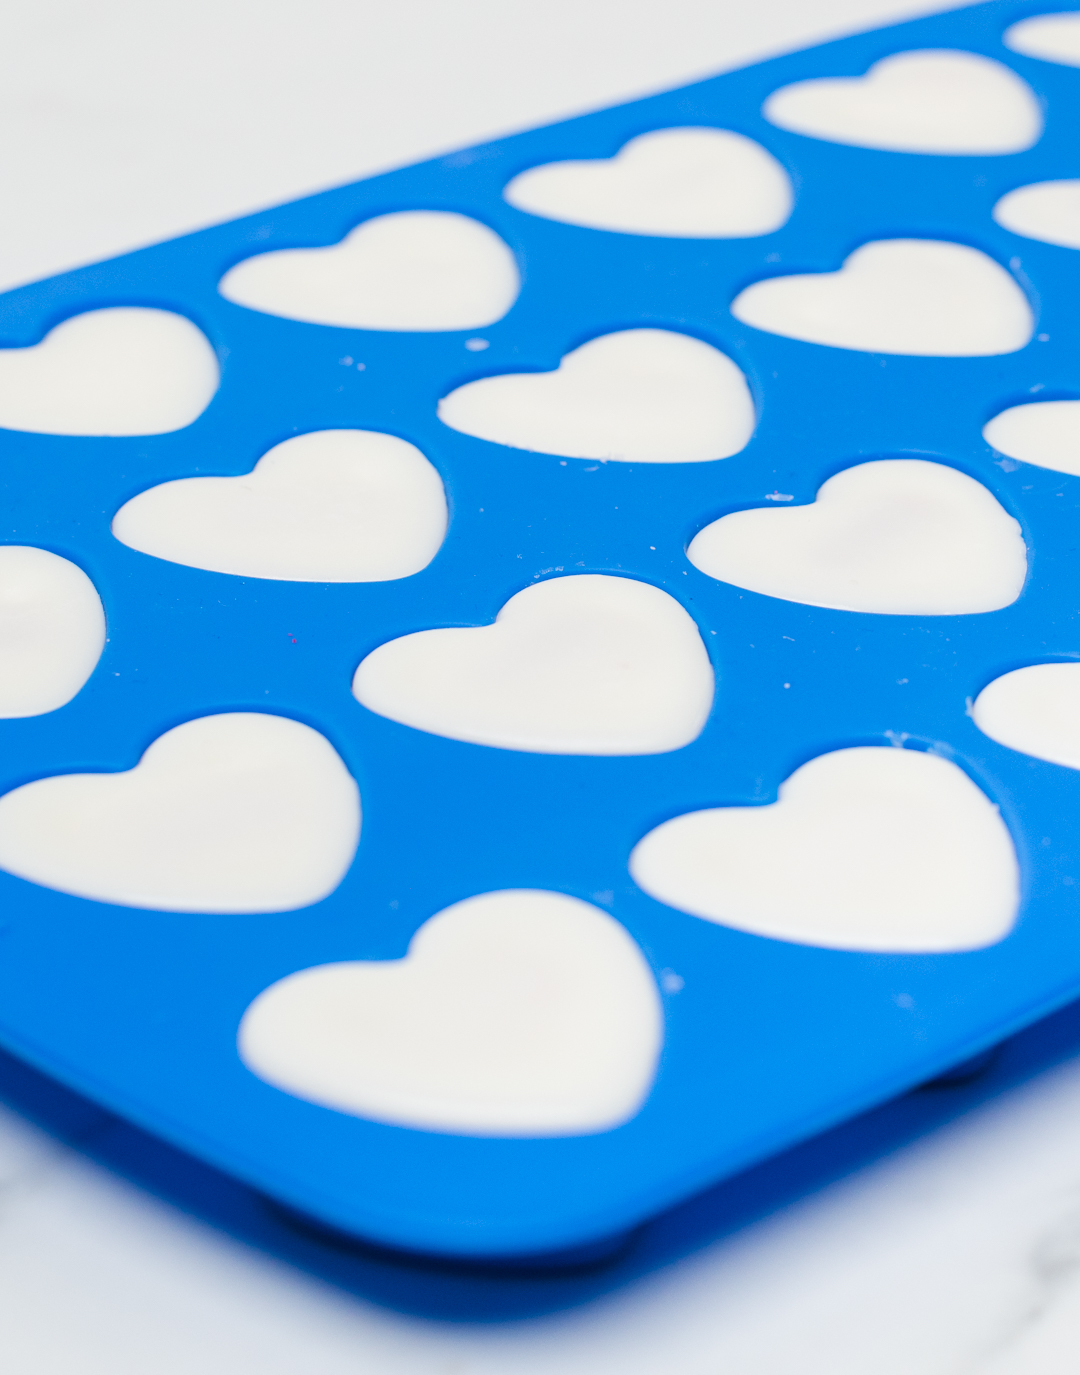
Allow the wax melts to cool completely.
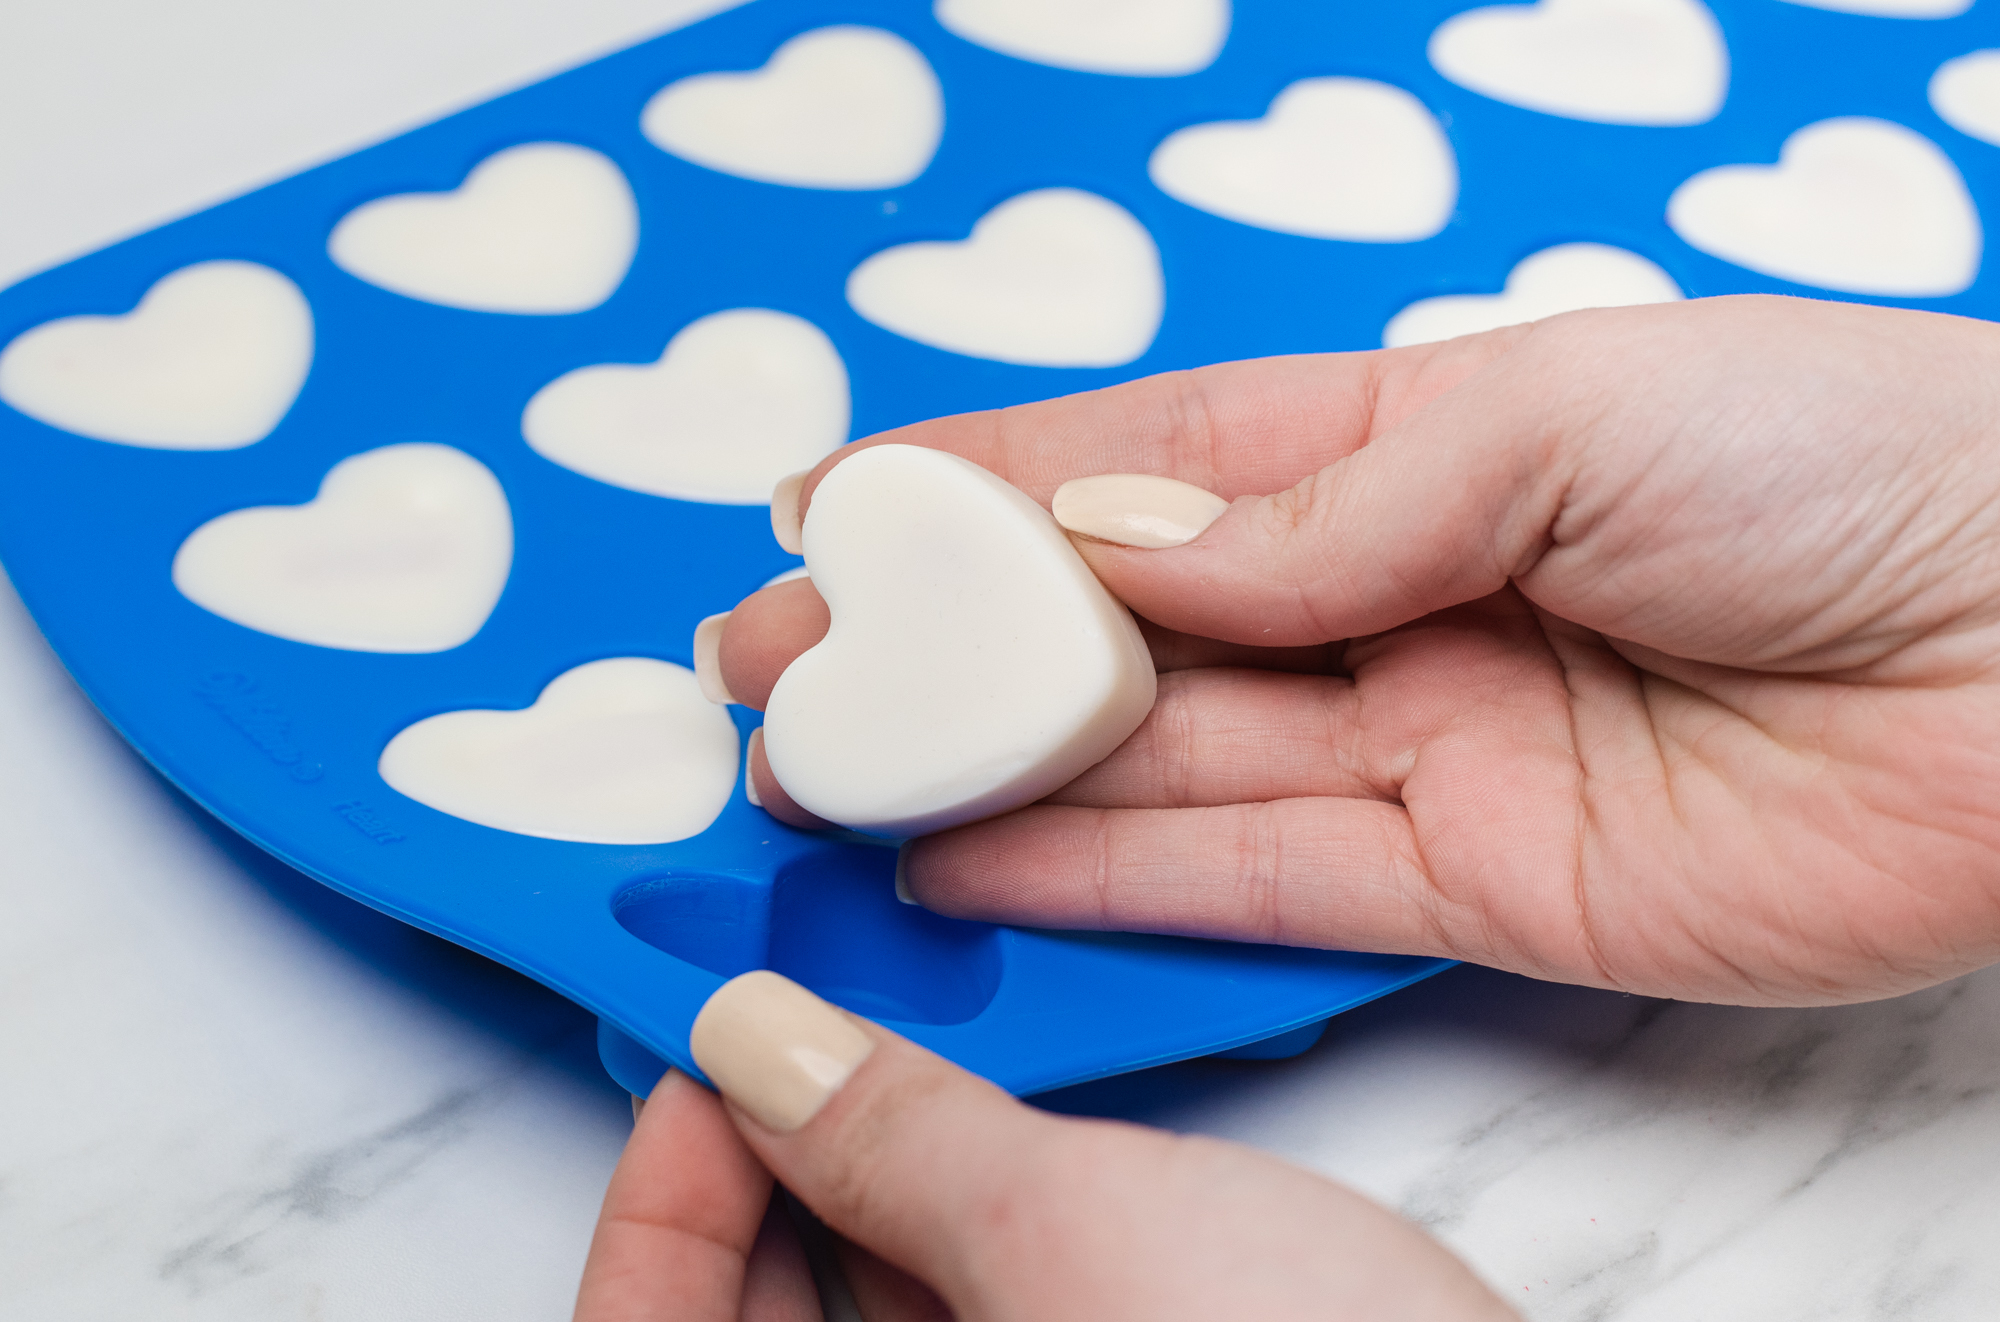
Step 5: Unmold wax melt
When your hearts are cool, carefully remove the wax melts.
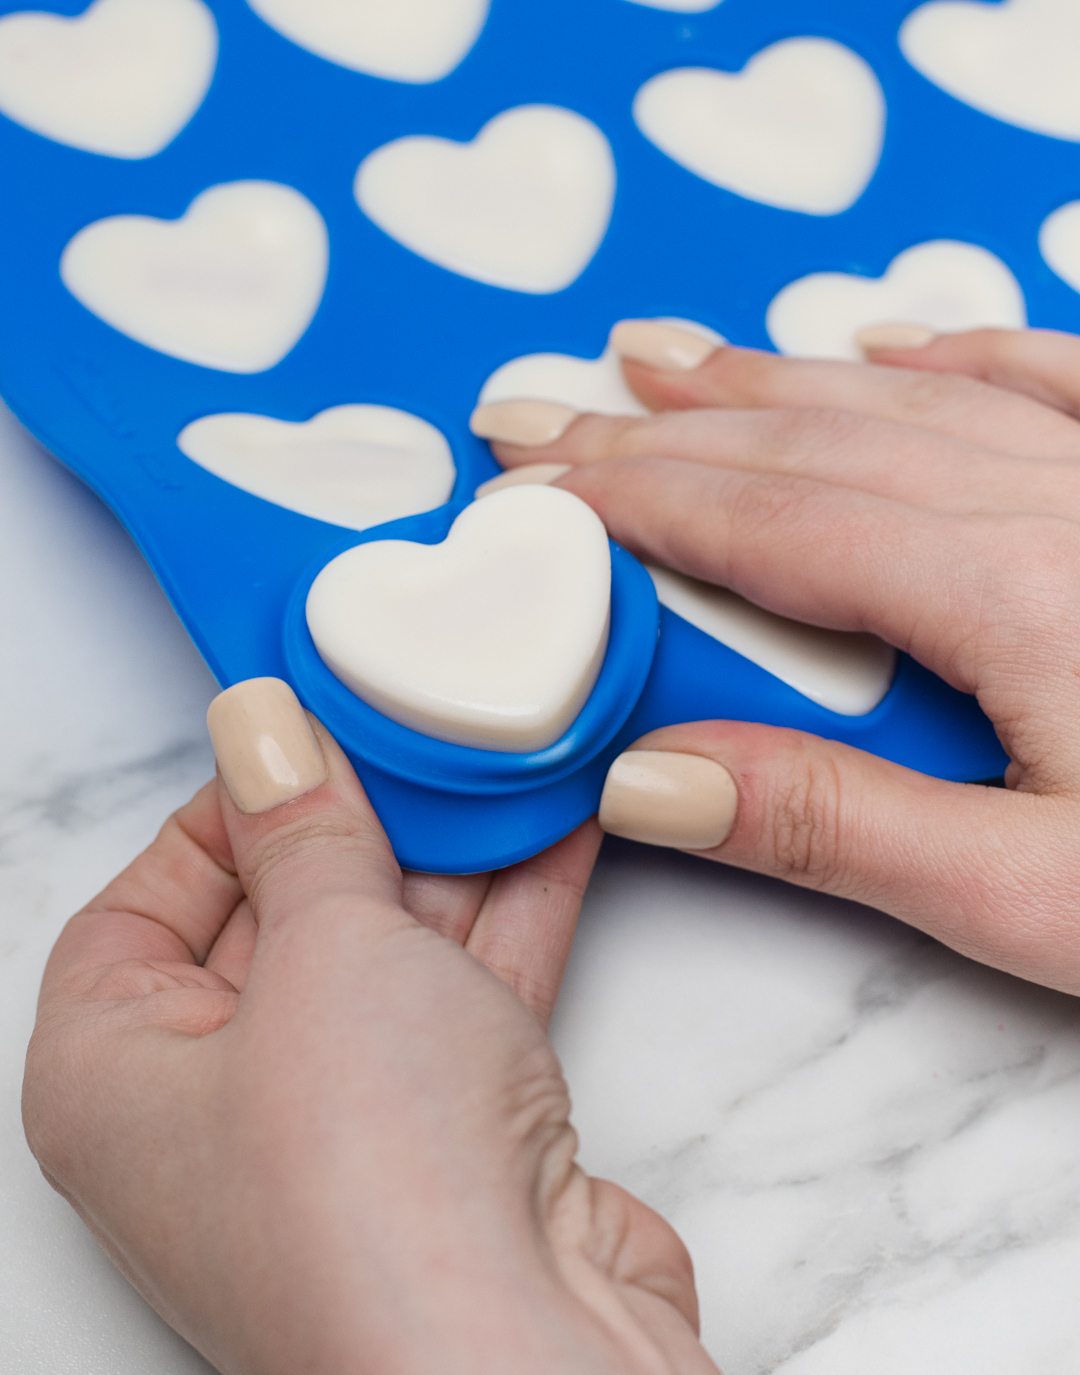
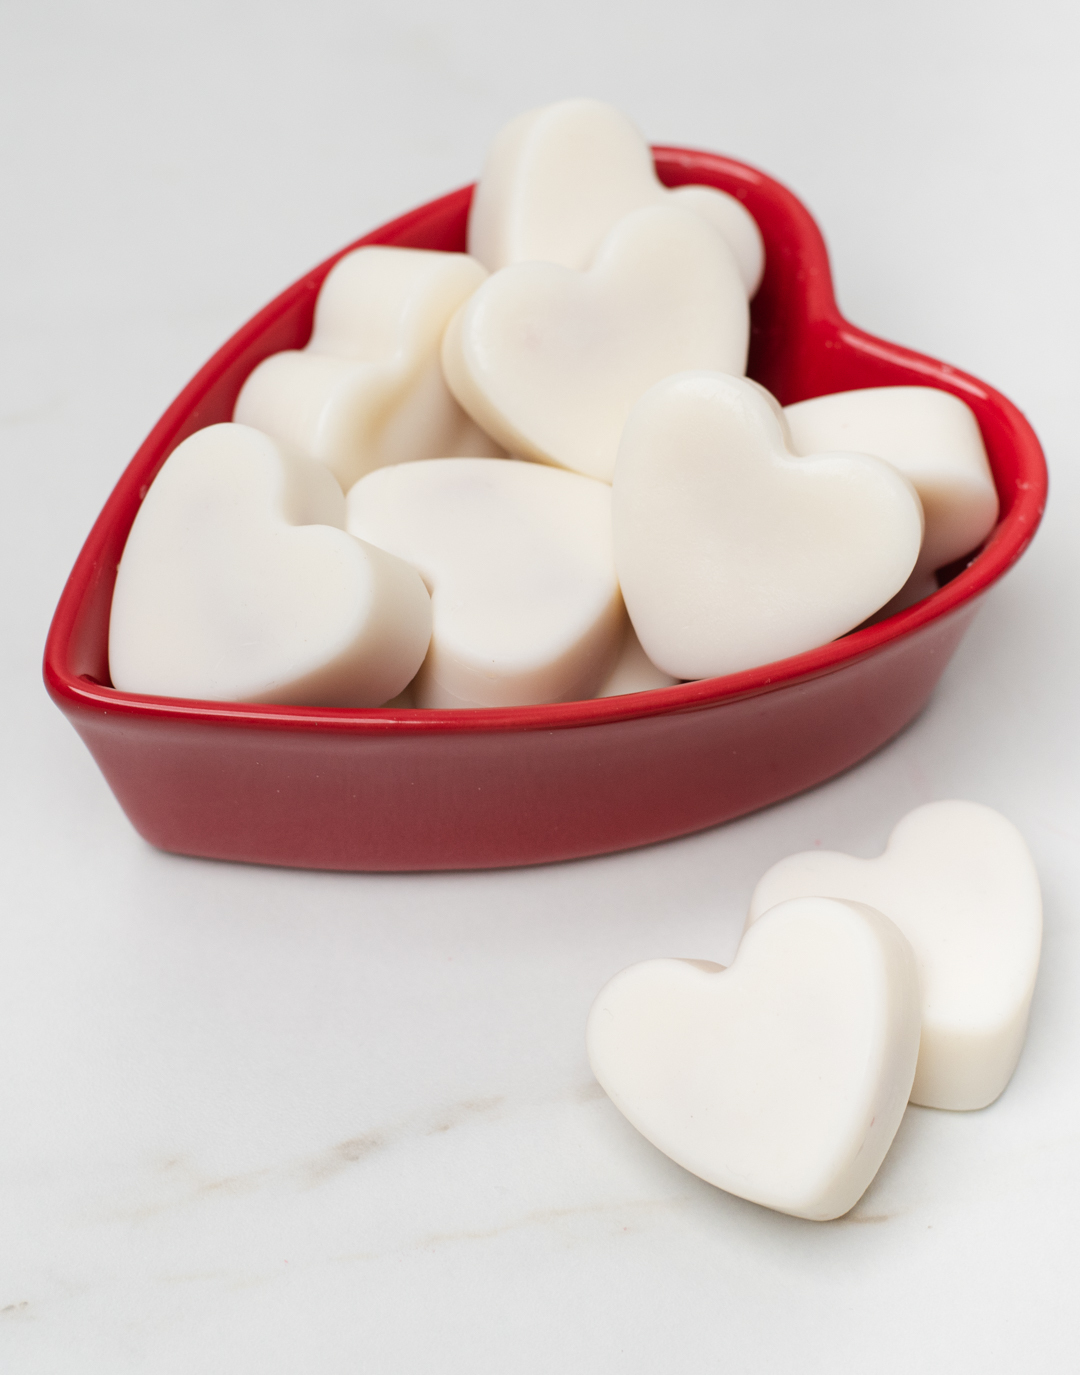
You can toss one in your favorite wax melter to enjoy the “bleeding” effect right away. For optimal scent throw, we recommend letting the soy wax melts cure for 1-2 weeks.
If you’re running into trouble getting your wax melts out of their mold, here are 6 tips for demolding wax projects.
Note: Be sure to follow all wax melt safety rules.

Other embedded wax melt project ideas
One of the things we love most about this project is that once you master how to make wax melts, it’s easy to customize and make it your own. With different molds and color combinations, the possibilities are endless! We recommend simple molds about 1.5”-2” (4-5 cm) in diameter for best results. Here are a few ideas:
- Add micas to the wax embeds for a sparkly surprise.
- Hearts of Darkness: Use a black dye block instead of red for the embeds. Your inner goth will be living their best life.
- Eggs-cellent Eggs: With Easter-themed silicone molds—like an egg-shaped mold—and some fun spring colors and fragrance oils, you have a wax melt fit for the Easter bunny!
- A Star Is Born: Remember that star mold you snagged to make beeswax Christmas tree ornaments? Break it out again just in time for your awards show viewing party! Make your embeds sparkle with King Tut Gold or Interstellar mica and watch them shine.