
How to whip wax
Whipping wax is a technique you need in your toolbox if you love making unique, creative candles. Use whipped wax to add texture, make dessert candles, or create sand, snow, and fluffy cloud effects. This beginner-friendly, versatile technique is perfect for getting those creative waxes flowing!
Note: For this recipe, we decided to use 8 oz (227 g) of 464 soy wax. You can adjust the amount and type of wax depending on the project you are creating.
Additional items needed:
- Metal stirring spatula
- Paper towels
- Isopropyl Rubbing Alcohol
- Double Boiler
- Scissors
Directions:
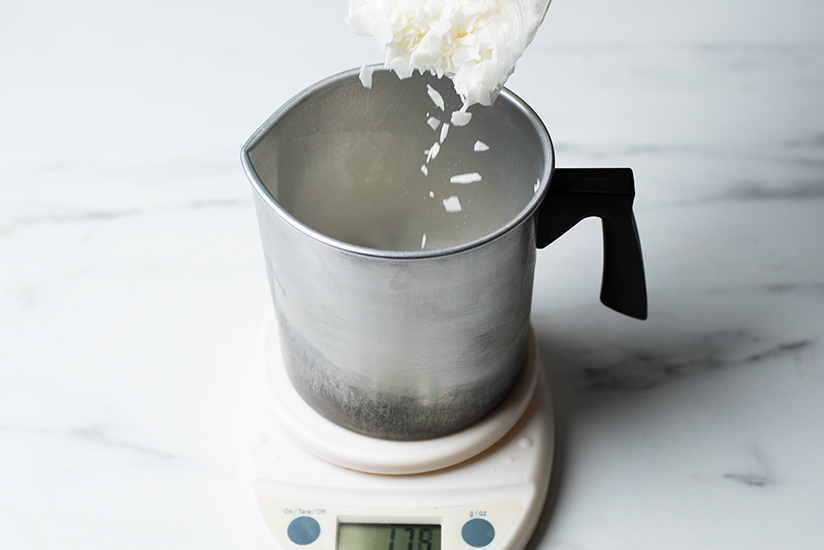
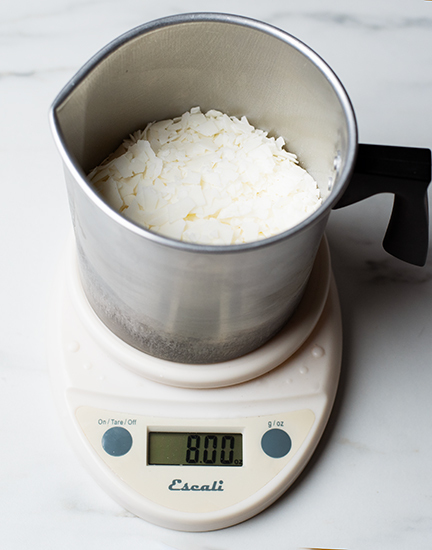
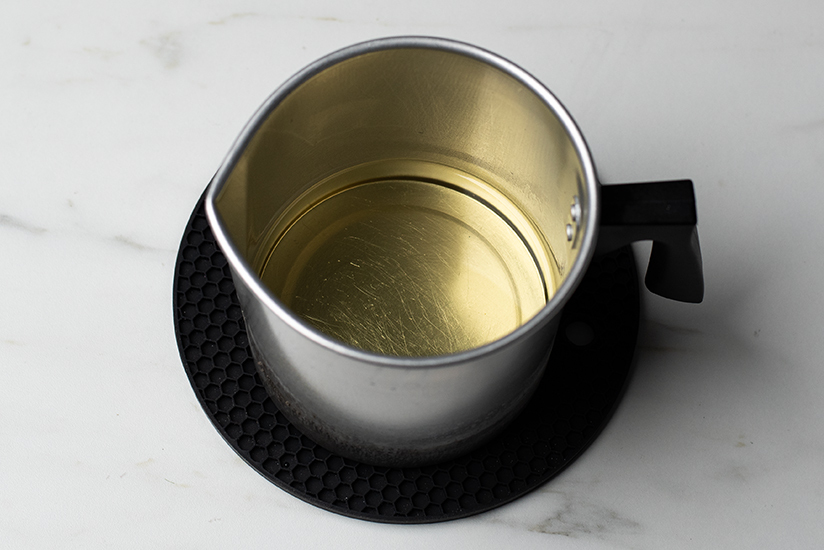
Step 1: Weigh the wax
Place the pouring pitcher on your digital scale and tare the weight. Weigh 8 oz. (227 g) of the 464 soy wax flakes in the pouring pitcher.
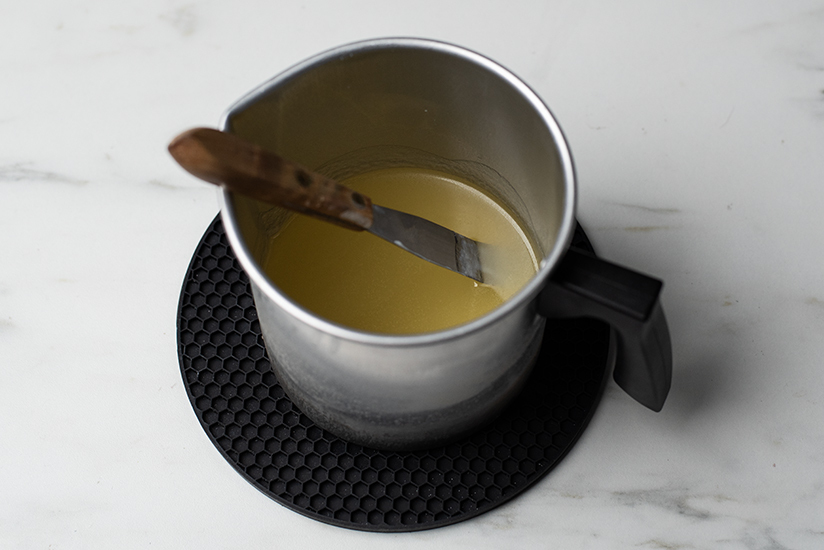
Step 2: Melt the wax
Melt 8 oz. (227 g) of wax in the small pouring pitcher until it reaches 120ºF (48.9°C) and remove it from the heat.
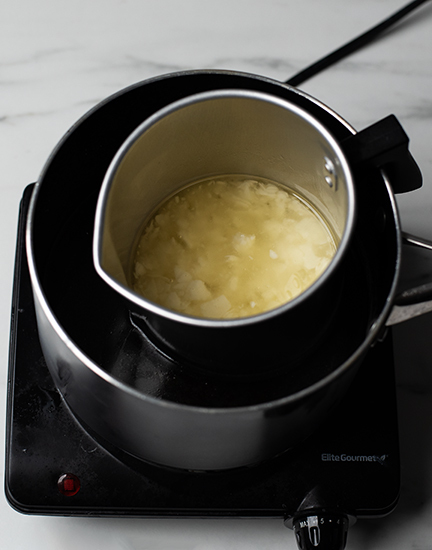
Allow it to cool until the wax around the edges of the pitcher begins to solidify.
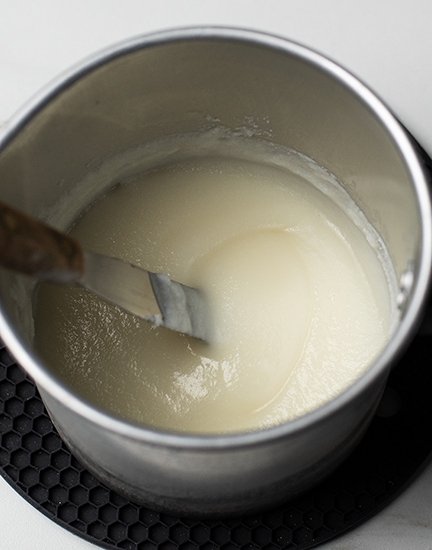
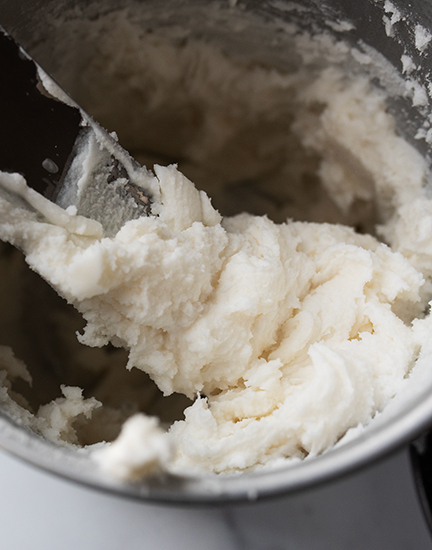
Step 3: Whip the wax
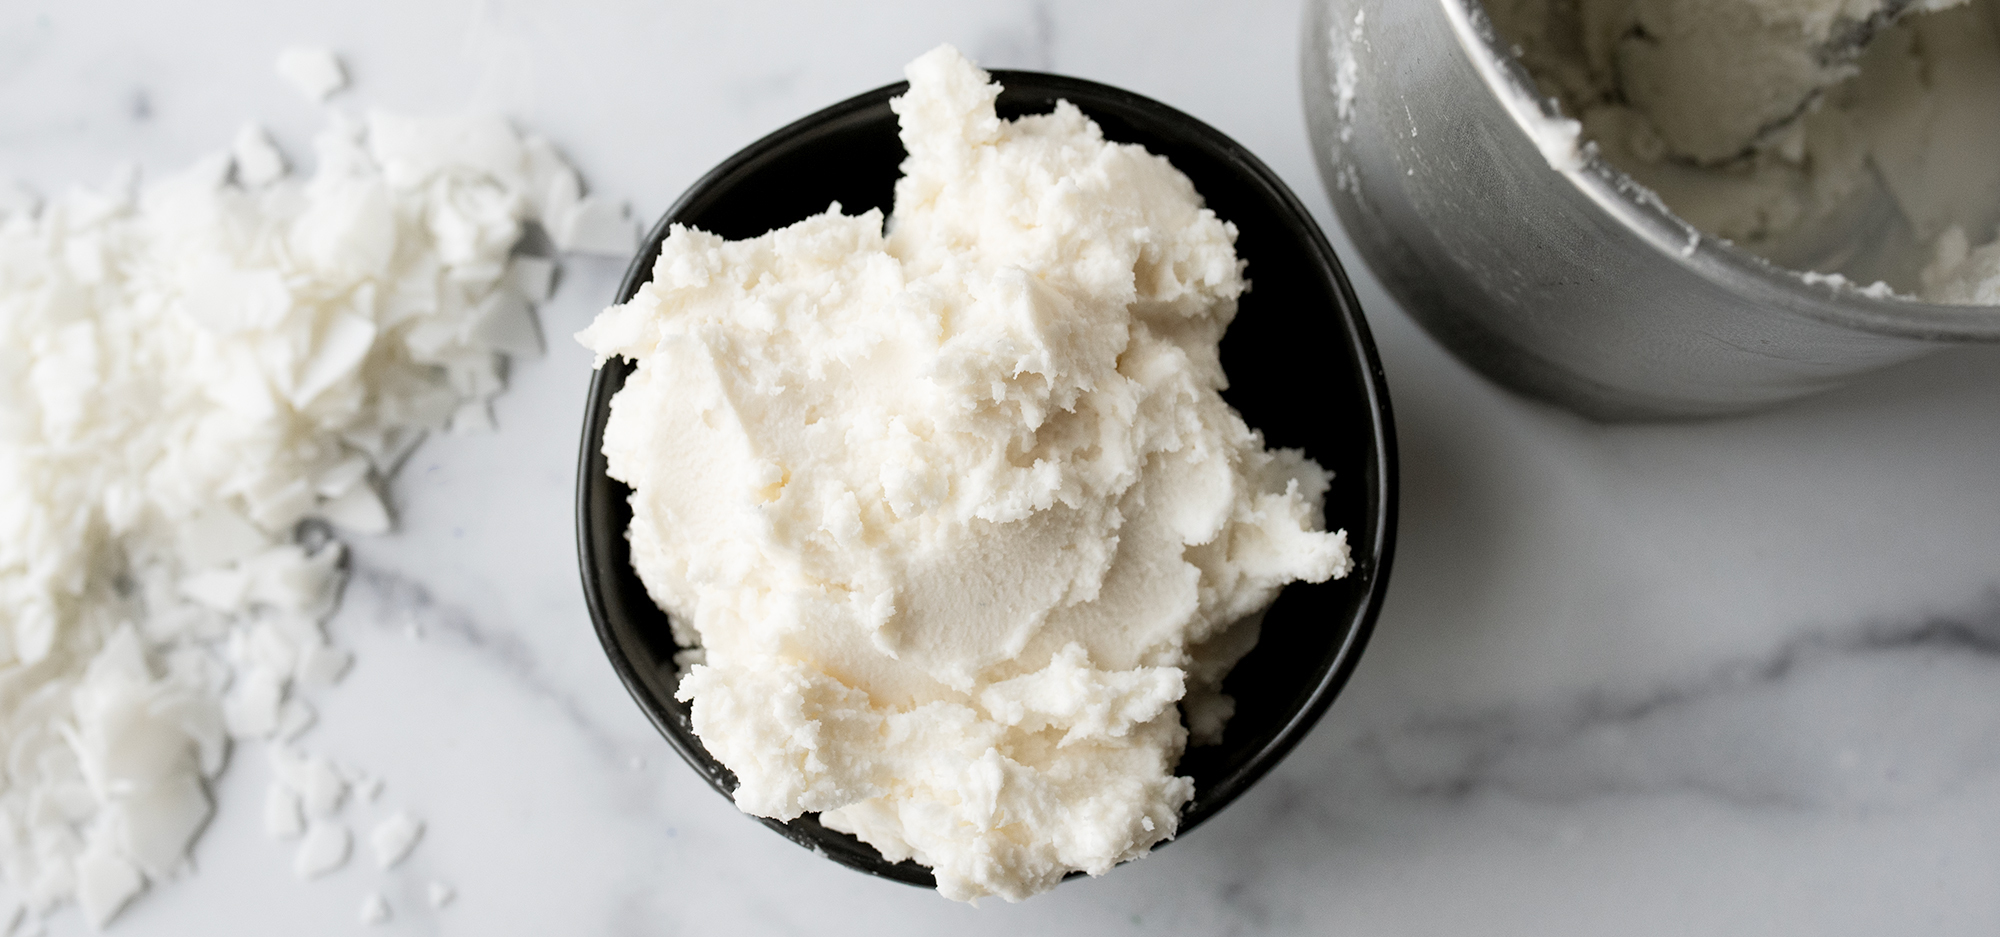
With a whisk or other utensil, stir the wax briskly until it begins to thicken and hold its shape. The consistency will not be as “airy” as actual whipped cream, but you should be able to form a peak.
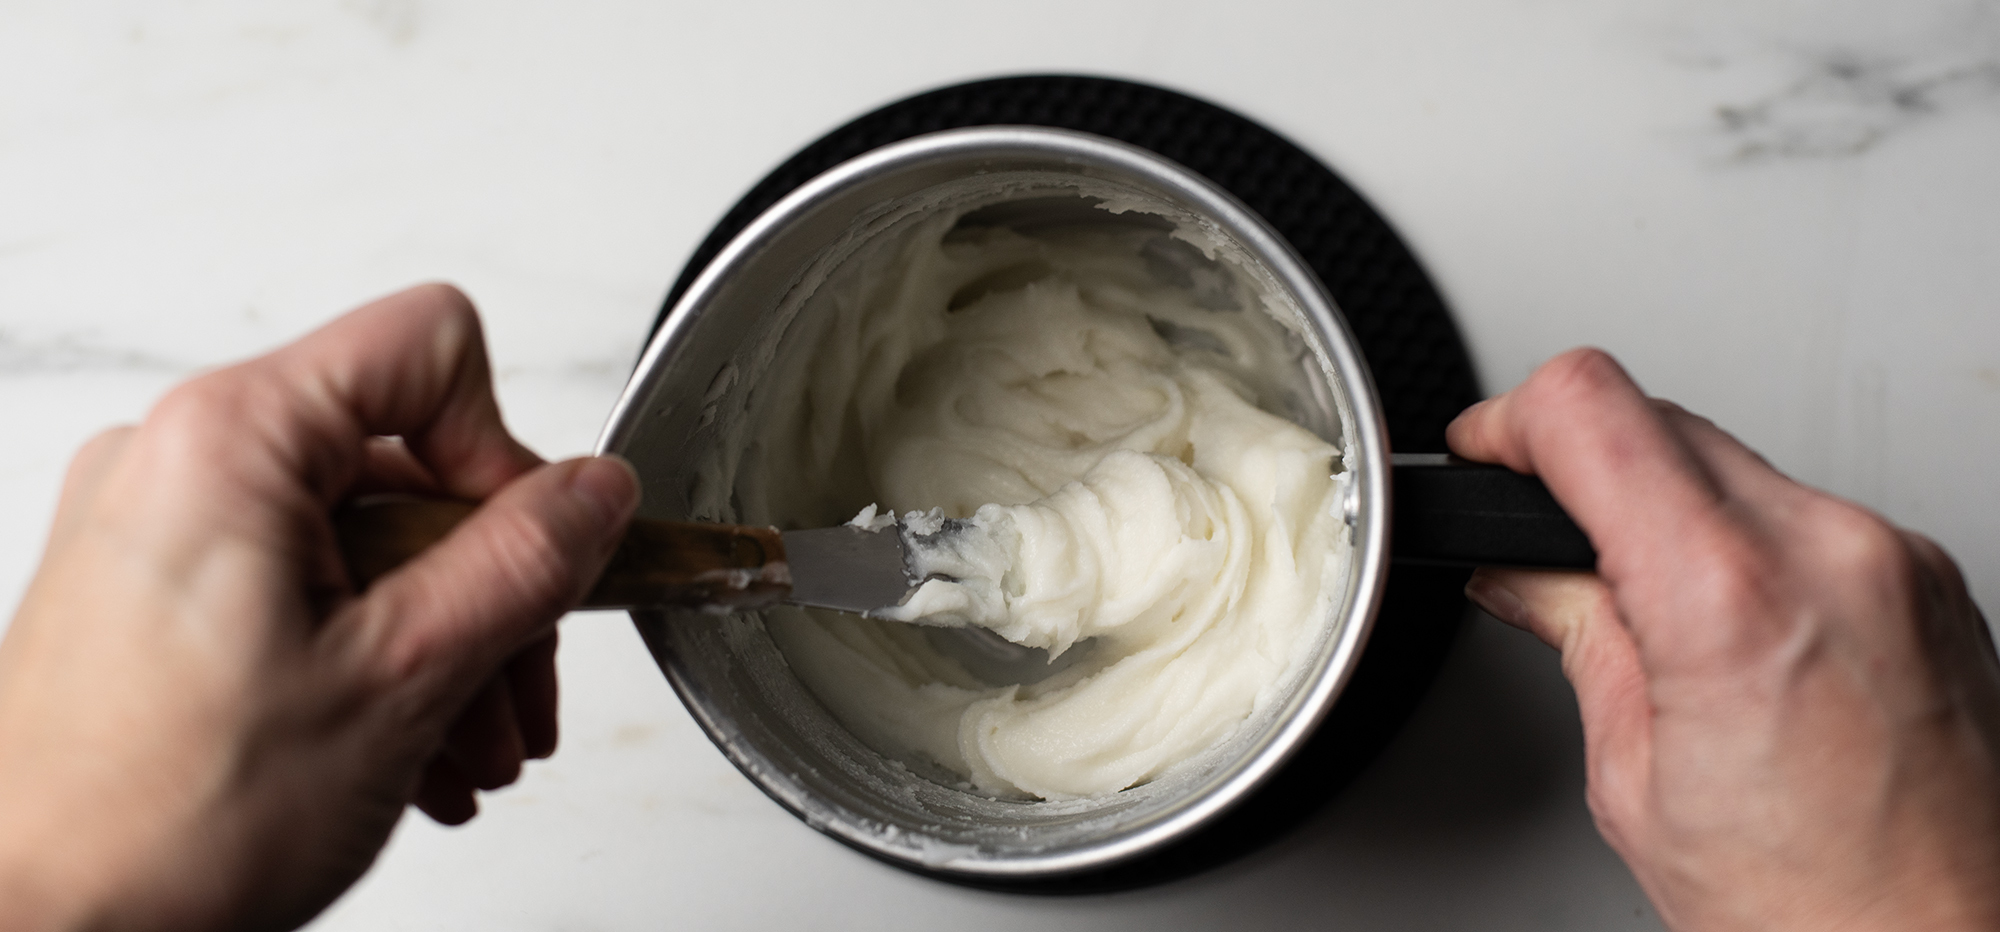
Note: You can speed the process up by using a hand mixer (do not use for food after this!)
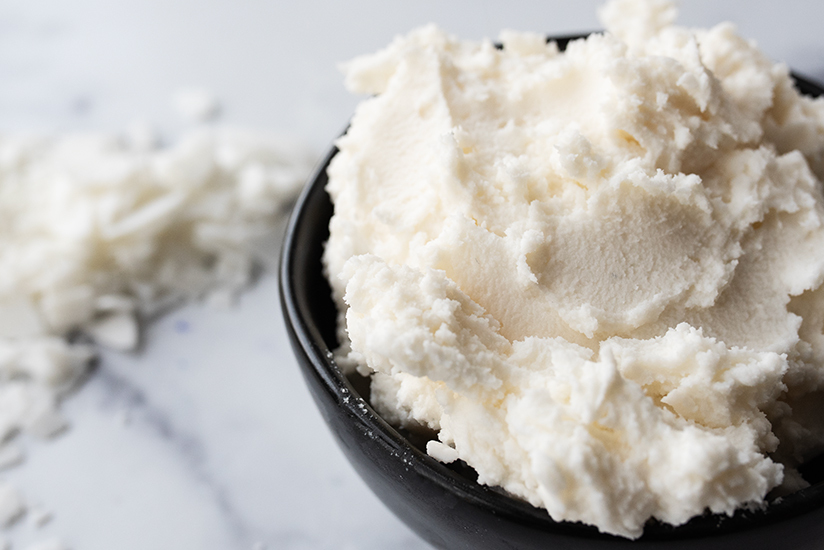
Note: Whipped wax can be used as is or you can pipe it by using a piping bag and tip. Treat it just like regular whipped cream, but work in small batches so it doesn't cool too much. You can also create ice cream scoops if you allow your whipped wax to cool longer to around 80°F (27°C), and it becomes stiff and difficult to stir. Use an ice cream scoop and place them on parchment paper to cool.
Show off your whipped wax and all your handmade creations, with the CandleScience community by tagging us @CandleScience and using the #CandleScientist hashtag on Facebook, Twitter, and Instagram. We may feature you in our Stories or on our website!